The Project:
I want to create a few small to medium sized fields using the Warhammer Walls and Fences kits I've had for over a decade. I want these to really look good on the table but I also want to have removable crops in them so that regiments can be placed inside.
It might not sound too difficult but my friend Steve set the challenge to have the crops removable and that's thrown quite a spanner in the works. Do I have the entire crop lift out at once? Seems the easiest to do but it'll look poor once units are in there and suddenly the field is bare. Maybe it is better to divide the inside into irregular shapes that will fill it and can be lifted out as required though it shouldn't be either too regular or a jigsaw puzzle. I'll need to get a field put together and work with some scraps of paper to decide on what might work. I guess one large irregular piece and then some smaller irregular ones to go around it will probably be the most adaptable.
Then I have to think about what crop. I was going to go with the ubiquitous wheat crop but I'll need to see what the closest DIY shop has on offer, judge its quality and work from there. I could just do something a little different like cabbages but I am really unsure about how to approach that.
My first task therefore is to build the fields by getting a base adding the walls and painting all that up. Then I can look at what'll fit in and how it might look once it is finished. Also if you are reading this: thanks. Let me know in a comment just so I don't get the feeling I am shouting into the void.


 I've been working away on some Old West terrain for a while. As I am slowly building a complete town with a friend we need quite a lot of terrain. While buildings are fun to do we also need some more scatter style pieces. As the town represents a rapidly growing gold rush location we felt that some more temporary accommodation might be fitting. Having looked at the Dead Wood series we came to the idea that tents would be a common feature of towns like this as people arrive but can't afford to build a house straight away or live indefinitely in a boarding house. I tried making my own to varied success and finally felt that the effort wasn't worth it for the result and so I went in search of some alternatives online.


 Even though I wasn't posting much on here over the last while I was still painting. In fact I managed to paint an entire 1500 point Ironjaw army for Age of Sigmar over the last year. I didn't like the yellow scheme that Games Workshop went for but I do like my Orruks in yellow as you will have seen with my 40k Orks. Inspired by them I kept the scheme going and embellished it just a little with some checks and flames. Even a little rust and scratches. These are now my regular army while I am painting up my Nighthaunt models and while the play style can be a little flat and boring I still enjoy charging these across the table and wrecking havoc.
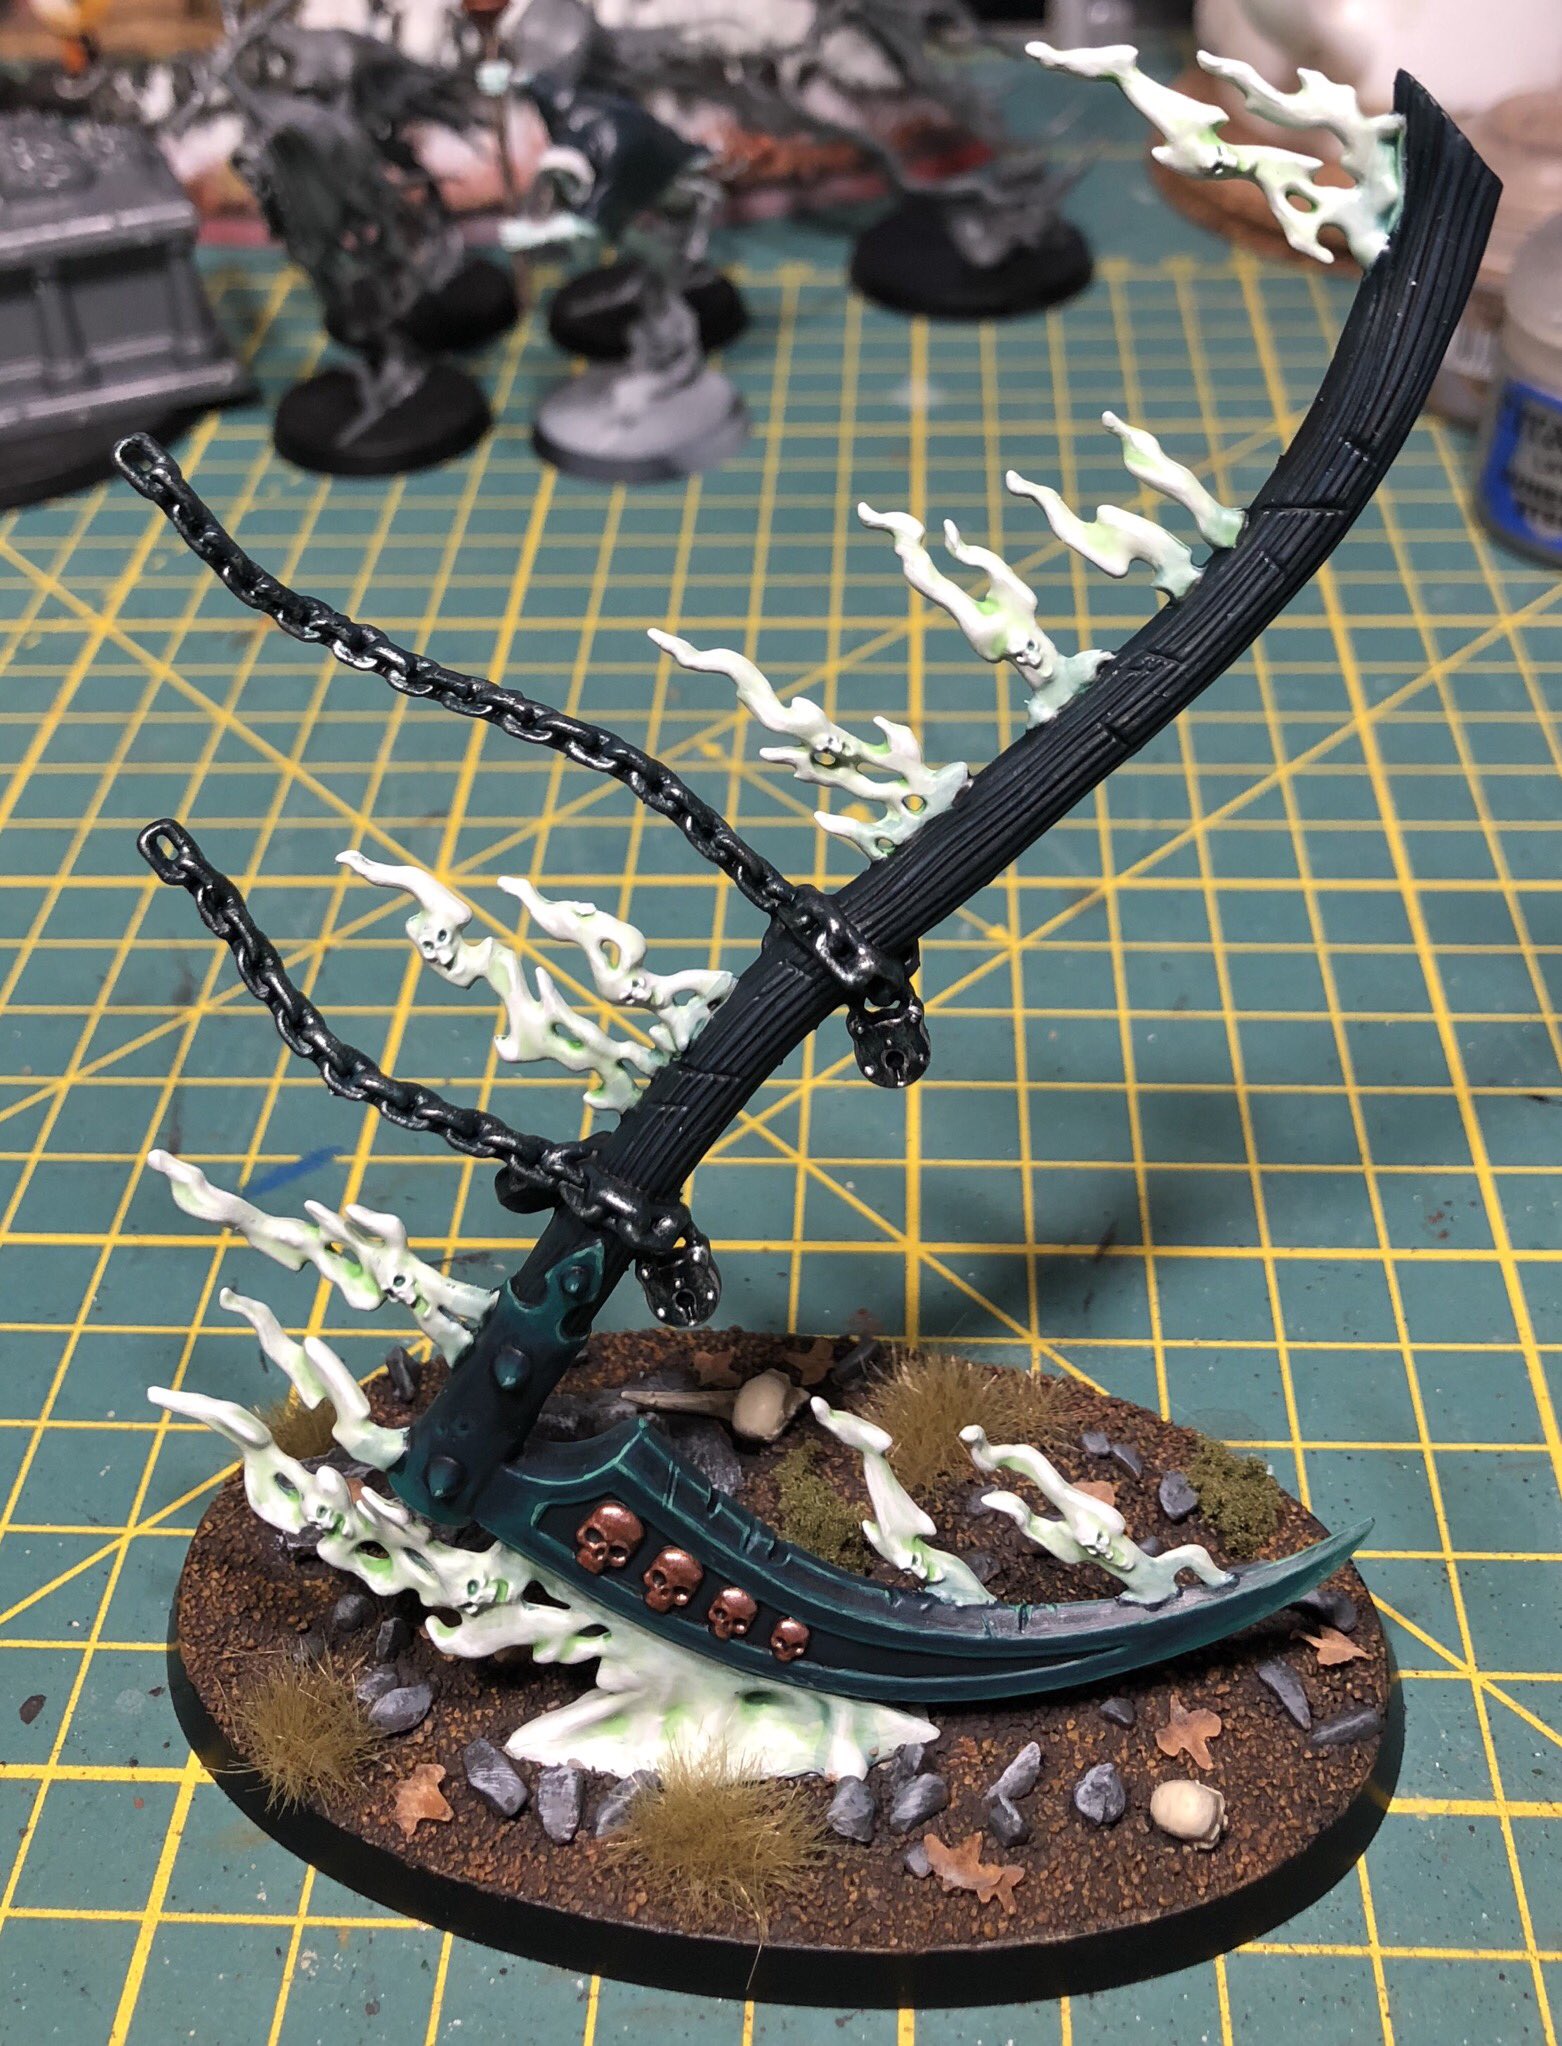
 I am still making progress on my Nighthaunt army despite a wicked bout of food poisoning. As I am still awaiting the arrival of a few regiments I have been focusing on characters. This lead me to clipping out the Guardian of Souls and making some progress on him over the weekend. He is a gorgeous model and fun to paint. I am almost there with him now just some of the finishing touches to do still. I kept him in the standard scheme of the rest of the army which in this case means no dark blue robe/cowl. I was tempted to do the fade from dark blue to white on his robe but as I have been experimenting and failing with this of late I decided not to. Its an interesting technique and one I will certainly use in the future but I really need to refine it and the glazes I use for it more before I do it on a character model. I did try it here on the flames somewhat and it has come out a little stark. It's fine but would have been better if I had gone for a traditional blend. Though that would have taken far longer and the point of this army is to get them done quickly rather than expertly. There are currently a lot of projects calling to me to get done and well I can't do them until the Nighthaunt are at a point where I am happy. I don't think that will take too long. I have maybe three regiments to finish off to get me to a playable 2000 points and with one or two additions more I would have an army where I could mix and match to keep the games interesting.