

Showing posts with label Age of Sigmar. Show all posts
Showing posts with label Age of Sigmar. Show all posts
September 5, 2018
Chainghasts
August 22, 2018
Ironjawz Brute
 Even though I wasn't posting much on here over the last while I was still painting. In fact I managed to paint an entire 1500 point Ironjaw army for Age of Sigmar over the last year. I didn't like the yellow scheme that Games Workshop went for but I do like my Orruks in yellow as you will have seen with my 40k Orks. Inspired by them I kept the scheme going and embellished it just a little with some checks and flames. Even a little rust and scratches. These are now my regular army while I am painting up my Nighthaunt models and while the play style can be a little flat and boring I still enjoy charging these across the table and wrecking havoc.
August 21, 2018
Shardwrack Spines

These are base coated in Skavenblight Dinge (GW). Somehow I managed to pick up two pots of this and in an attempt to use it I've been painting a lot of things with it. Its a very dirty grey and this looks great for trees and plants. I lightly drybrushed this with Sea Grey (VJ) and washed it with Athonian Camoshade (GW). This green brown wash really brought the tree to life as it added a perfect narural bark colour to it. All I had to do then was pickout the pustules/fungi on the surface. These make the model a little too Nurgle looking but I think when they are painted rather more neutral they can look quite natural. Only the big ones ruin the effect I think. These I actually painted yellow and then highlighted them with Bleached Bone (VJ) to wash out the colour a little.
All in all I think the model came out great and I'll slowly be doing more of these over the coming weeks to replace the forest trees I have while I am waiting for the next round of Azyrite Ruins to be released.
August 13, 2018
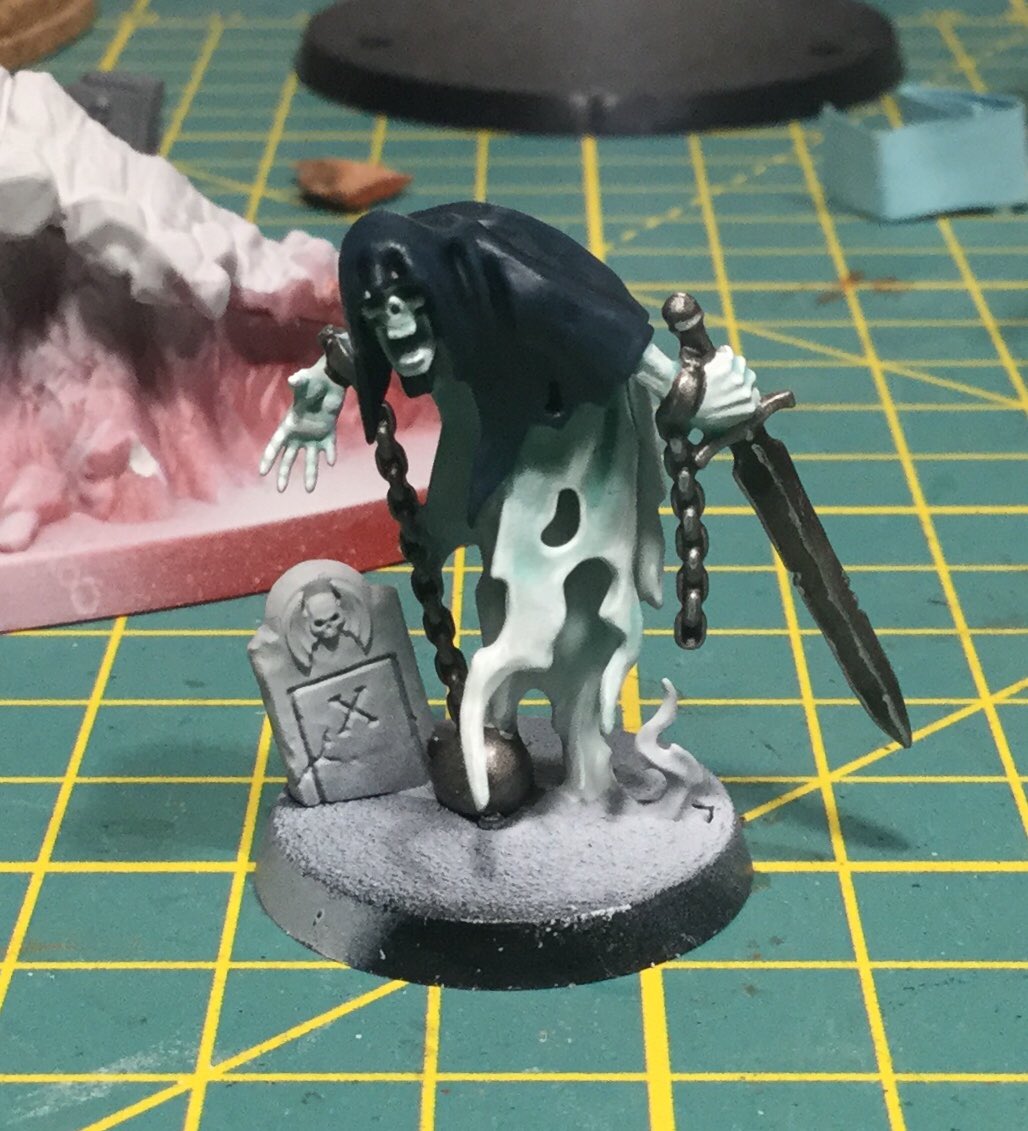
WIP Guardian of Souls
 I am still making progress on my Nighthaunt army despite a wicked bout of food poisoning. As I am still awaiting the arrival of a few regiments I have been focusing on characters. This lead me to clipping out the Guardian of Souls and making some progress on him over the weekend. He is a gorgeous model and fun to paint. I am almost there with him now just some of the finishing touches to do still. I kept him in the standard scheme of the rest of the army which in this case means no dark blue robe/cowl. I was tempted to do the fade from dark blue to white on his robe but as I have been experimenting and failing with this of late I decided not to. Its an interesting technique and one I will certainly use in the future but I really need to refine it and the glazes I use for it more before I do it on a character model. I did try it here on the flames somewhat and it has come out a little stark. It's fine but would have been better if I had gone for a traditional blend. Though that would have taken far longer and the point of this army is to get them done quickly rather than expertly. There are currently a lot of projects calling to me to get done and well I can't do them until the Nighthaunt are at a point where I am happy. I don't think that will take too long. I have maybe three regiments to finish off to get me to a playable 2000 points and with one or two additions more I would have an army where I could mix and match to keep the games interesting.
July 20, 2018
The Shysh Reaper
July 18, 2018
Tomb Banshee - The Lady of Laments
July 16, 2018
The Horde is Complete

The colours I'm using for the army will remain the same. I'll bring some red into the Reapers to break up the scheme just slightly. It'll also tie in well with the Black Coach as it has some proper cloth elements. I really like the combination of Incubi Darkness with Stegadon Scale Green, both are GW paints. It's a nice subtle highlight and with the larger Grimghasts I'll even try to bring this up to an edge highlight of a stronger green, Kalibite Green (GW). The models are mush larger than the Chainrasps and I think the large dark surface that dominates them would be too boring without at least a subtle edge highlight to bring it up.
July 13, 2018
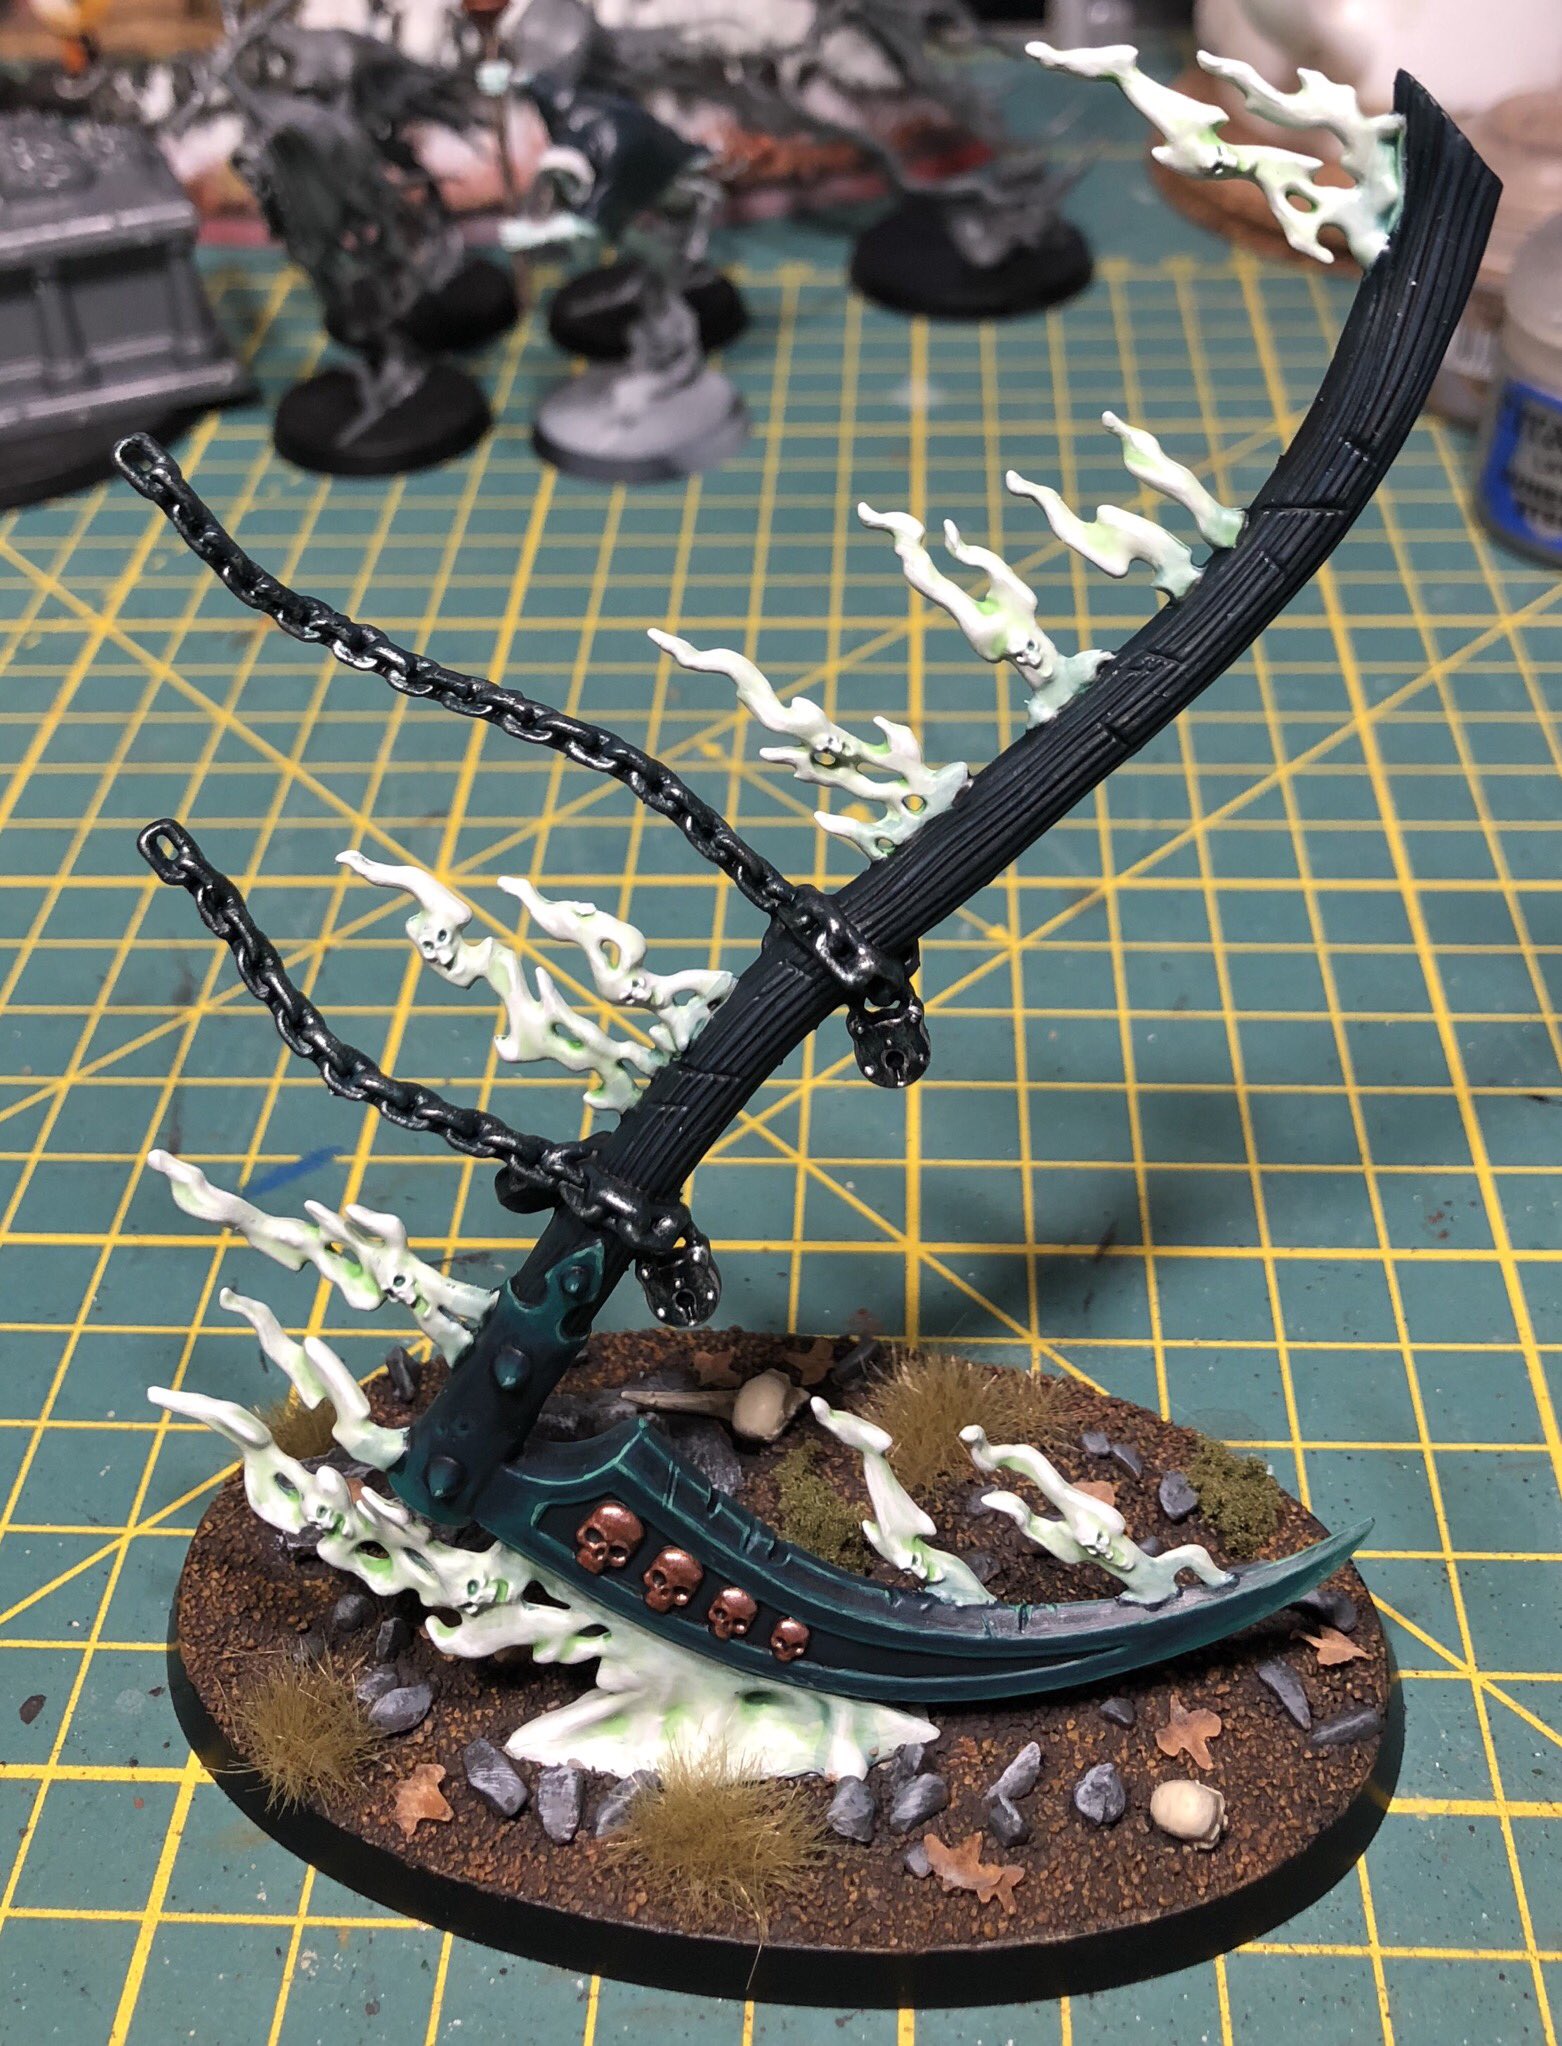
Aethervoid Pendulum
 I've been making progress on my Nighthaunts, I swear! However I've also been making progress with my endless spells. I'm not sure why I decided to paint the Aethervoid Pendulum, we'd been talking about it during last weeks game and maybe that spurred me into action. Its done now and ready to be swung in earnest. The spell seems okay but I'm waiting on a ruling to see if it really can travel only in one direction or if it can move back and forth along its line of travel. Its far more useful if it can go back and forth though also its potentially for more dangerous to my own army. If I cast this spell I'd much prefer that it keep going forwards towards the enemy than potentially coming right back at me.
I went with a simple paint scheme in keeping with my Nighthaunts. I was inspired by some of the work I've seen done on the Necrons and I think the sharp (but barely visible in the photograph) highlight of green brings some nice variance in the model. I'd actually be tempted to add another final highlight but we'll have to wait and see on that front as I have to get the Chainrasps done. A solid evenings work will see the full twenty ready for the battlefield.
July 9, 2018
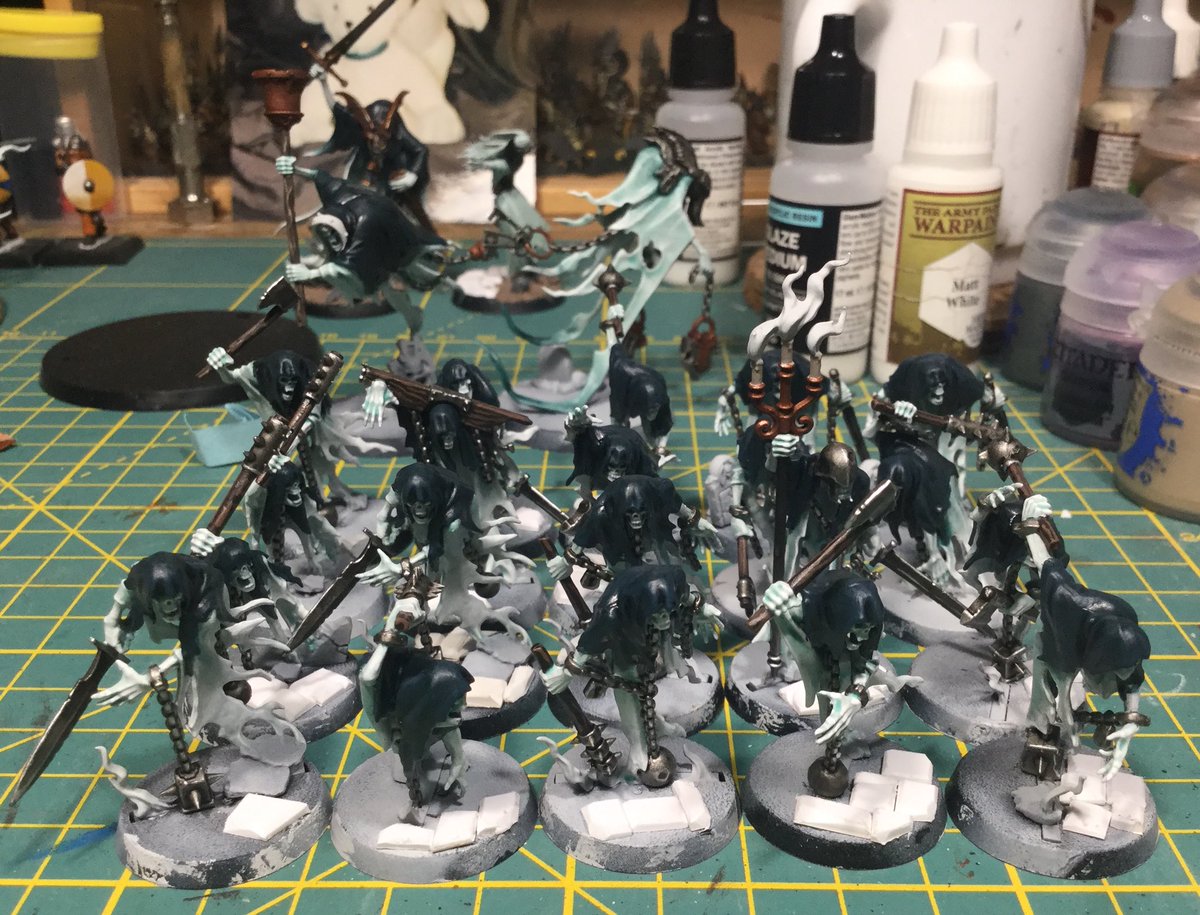
Chainrasp Horde
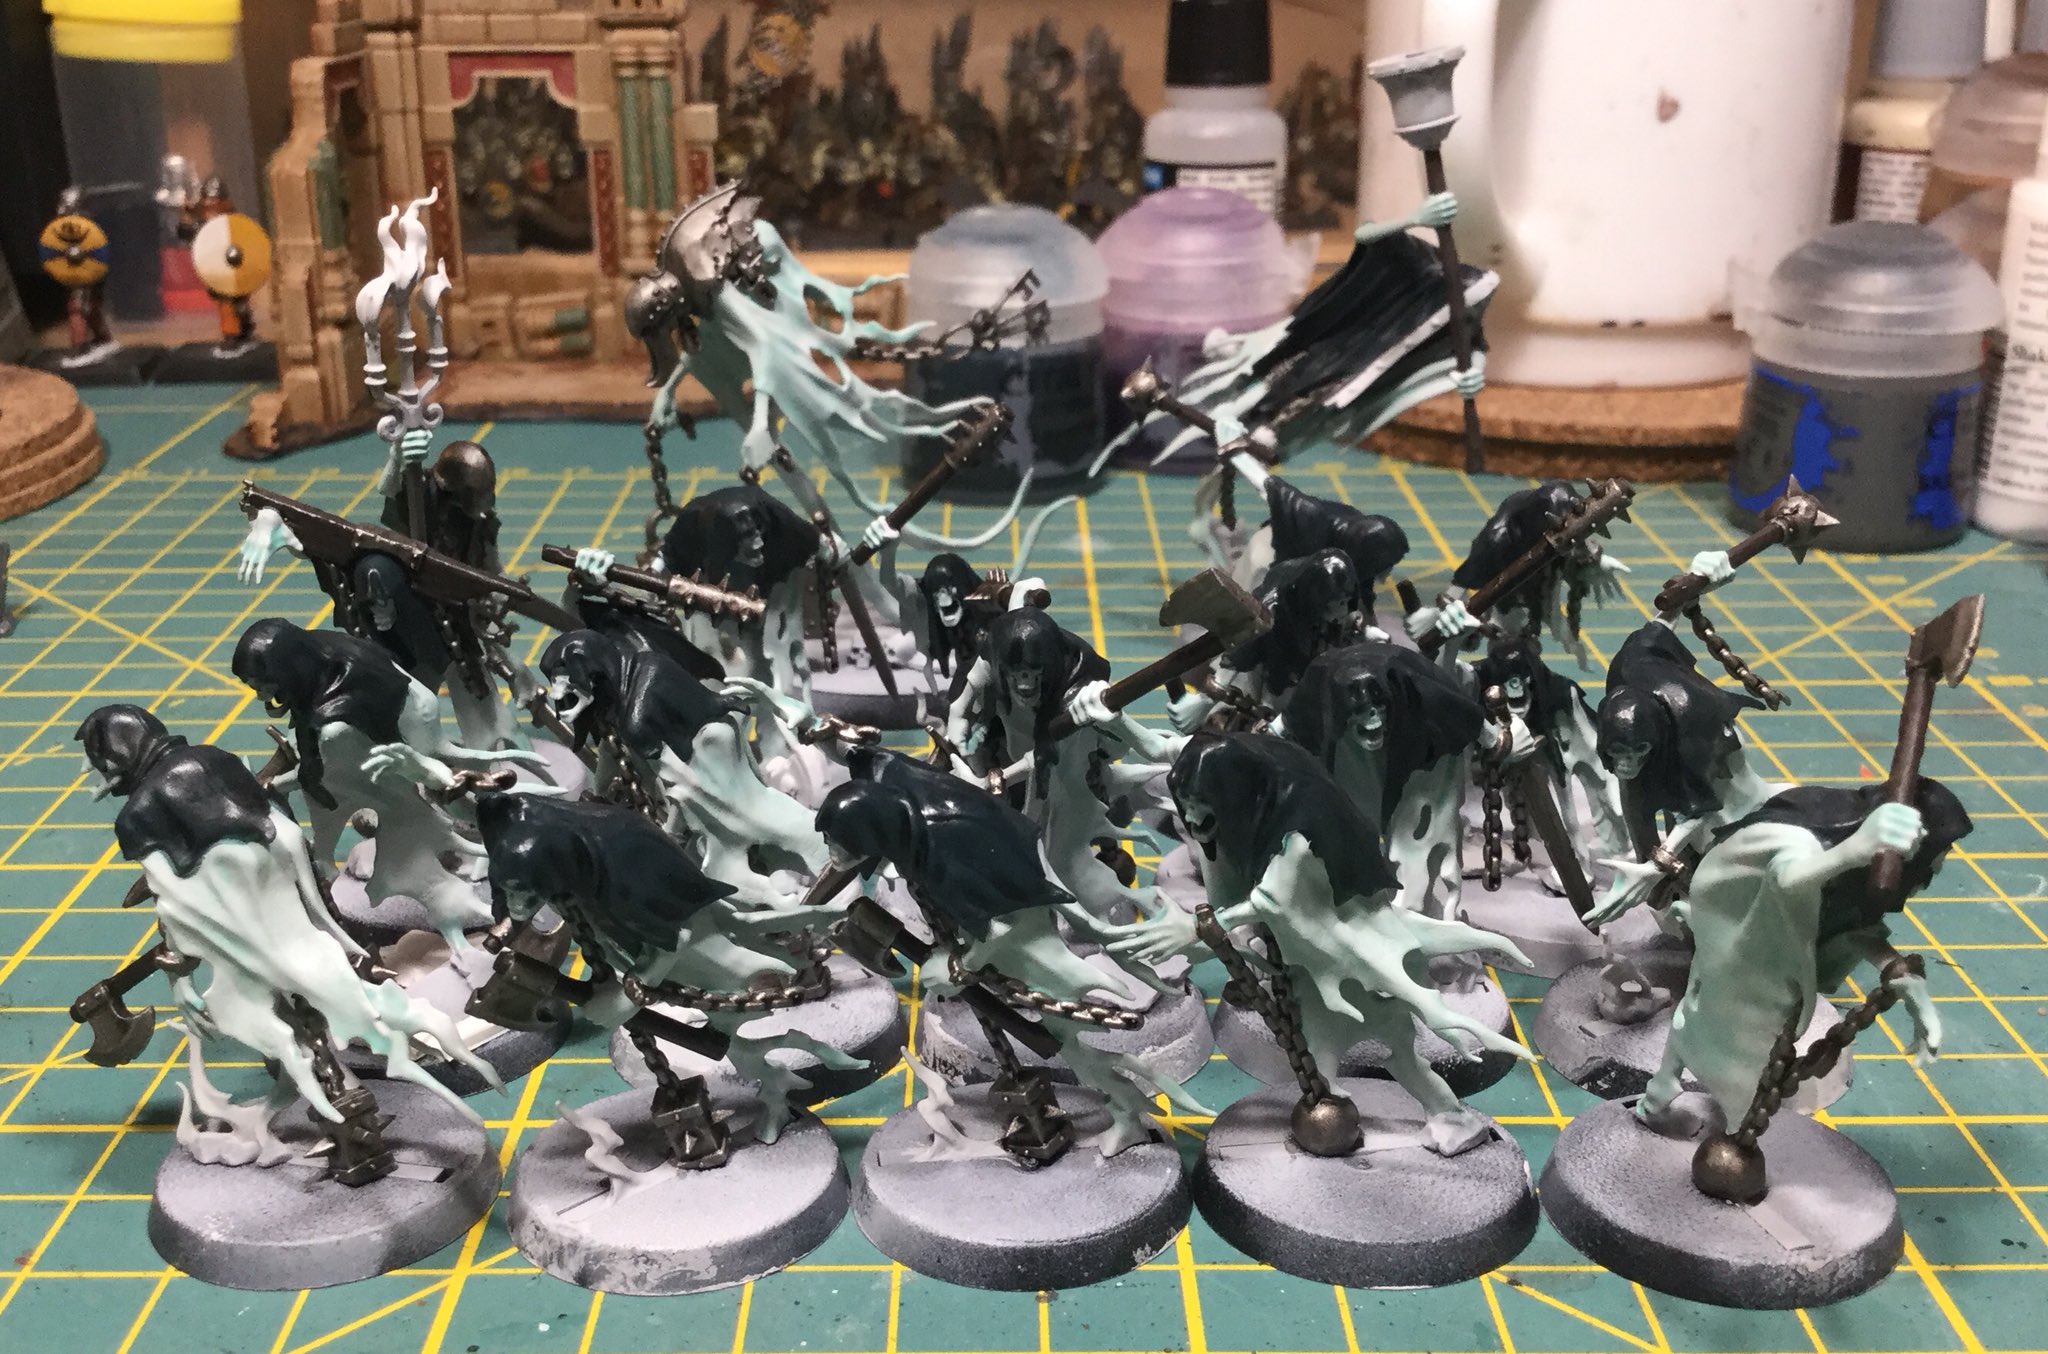
Disappointingly it seems I will have a lot more chainrasps to do in the near future. Now that the book has been released I've seen the battalions and the most interesting ones are comprised mainly of chainrasps. I knew I'd have to paint more but as these do take quite a while to paint I had hoped forty would be close enough to suffice. That would fill the minimum requirement of the battalions but to be effective I think I would have to go for two units of forty. Hopefully we will get a good multi-part kits for these that has a little more variance than the ones from the boxed set. at least that would make the painting a little less tedious.
 Having complained a lot I'll switch gear and show you the current status of the twenty models from the starter box. These are just about done. Most of the work left are little details and the bases. I got a good bit of time over the weekend to paint which helped me to progress with these nicely. The cloaks could probably do with one more highlight but I don't have a colour suitable for this at the moment so I have to search a little further. I don't want the hassle of mixing any paints for these. As far as is possible I want to go with readily available paints. The cloak is Incubi Darkness, washed with Nuln Oil and then highlighted with Incubi darkness and Stegadon scale green. The quality of the photograph here makes it impossible to really see much of the paintwork. Still the highlights are subtle, the way I like them, but they are just not visible enough. I'll spend a few moments on the GW website later in the day and see what paint might fit with the ideas I've got.
 After the Chainrasps are done I want to start with the Glaivewraith Stalkers. I haven't as yet taken any off the sprue but as these are larger models hopefully they will be easier to put together and possibly quicker to paint. It is easy to forget that the larger surface area of a model can take a lot longer to paint than something smaller. The endless Spells for example take an age to paint simply because the surface areas are massive.... maybe I need a bigger brush? Anyway more on them towards the end of the week.
July 5, 2018
Purple Sun of Xereus
I picked up the Malign Sorceries expansion when it came out last weekend. The spells look amazing and its nice to have them represented on the battlefield again, just like in the good old days of fourth and fifth edition. They were removed I think, as templates at least, once sixth rolled around and this was probably for the best. However as models these work excellently on the battlefield. Not only do they look cool but they have a big impact on the game. I suppose that's just conjecture on my part as I haven't used them yet but it does look like they'll be huge.
 I was mainly interested on the Grave Tide but for some reason I probably did like everyone else and glued the Purple sun together. This was easy enough as the internal frame worked a treat. I guess they might begin to use this on other bigger models in the future as it makes them very sturdy. Everything pushed together well despite the smaller spikes being a little too sharp for my delicate thumbs. The kit has a big problem with gaps and while I filled them all using the Gloss Varnish method it just wasn't enough. I should have done a coat or two more to really smooth them out. As this was the first time that I had tried the method however I can't expect great results. Next time I'll know. As for painting I didn't want such a dark orb as is shown in the picture and I didn't want to go and buy a load of purple paint that I'll barely ever use. I had a purple wash and that was going to suffice! With that in mind I sprayed the Sun white. Over the purple plastic it was hard to get a solid colour so in the end I had to brush a layer of white on. Over that I added some diluted Druchi Violet. This came out quite pink and so I gave the recessed areas a second wash to deepen the colour and bring it up to a more purple hue.
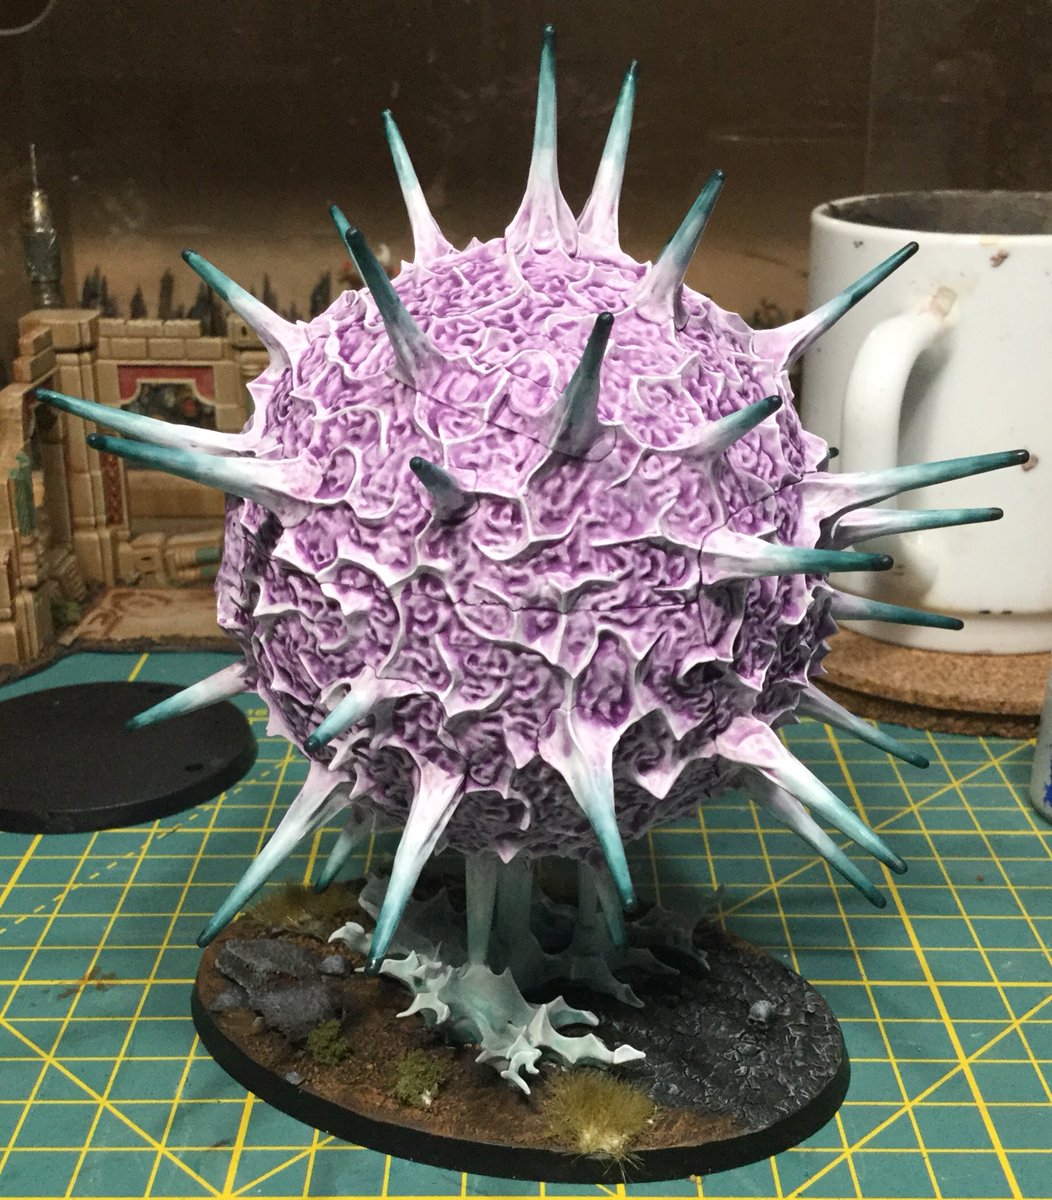 The fun started next with a simple line highlight of white along the most raised areas. I could have targeted this better but the effect I got is good so I'm happy with it. At that stage I had the Purple Sun basically done but as it was essentially all one colour it looked really boring. To change it up a bit I started blending the tips of the spikes out to Incubi Darkness. This worked really well on the downward pointing spikes but on those that pointed upwards it was hard to control the wash and prevent tide lines. Again it came out good enough that I didn't really worry too much about fixing any errors. For the base piece I decided again that going purple with it wasn't going to look that good so I went for a blue green. Its subtly different from the spikes but not much and most people won't notice it. Finally when it came to basing the model I went with a fairly standard basing scheme to match my armies and the board. However I guess that the passage of the Purple sun must have some effect on the ground behind it and so I used one of the crackle texture paints to give that effect and I painted it to look like ash. All in all this model was good fun to paint and while it won't see much board time sadly it will look great in the collection.
July 4, 2018
More work on the Chainrasps
July 2, 2018
Chainrasps and a few others
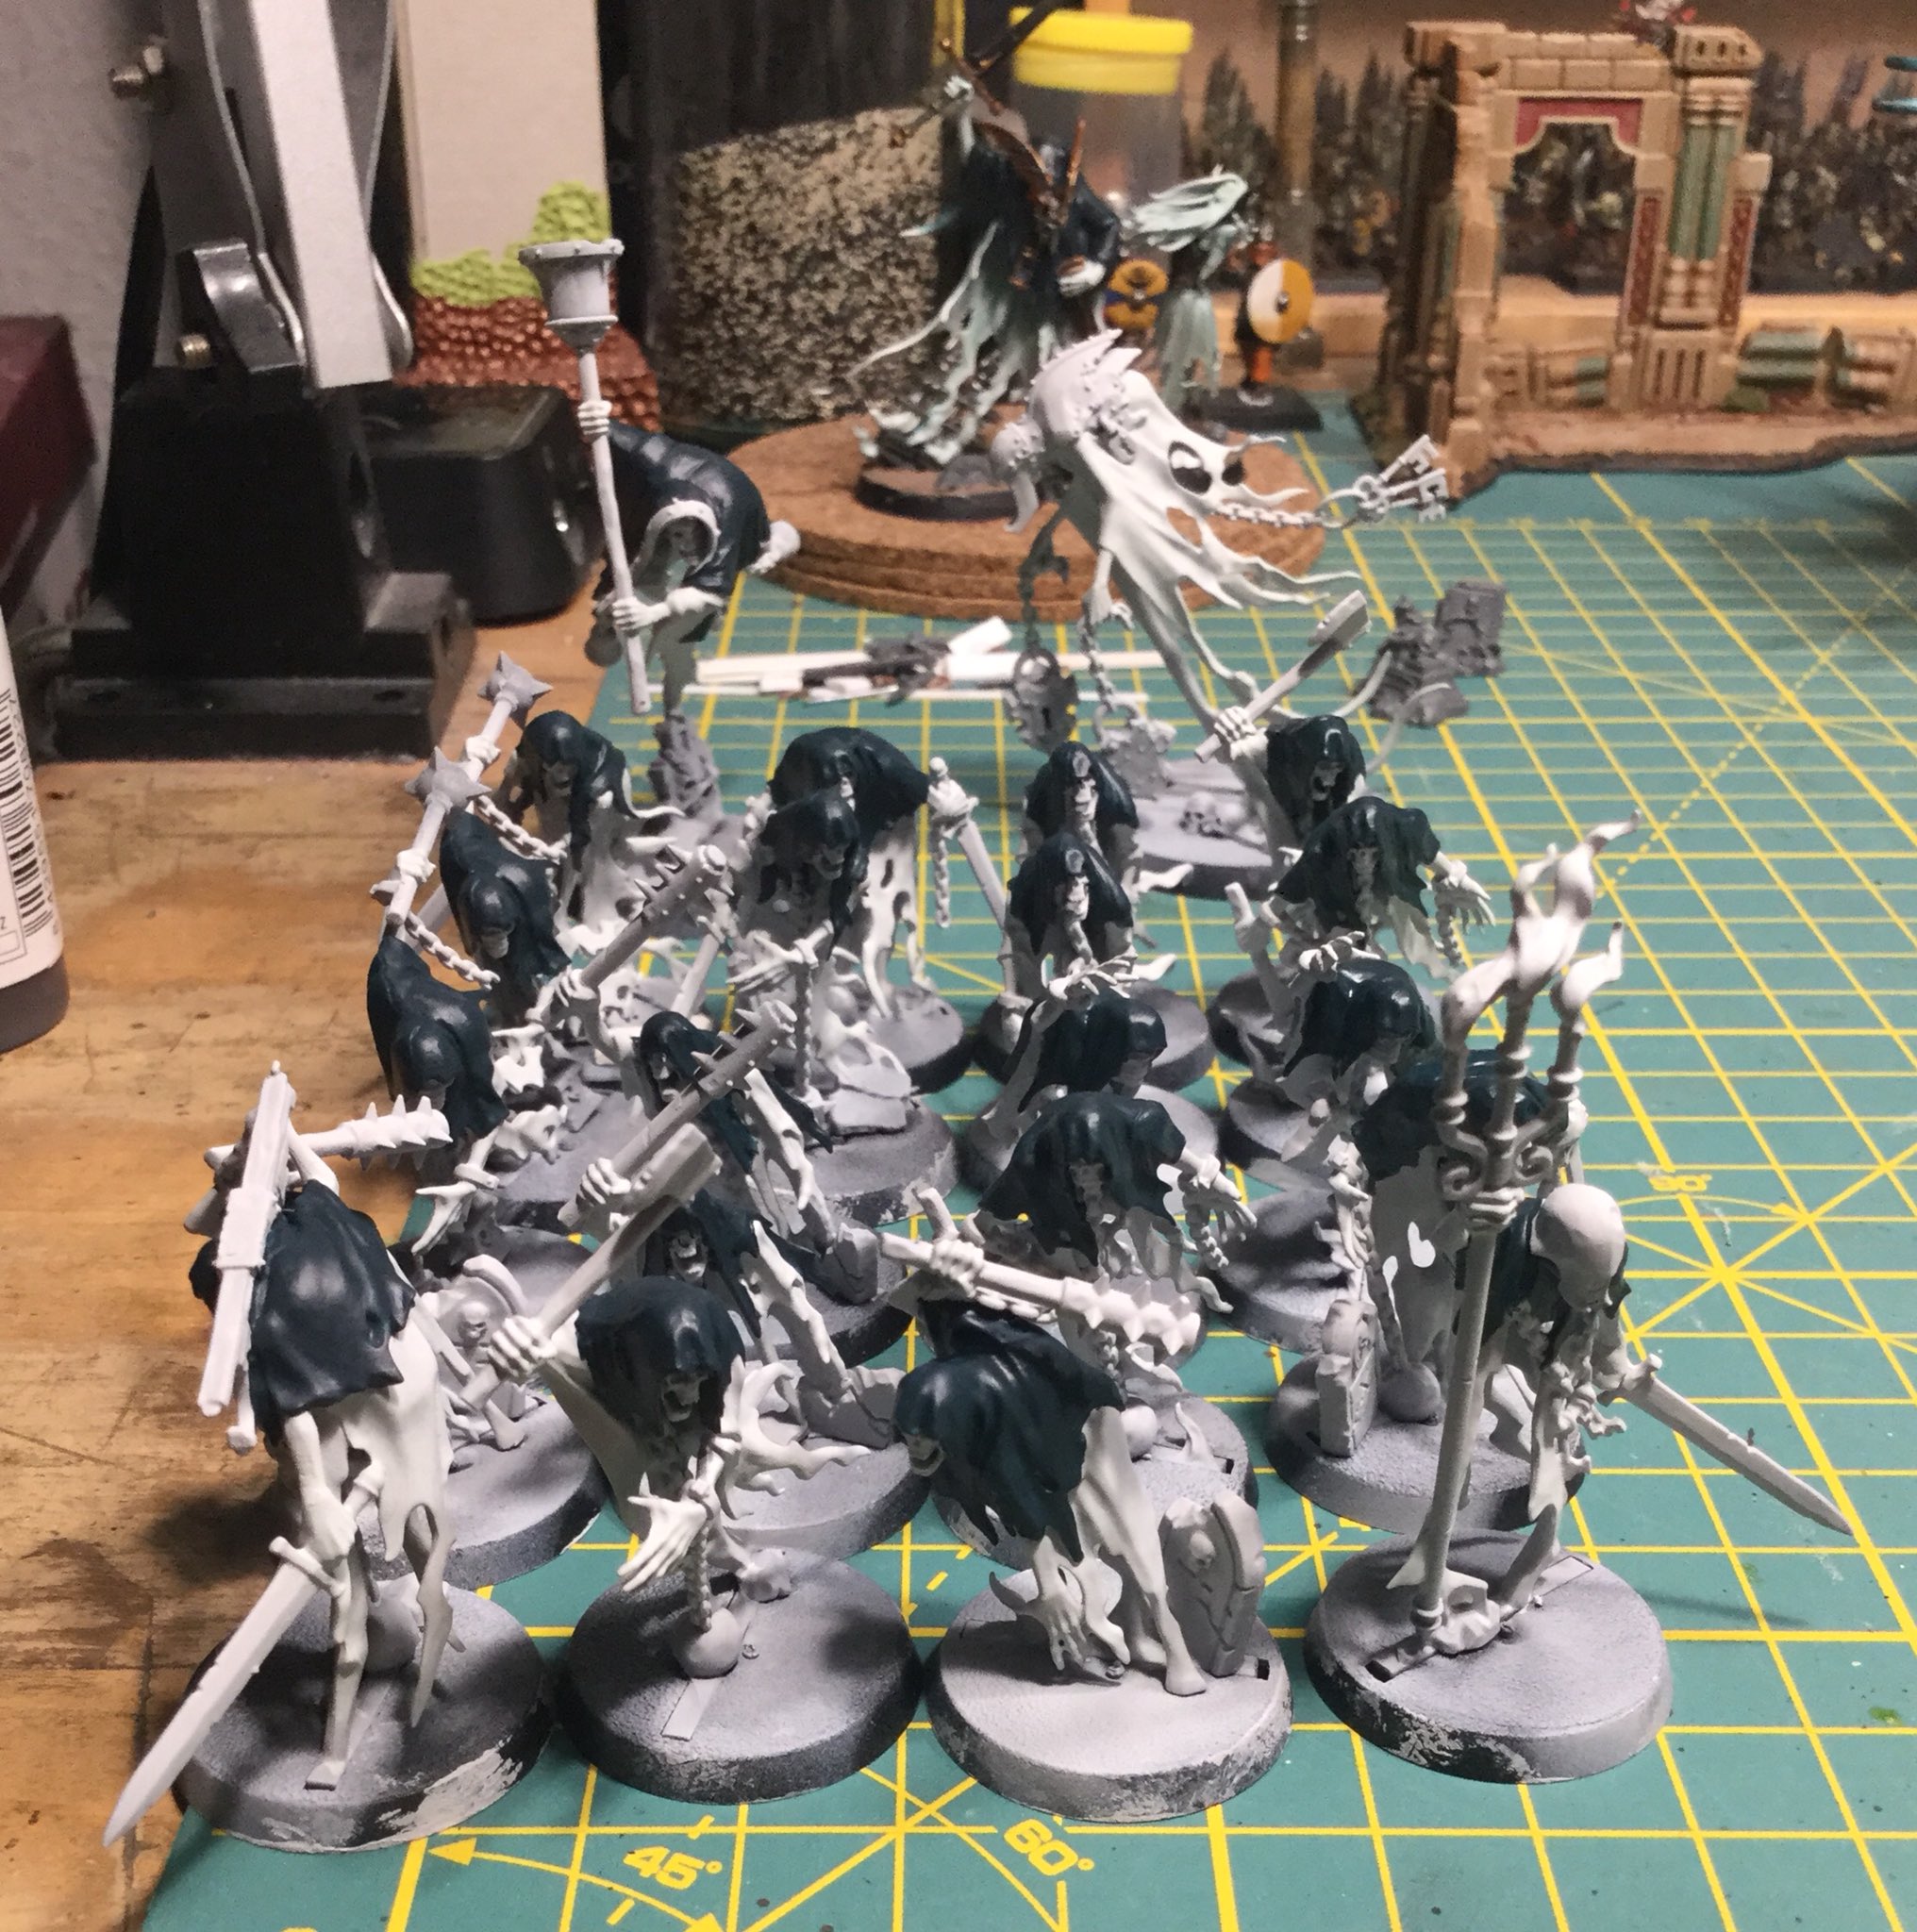
Anyway I have managed to get two of the three colours on these guys that constitutes their base coat, Ulthuan Grey and Incubi Darkness. The third is for the metals and is Leadbelcher. Once that's on tonight I can start washing the models and hopefully I will make rather rapid progress from there. I have pre-mixed both a blue and a dark green wash so I don't have to worry about getting ratios correct each time. The only wash I'll still mix by hand is Waywatcher Green as I use it very sparingly over the models.
If all goes to plan I'll be able to post updates each day this week and by the end of it I'll have the bulk of the Starter Box done. That's the plan anyway.
June 25, 2018
The First of the Nighthaunts

For bases I have gone with a graveyard theme as a lot of the models in the range come with this as standard. I made some railings and flagstones for the bases and with the addition of what comes in the kit I think it all works well together. Some dead looking vegetation tops this off for a nice Shysh look.
June 20, 2018
Spirit Host W.I.P.

June 11, 2018
Mordheim Witch

June 8, 2018
Azyrite Ruins
 I’m slowly getting some terrain done for Age of Sigmar. I’ve been eyeing up the Azyrite Ruins kit since it came out and I finally grabbed one last week. The kits great, not quite as modular as I’d have liked but good enough to get some variation in the final pieces. Of course I couldn’t just do a simple build I had to complicate it. I saw somewhere online that somebody had built a realm gate in with the kit and as I don’t have a realm gate yet this seemed a good way to make a unique looking one. This is still very much a WIP but hopefully I can get it finished in the next few days.
June 3, 2018
Knight of Shrouds
 I’ve decided that I’m going all in on the Nighthaunts for Age of Sigmar. The new models are really g
May 27, 2018
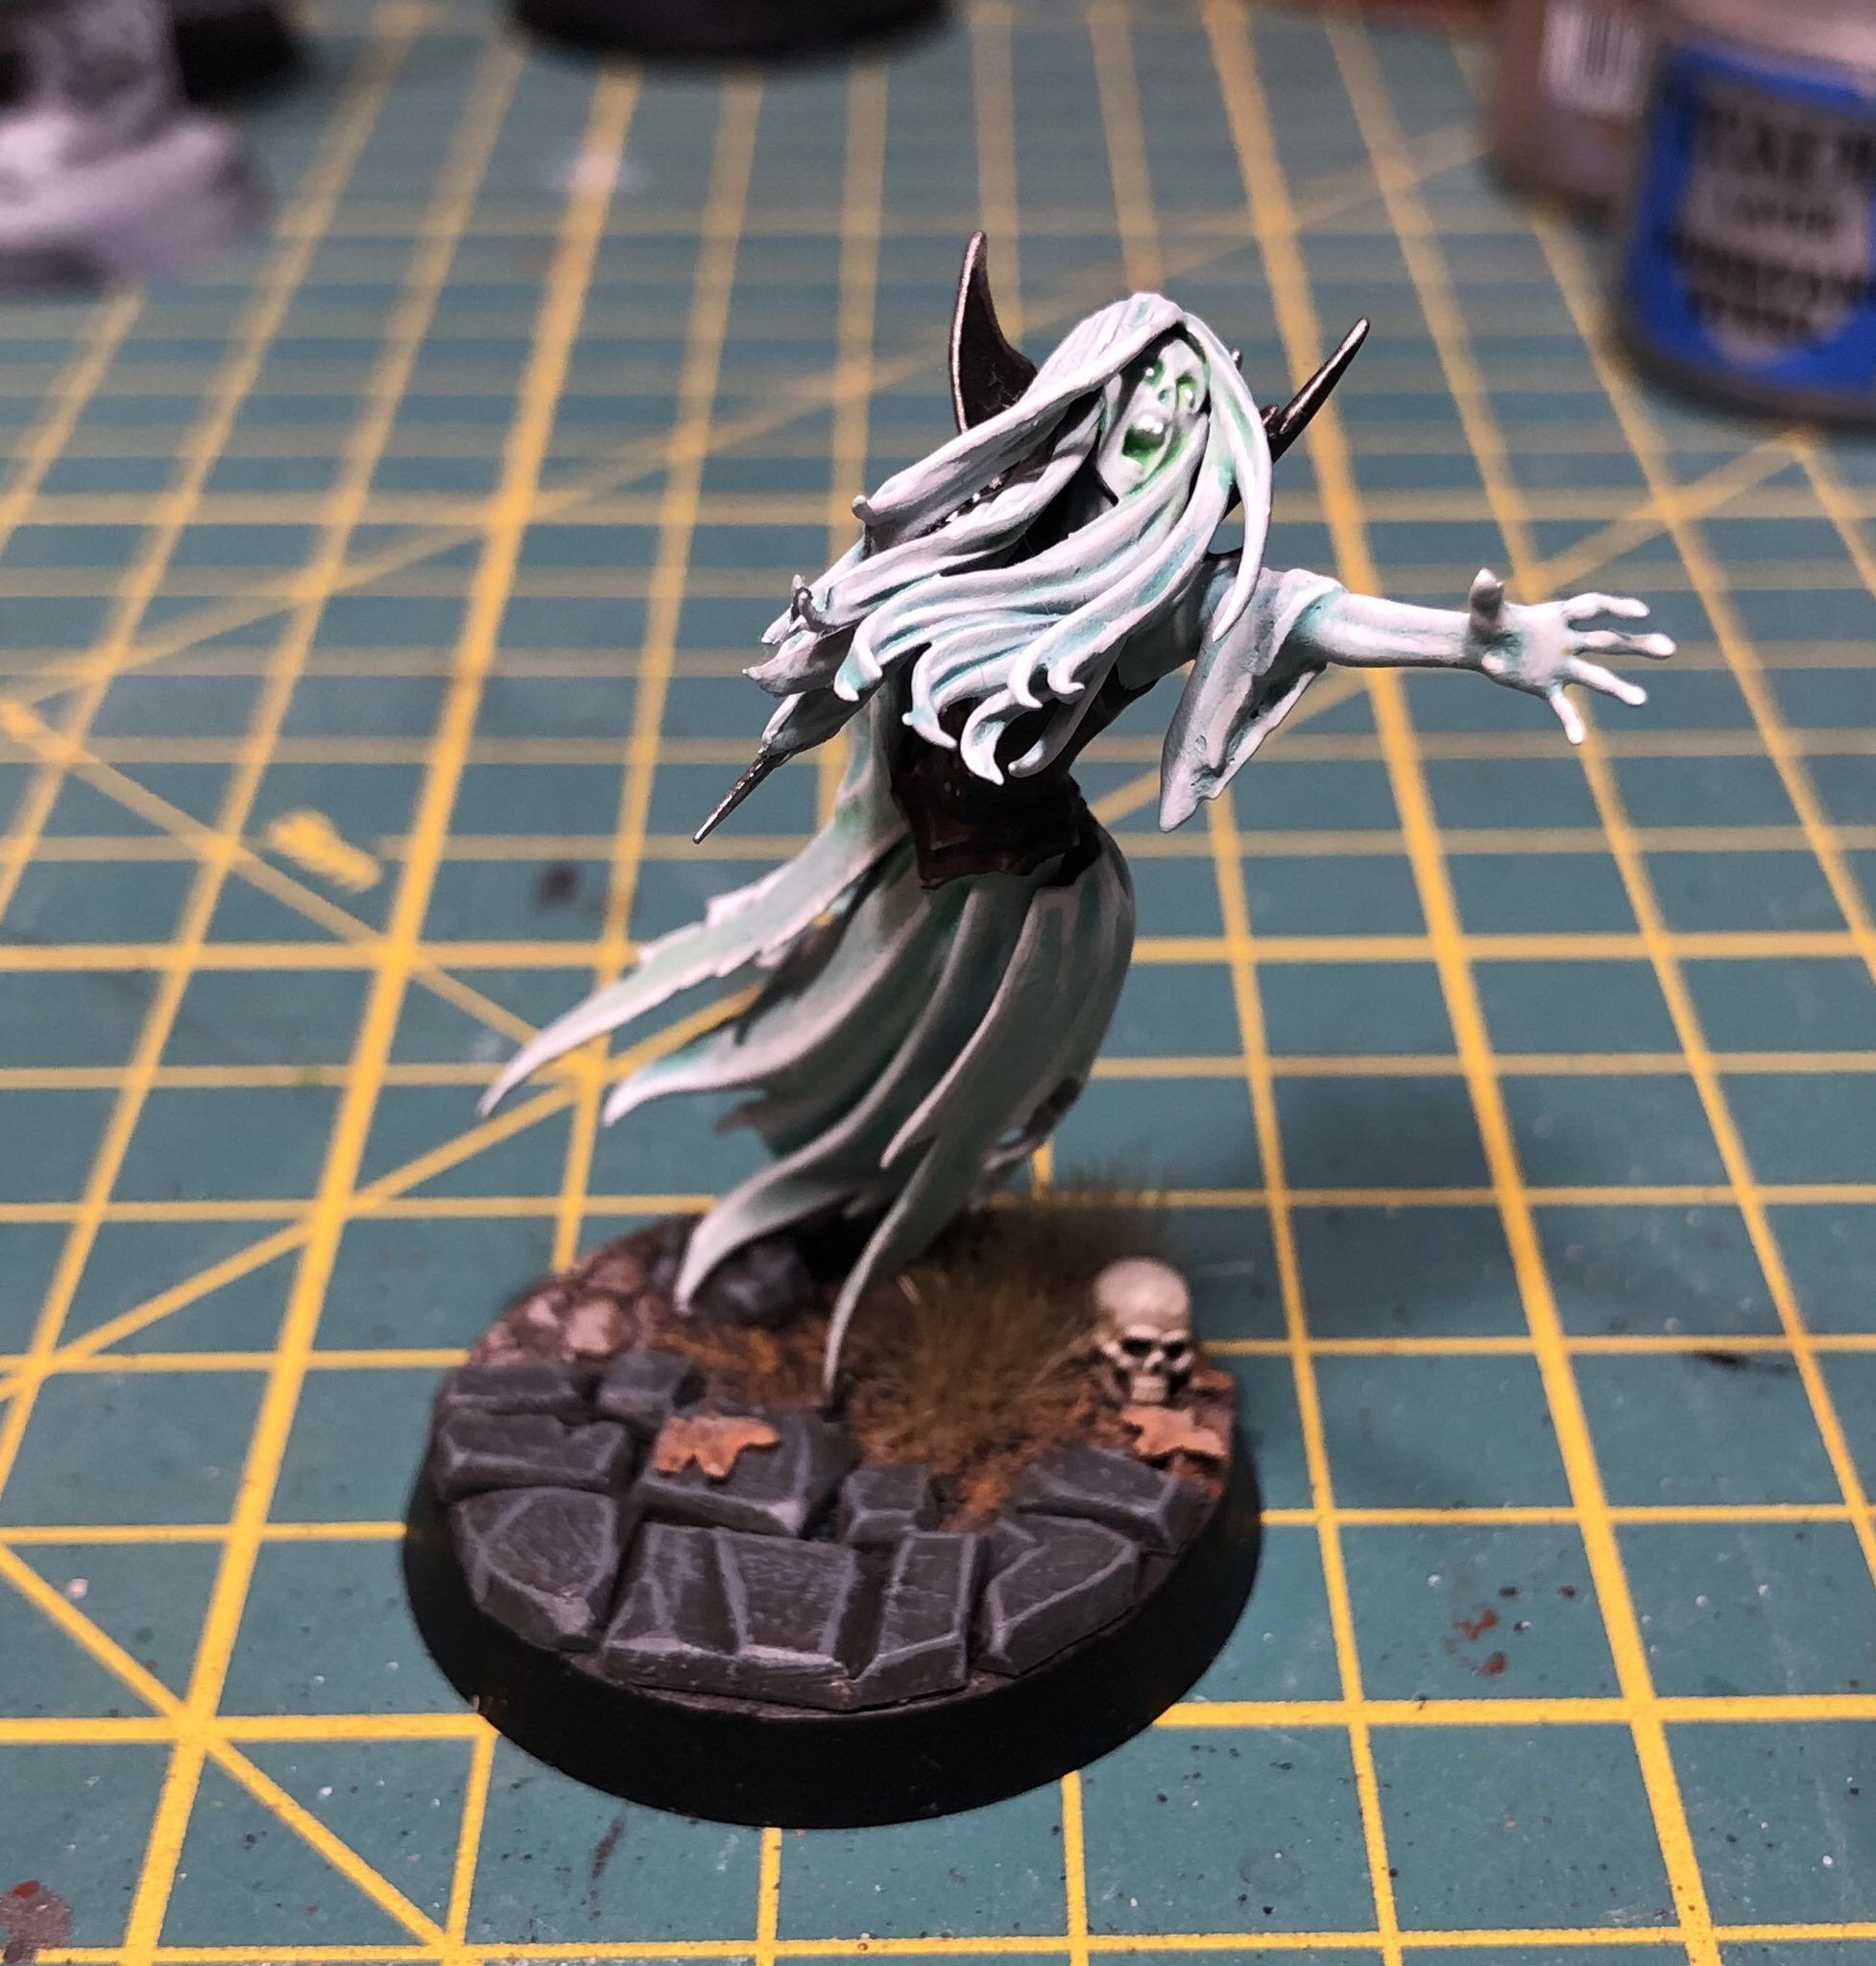
Nighthaunts on the Horizon

The best way to really decide if I want to start a new army is to paint a starter model and that’s just what I did. I’ve had a Tomb Banshee for a while and it’s the perfect model to test an ethereal scheme on. I’ve used Tyler Mengels tutorial from here as a basis. I did an extra coat of the Oxide and that was too much, I’m future I’ll be more sparing in how I apply it. Still the rest came out well enough and I’ve learned or at least considered things I change for future models. I want to get this army done quickly so that I can get back to doing more Stormcast.
September 1, 2017
Warboss Grimrak
I recently finished my Orruk Megaboss, Grimrak. He came out surprisingly well for the amount of time I put into him. I've slowly been collecting Ironjawz over the last few months and painting them up. As a lazy blogger I haven't been posting shots up but I hoping to get a few more regular ones up here. Anyway this is just a taster of whats to come with my Ironjawz.
May 2, 2017
Wasteland Bases
 It's not the greatest of photographs but I think it gets the message across. I usually always do the same type of bases for my armies as it makes it easier to mix and match them as I want and it fits with my terrain collection. For the Ironjawz however I really wanted to do something different. I had tried a few ways that would combine what you see here with what I have done previously and well it just didn't work. I had been wanting to play with the new GW texture paints too so this served a double purpose. I could do some new basing techniques and try out the new paints at the same time. While this isn't finished its close to being done. The addition of the skull adds a lot of character and evokes the landscape in a way that the colours and texture just don't manage. I'll stick with this scheme for now and add a few more elements. Some dried grass tufts and low bushes would also be good. I just have to get some wire thats fine enough to make the style of thorny bushes I imagine growing in this wasteland.
Subscribe to:
Posts (Atom)