February 29, 2012

Obstacles rather than a Canal

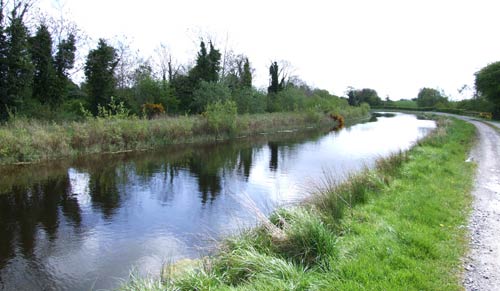
So I failed with getting my canal done. I actually couldn't find any material that suited my purpose to make the tow paths. I had seen a nice set of bricks by PK Pro but they are far too thin for what I want. They seem to be for adding onto a backing piece to simulate a wall rather than being scale bricks in and of themselves. So rather than fail the promise\challenge of doing a terrain piece each month I decided to do some obstructions.

They are simply enough made with some balsa wood and bits and pieces from my spare box. I was attempting to make my own objectives but the first few boxes I made didn't fit on a large base so I decided to use them instead on this piece. I also wanted to try out some camo netting using medical gauze. Its not that easy and I am going to need more practise to get it right. It came out fine enough here but far from perfect. I want to do some trenches in the future and I think adding this type of netting would be nice.

February 28, 2012

Dropping Vindictus

More menites painted and this time another 'Caster. Vindictus appeals to me but I just don't see how I can get him to work. I have two units of Zealots and realistically I think I would need another full one to do his list justice. I like the Zealots but I don't really want the hassle of a third full unit. Its not like they are that hard to paint or assemble but I would only ever use them in his lists and nowhere else. If I was going really hardcore playing him maybe it would be worth it. However I tend to change 'casters with slightly less regularity than my socks so I don't see myself sticking with him for long.

At least now he is painted and so he is an option to play with. I think I will have to redo the red though as it sucks. I have been practising blending reds recently and I wasn't putting in much effort when I painted Vindictus. I think it was due to the fact I broke him six times while painting him. I just kept dropping him which is uncharacteristic for me. Every time he fell something else broke so I got sick of him. Maybe I will wait a while before I go back. Knowing my luck the second I take him from my cabinet to redo the red he is going to hit the floor!

February 27, 2012

Silent and Stern

I want to get as many options viable for my menites as possible and as such painting up more Warcasters is the best way to do this. I really like how in Warmachine and Hordes your force is completely changed by swapping a single model. This of course can lead to problems with some 'casters having very bad match ups but it is nice. I am in the middle ground in the local Wartorn-Alliances league and I am using it as a excuse to get more menites done. The Testament is a great model. I really like the image they have managed to capture with him. He looks tough. My wonderful trusty ten year old digital camera has once again washed the white out so you can't see that it is decently shaded. I shouldn't blame the camera really as I should put together a light box. I didn#t put any special effort in here. It is a quick job just so I can get him onto the board as soon as possible. Not many people have faced him before and maybe I can suprise a few players and climb into the higher ranks of the league. I haven't used him either but he can't be that hard to learn right?

February 23, 2012

Tharn Magic!

This is actually a WIP as I haven't as yet been brave enough to do the seeping blood from the heart he is clecnching in his fist. I have used the now famous Mika Gore receipe a few times and it is really hard to get it to look good and not overdone. I have already runined a giant model for Warhammer by putting that little bit too much blood on and I don't want to repeat the experience with this guy. Especially as he took me an age to do. There was so much detail lurking in this model. I didn't like him at all at first but now that I have painted him I have come to like him a lot. It's really interesting how that can happen. Sadly it can do it in the opposite direction for me to and it means I end up with a lot of half finished models. I am not too bad at the moment butin the past I was terrible at starting one model and coming to hate it. Then it would languish on my desk for a few years before either being hidden or completed. I suppose the Farrow Bone Grinders are a good example of this. I started then years ago and finished them only a few weeks ago.

Back to the Shaman. I am pretty happy with how the skin came out. I have the tones worked out well and I think I amanged to make the skin here look a lot less purple than on the other Tharn I have been doing. Some of that comes from learning how to shade and highlight flesh/musculature. I really enjoy painting flesh now even though I hated it once. I still have a good few Tharn to do so lets see if I still like it after all of them! I also used a lot more yellow on this model to tie him in with the female Tharn who have it on their scheme. It suits the autumnal colour scheme and I think I shoud find some excuses to use it a little more.

I have been listening to the first twelve novels of the Dresden Files while painting and I am up to book seven now. These have been keeping me going when I find my motivation lacking. I can't paint anymore without listening to something. I used to paint in silence for hours but I slowly developed the habit of having the radio on. Then I watched the Lord of the Rings with all the various audio commentaries on while painting. I think that was the rubicon. Now I have to listen to something while painting, oh and music won't cut it. The one thing that is a real benefit however is that if I first start listening to an audio book I find myself slowly getting in the mood to paint. Looks like you can teach an old dog new tricks...

February 22, 2012

Menoth's Magic

Here is a rather quickly painted Vassal of Menoth. There isn't a wealth of detail to the model even though there is a wealth of character. This model is one of my favourites as it really captures the atmosphere of the concept artwork. I did the metallics simply with a Hawk Turquoise (GW) wash followed by a Skull White (GW) wash on the gold. I find that this really works well on bronzes. This isn't a shining example as I spent about half an hour doing this model. with a little more care I guess it would have come out better. The silver has some rust pigment added and then sealed with matte medium. It seems to keep the richness of the pigments whereas varnish washes them out a lot. I should have been a little lighter in my application of the pigment but it is fine. I am looking forward to dropping this guy on the table a little more regularly as he is considered pretty powerful.

February 21, 2012

Kromac is hungry

With the Tharn Ravagers finally reaching max unit size I thought I should paint the big daddy Tharn. I bought him when he came out first and well left him there unpainted and unassembled. I actually think he was a Christmas gift from Al so its nice to see Kromac getting some attention finally. Kromac is actually two models. The one you see here and an untransformed human like version. I haven't yet managed to paint the normal version and maybe I will manage it this week. With the Wartorn-Alliances league running I have been catching up a little on my menites so I can bring some extra punch to the table with them. The large version took me ages to paint and Ialso want a bit of a break before having to sit and commit to the same effort on another model. Sometimes it is nice to relax with my menites as they are not at all as demanding to paint.

I was trying to do better metallics on the axes shown here. While they are better I don't think it is a real technical improvement. I just highlighted them as I would any surface. There has to be some knack to metallics that I am missing. I don't want to do non-metallic metals as I don't find it to be that interesting a technique. In general the models I have seen done using it don't look that good. I want to get proper metals using metallic paint. Maybe Circle aren't the best force to be doing that with. They are mainly fur and cloth. Still I have to start somewhere.

The bonework on Kromac was interesting. I usually go for a much more white tone in the bones. I used to paint them from a Snakebite Leather (GW) base and highlight with Bleached Bone (GW). It gives a much more brown tone. Having seen a lot of bones professionally both approaches seem correct. However I have never seen bones that have been carried to war on a belt or head-dress so I wonder how they would actually appear?

February 20, 2012

Alexia, rides again!

I picked up Alexia cheaply recently and rather than let her linger in my cupboard of unpainted stuff I immediately got to work on her. There is a guide in No Quarter 37 and I followed it loosely when painting the horse. I wanted to get a nice undead look to it and I think I achieved it. The horse is a little more purple than I would have liked but it does look rotten. I was using GW and Vajello paints as substitutes for the P3 recommendations. I think this made the purple a little too strong and I didn't quite get the green tone I wanted. It was pretty quick to do however. The model was undercoated black and then drybrushed in a few succesive coats until I had a nice light rotten green flesh colour. From them on it was a series of washes mainly. I don't think I will use the technique on anything else but it is nice to have had some practise with it. I can imagine that for undead flesh it would be good. For Alexia I just went with a standard enough paintjob. I did the large cloak in red as I am attempting to get more practise doing that colour. I have a massive Khador project looming on the horizon and so I really want to get my red blending to a decent standard. I am also trying in vain to get better effects on my metallics. It has been a pretty mixed bag with regard to the results. Sometimes it comes out fine or even good but I don't feel like I know what I am doing. I haven't as yet come across a good tutorial for metallics online but the search continues. It is mainly silver as I can do decently good gold. Still it would benefit to get some basic guidelines on how to do metallics. Everything for my mercenaries is on hold at the moment as I need to get more work done on my menites and circle armies. I have finally managed to get my hands on the two cutthroats I needed to have a full ten man unit and I should paint them. However that I guess deserves stripping the original models and redoing them to suit the better style of the mercs I am doing now. So maybe over the coming weeks I can get around to that.

February 15, 2012

I am devout

Rome: Total War is a horrible thief of time. I have spent the last few days playing it almost non stop. So there was no hobby time. I love that game. It really reminds me of Warhammer Fantasy except on a wonderfully large scale. I am going cold turkey today and if I am brave enough I will uninstall the game. The little hobby time I have had consisted of me repainting some 'jacks. I have four of them in my old style and I want to bring them into line with the rest of the army. Fisrt up has been the Devout. I am playing eagerly in the local War-Torn alliances league and I was expecting to have the upgrade available to me rather soon. However one win and two loses in a week have hampered that plan. The league has been good fun so far with a nice mix of players. We have filled the twelve opening spots so for Hamburg thats a good turn out. Only one Cryx player and two Legion players so not too much nastiness! Three guys with Cygnar bizarrely enough but the rest is an even spread.

I will be playing in the Irish Masters next month so I am viewing the League as a warm up event. I have three lists I am messing around with and I am considering if I should use the devout or not. There are a few things in the game that make it difficult for aggressive 'casters like Feora. One of them is the Ravagore and the other is Rahn (could be wrong with that 'caster name) They can pretty much shoot you from anywhere regardless of LOS. I need something that can intercept those ranged shots and allow my Warcaster to sit near the front lines. The devout seems to offer that. I do think that five points is a hefty enough price to pay. It is almost a unit of Temple Flameguard. I will be testing these fellows out in the League and seeing if they are really worth it.

February 9, 2012

Operation Varnish

I bit the bullet. I am rally lazy when it comes to varnishing my miniatures. I rarely do it and only if it is a metal model. Today I pulled out all of my menites and got to work. I managed to get them all varnished when I realised that I hadn't been using varnish. Nicely Vajello have black lids on all the pots of things that aren't paint. Well I just grabbed the first black lidded pot and poured it into the airbrush. I do remember thinking that it was a bit thick. Now all my menites have been nicely coated in matte medium. I don't know if this will protect them at all but at least it isn't shiny. After my small loss of temper when realising this I got down to basing the models. I have been doing swamp bases for this army but I haven't really done the water part. I double checked what I was using this time and thankfully got the gloss varnish correct. This shot shows a decent proportion of what I have in my entire collection. Anything that's not shown doesn't have a little pool on its base. I have done about three thick enough coats now and I am annoyed. Its wrking fine but takes a long while to dry... At least by tomorrow all should be ready as I am playing my forst game in the War-Torn Alliances league. Legion is my first opponent, never an easy match up for me. Fingers crossed all goes well.

February 8, 2012

Tharn Reinforcements

I am concentrating on getting my Tharn done at the moment. First up is the two extra models I need to max out my unit. As I have mentioned before I needed to match the new skin versus what I did with the old stuff. I eventually figured out that Scorched Brown (GW) was the secret. That plus some elf flesh and I had it. I was using Charred Flesh (VJ) but it doesn't work at all. It doesn't have the same red content and makes what would be a really odd skin tone. At the moment I am working on the Shaman. Yyou can see my progress here. Hopefully my White Mane and Chieftan arrive soon. They seem to be out of stock almost everywhere. I am also tempted to get a second unit just so I can do Kromac's theme list. I have Kromac but I haven't as yet painted him. I might get to him next week, depending on Beastmen progress. His theme list seems great and so I might start playing it a little. AT least I can test it on VASSAL first before investing.

February 7, 2012

A Tale of Three Gamers - Month Three

I am not the only one to have made progress this month in the Tale of Three Gamers. Al managed to finish off a chariot and a BSB. It seems to have been a good month for BSb's. All are themed in a Hoplite style. You can check out his other stuff here. The more I see the army the more I worry that my Gors won't be able to stand up to the sheer quality of the Chaos Troops, especially as I am plaanning on taking two giants. I might need to upgrade them to something that hits a little harder/better.

This month Al is aiming to get some of his core requirements done, 12 Khornate Warriors with two hand weapons. I am jealous. I have to do a minimum of twenty Gors. I started gluing them together yesterday and it is annoying me already! If ever I do another Warhammer army it is going to be with expensive troop types.

Still waiting on Gars entry for the month.

February 6, 2012

Canal, next project!

After managing to complete my hill within the deadline of one month I have what I think is a more ambitious project, a canal. I have always wanted to make a river and I have failed many times. Its not so easy as it looks and even when you get it done the final water stage is usually not exactly what you were thinking of. One solution to the numerous problems of a river is making a canal and thats really suitable in the Iron Kingdoms. First of all as they are regular in size they are pretty simple to do in sections and have them join up. Also when making a river it always seems to sit above the table level rather than flush with it or better still embedded in it. It just looks wrong. A canal gets past some of this as its banks (tow-paths) are supposed to be raised.

So what are canals according to the rules then? Well in Warmachine they are discussed on page 88 just after hills. Wwarmachine has two types of water, deep and shallow. I think that a canal would be deep. So that means a model can't run or charge through it. Movement is halved and further still all actions, spell casting and giving orders is impossible. Yyou can't even feat while in it. Ending your activation in it causes one damage point. So getting into the water isn't such a good idea! Pathfinder doesn't help out here as it isn't rough terrain. So putting down a canal on a table is going to cause all armies a lot of trouble. Well maybe the gators won't worry about it too much. It does bring a lot to the Warmachine and Hordes table though. Pushing or slamming models in will cause huge problems for them. Any crossing point is going to be really hotly contended and makes for the perfect control zone in scenario play. It aids ranged armies that can effect things across the width of the canal hugely. It also makes amphibious and flying really relevant abilities as stated above.

In Warhammer its something else entirely, it is discussed on page 120 of the rulebook. You can't march while in a river but otherwise you can cross it normally. It has a big effect in combat with units in it losing steadfast and their rank bonus. So getting caught in a river is going to be trouble if your foe has the right unit to deal with you. Rivers do have to have one crossing however but the unit crossing would need to reform to fit on the bridge, so realistically for the game you would game a bridge of about 125mm across. There are of course some myterious rivers but they are really not something I am going for here. A necrotic ooze sounds interesting actually but I just want the standard fare, especially if it is to be a canal.

Despite not plaing 40k I checked the rules there to see what they might say regarding rivers. Basically rivers are again either deep or shallow and depending on which they effect movement. Deep rivers prevent it and shallow rivers (streams) are difficult terrain. Simple enough I guess and does the trick.

So having seen that this canal is going to have a big effect on the game I really think it needs to be planned out properly. I want as per the hill to have it as a realistic piece. That means it needs to be fairly wide. Here is where I start mixing Imperial and Metric measurements, enjoy! I am guessing 6" at least for the channel. So that is basically going to prevent all movement across it in Warmachine for standard models. A little annoying but I think reasonable. I could reduce it to 5" and it should be fine. I see the bank portion taking up about three quarters of an inch on either side so thats a total of between 8" and 9". Thats a large foot print. It has to be about 12" (30cm) long as ut needs to divide into sections and these need to divide into the footprint of the board. I do want the pieces longer than wider so there is no other way it works easily. That means its always crossing the board horizontally or vertically at least. No messing around at this stage with diagonals. The styrene I am using for the base is 12 3/4" wide (exactly 30 cm) so thats what I am going for. The question remains then 5" (~13cm) wide or 6" (~15cm) wide.

I want to make a few other pieces for the canal at a later point but these should be given some thoughts here. I want to add a boat. A traditional narrowboat which then shouldn't take up too much space on the canal. Traffic goes in both directions so I guess less than half the width of the whole channel. That offers me a boat with 2 1/2" width. I envisage this as a steam-powered canal boat delivering coal or some other heavy substance. If I went with the narrower channel I could only go with 2" so I can't fit large based models on the boat as easily. I also have to do a Bridge and I would like this to be 4" wide (~10cm). This maintains the nice visual that the bridge is longer rather than wider. It wouldn't be that awesome for Warhammer but well I am really building this with Warmachine in mind. For Warhammer I would need to go with 5" to accomodate a 25mm based five wide regiment. Hmm when it comes to that part I will consider it. I saw in the recent No Quarter number 40 a picture of a bridge they have made and I think I will be copying the form. It is a bridge that can be raised to allow barges to pass underneath. It looks great and hopefully can't be too hard to build. The final thing I want to build is a Warehouse complete with a crane for storage and loading. It would be a decently large building made in brick. It won't really effect the canal too much though I have considered making it a dead end to the canal having the effect whereby the canal doesn't reach across the whole table.

So enough musings. The plan for the all too short month of February is to make three 30cm long canal sections and one with some form of a bridge which hoepfully will be steam powered! So lets see if I can manage this one.

February 3, 2012

Friday Showcase - Bog Trog Ambushers

Keeping the Blindwater theme of last weeks Showcase here are my Bog Trog Ambushers. These are the only models predominately green in all of my Hordes models. I felt that I couldn't really justify painting them any other colour. I still went with the muted tones and I think it worked pretty decently. The models are quite detailed and while I usually don't like that these were fun to paint. There are little frogs, turtle shells and various bones all over and they really give the models a nice swampy feel. It is really in contrast to the rather simple Gatormen.

The colour scheme is fairly close to the studios. Sadly there was never a good painting guide for these guys, well at least in Evolution. Maybe there is one in the Minions book? The gatorman guide was excellent despite the fact I didn't follow it. Privateer Press do some excellent painting guides in the books easily on par with anything the 'Eavy Metal team do. As was usual I didn't buy the full unit I instead have eight models so I am going to need to pick up another blister and somehow match them in with the earlier ones. I hate doing that as so far my attempts have been failures. I have spent a few evenings this week just mixing colours for my Tharn flesh and I haven't yet hit upon the correct formula. I know the highlight was Elf Flesh (GW). The base colour has been elusive. I even went to GW and picked up some paints I haven't had for a while. I am thinking that the base colour is Scorched Brown. I usually use Vajello's Charred Brown but it doesn't have the same red content so the skin comes out very very pale. I have no idea what I used for the Bog Trogs so it is going to be fun finding out, Once again the idea of a painting diary seems like a good one! Now it is back to the Chain-Attack podcast and some painting.

February 2, 2012

Gors finished - Tale of Three Gamers

Another month over and here I am showing that for once I hit all my targets. I have completed these Gors as part of the tale of Three Gamers I am participating with my two buddies from home. I managed to get the BSB done much earlier in the month. All in all it was good progress and while I do have to admit painting this many guys is beginning to drag getting the first twenty Gors complete is providing some sense of achievement. Now to get them to forty.

This month I am still sticking with core. I will be annoyingly bulking out my Gor regiment to forty models and I will do another chariot. I have some Circle models to finish first but fingers crossed they won't take me too long. After three months I have the following completed: 20 Gors, 25 Ungors, a Chariot, a Giant and the BSB. That is for me really good progress. After this month the army will be at the halfway mark which is suprising. I didn't realise how quickly the points all started coming together. I guess once the Gors are done I can get started with some of the more interesting stuff!

February 1, 2012

Hill complete... finally!

I have been busily working away on my hill/knoll. It's now become an escarpment. I could kind of see that happening from the start and while it isn't what I planned it was inevitable. I think it worked out decently too. I wanted to get it finished for the end of January deadline that I set myself and I barely managed it. It took far more work than I had intended but I think it was worth it. I follwed some online tutorials and they proved great. I hadn't realised that adding some plaster to the model would be so helpful and messy! The T3 studios has a great tutorial here. I am not 100% sure how practical their hills are but they sure look good. I approached mine from as practical a position as possible and here is how I went about the final steps. The other steps can be found here: Part 1 and Part 2.

Last time I stopped with the basic ground work done. I then started adding the plaster to the frame. It was just a simple wall filler plaster mix. I put it on fairly thinnly to save myself having to wait ages for it to dry. I smoothed it on with a kitchen knife. It still dried quite rough and in some places it was far thicker than I would have liked. This happened because of the rough cutting I did to the polystyrene. It is also important to pay attention to the join between the cork and the rest of the hill. I allowed the plaster to overlap quite a lot on the cork as I wanted more of a cliff face look than that of an outcropping of rock.

Once the plaster was on and drying I started to work on the ground in front of the cliff. As I did with my other rock formations I like to use some modelling clay to smooth out the ground in front of the cliff. This ties the piece in well and also has the benefit of filling the gaps you sometimes get in the cork. I did this in two stages. The first stage is just adding in a piece every inch or so. After that has dried I fill in the gaps. Doing it this way prevents warping. I didn't think the base would warp but it is better to be safe than sorry.

Once the plaster and clay were 100% complete I spent a few minutes hanging out of my apartment window sanding the hill. The plaster needs to have all roughness removed as otherwise the flock will match the roughness. It helps to strengthen the piece I think by preventing small pieces of plaster and flock from being knocked off. Once that was complete flocking could begin. I am also freaked out about warping when it comes to flocking. I flocked the hill in three stages letting each dry first. In the first stage that you can see in the picture I left the small stones in the sand. In the last two stages I removed these. I did this because I often find that they break off pretty quickly. They are nice to add diversity to the finished hill but otherwise it can just lead to the flock coming off in patches. It took a while to get all the flock on but no warping at all, nice!

I used my airbrush to paint the hill in an effort to save some time. I needed a massive box to catch all the excess spray and this was the biggest I could find. It took one pot of scorched brown to do the complete hill and some grey too which wasn't bad. I thought it would really take a lot but thankfully not. I used the expensive paint as I was too lazy to search for cheaper ones that would still work with my airbrush. I left it a while to dry and then the real painting could begin.

Using the airbrush gave a nice effect where the cliff met the hill. The excess brown spray ran up the cliff. This was nice as I could leave it and get a nice effect when it came to dry brushing the cliff. I also added some green wash in places. This looks like moss when it dries and again adds to the effect. I wwash the whole cliff then in black to bring out the detail. To finish it off I dry brush with progessively lighter shades of grey.

One pro tip I can give is to buy a good big brush when it comes to doing something of this scale. Seriously a big big brush! I managed to forget to buy one and I spent ages doing this hill with a crappy small brush. That wasn't fun. I paint the base colour in with Scorched Brown (GW). I give two further coats of Bestial Brown (GW) and Snakebite Leather (GW). This matches the basing scheme of my varioius armies nicely. I picked out the little stones in the same colour as the cliff. It adds a nice variety to an otherwise boring monotone hill.

Here you can see how large the hill is. Thats a large based Warjack sitting on it. A whole battle could almost occur on the hill. You can also see how I added the static flock on. I added it beside the rocks. This helped the rocks to stay stuck on and it gives a better look. I added a few small bushes here and there but these are hard to see. I haven't added any varnish to the hill yet. I don't intend transporting it or donating it to a club so it won't see much wear and tear. So target one achieved!

About Me

Friends