I picked up the Malign Sorceries expansion when it came out last weekend. The spells look amazing and its nice to have them represented on the battlefield again, just like in the good old days of fourth and fifth edition. They were removed I think, as templates at least, once sixth rolled around and this was probably for the best. However as models these work excellently on the battlefield. Not only do they look cool but they have a big impact on the game. I suppose that's just conjecture on my part as I haven't used them yet but it does look like they'll be huge.
I was mainly interested on the Grave Tide but for some reason I probably did like everyone else and glued the Purple sun together. This was easy enough as the internal frame worked a treat. I guess they might begin to use this on other bigger models in the future as it makes them very sturdy. Everything pushed together well despite the smaller spikes being a little too sharp for my delicate thumbs. The kit has a big problem with gaps and while I filled them all using the Gloss Varnish method it just wasn't enough. I should have done a coat or two more to really smooth them out. As this was the first time that I had tried the method however I can't expect great results. Next time I'll know. As for painting I didn't want such a dark orb as is shown in the picture and I didn't want to go and buy a load of purple paint that I'll barely ever use. I had a purple wash and that was going to suffice! With that in mind I sprayed the Sun white. Over the purple plastic it was hard to get a solid colour so in the end I had to brush a layer of white on. Over that I added some diluted Druchi Violet. This came out quite pink and so I gave the recessed areas a second wash to deepen the colour and bring it up to a more purple hue.
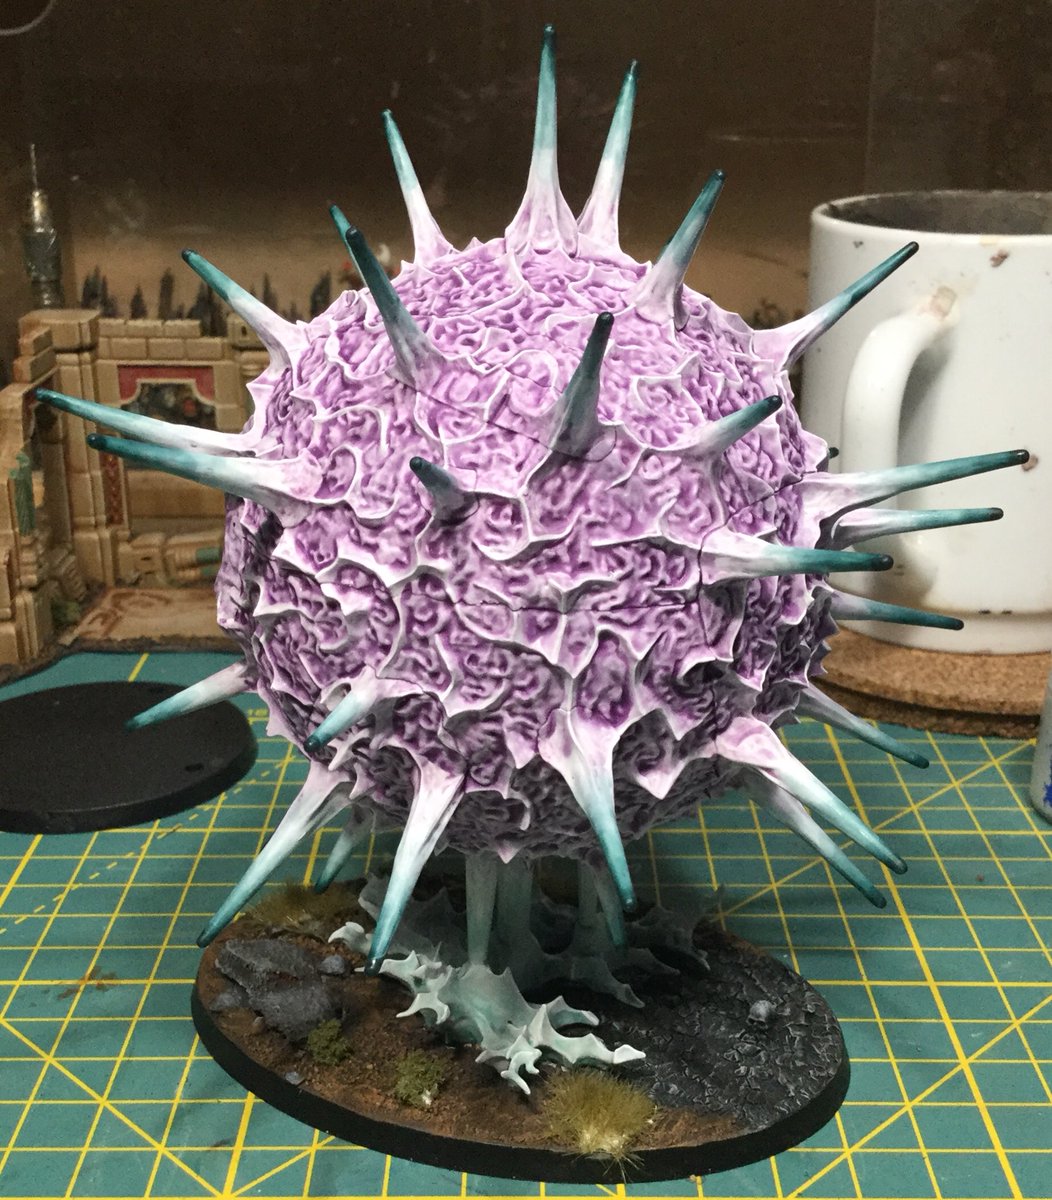
The fun started next with a simple line highlight of white along the most raised areas. I could have targeted this better but the effect I got is good so I'm happy with it. At that stage I had the Purple Sun basically done but as it was essentially all one colour it looked really boring. To change it up a bit I started blending the tips of the spikes out to Incubi Darkness. This worked really well on the downward pointing spikes but on those that pointed upwards it was hard to control the wash and prevent tide lines. Again it came out good enough that I didn't really worry too much about fixing any errors. For the base piece I decided again that going purple with it wasn't going to look that good so I went for a blue green. Its subtly different from the spikes but not much and most people won't notice it. Finally when it came to basing the model I went with a fairly standard basing scheme to match my armies and the board. However I guess that the passage of the Purple sun must have some effect on the ground behind it and so I used one of the crackle texture paints to give that effect and I painted it to look like ash. All in all this model was good fun to paint and while it won't see much board time sadly it will look great in the collection.
July 5, 2018
July 4, 2018
More work on the Chainrasps
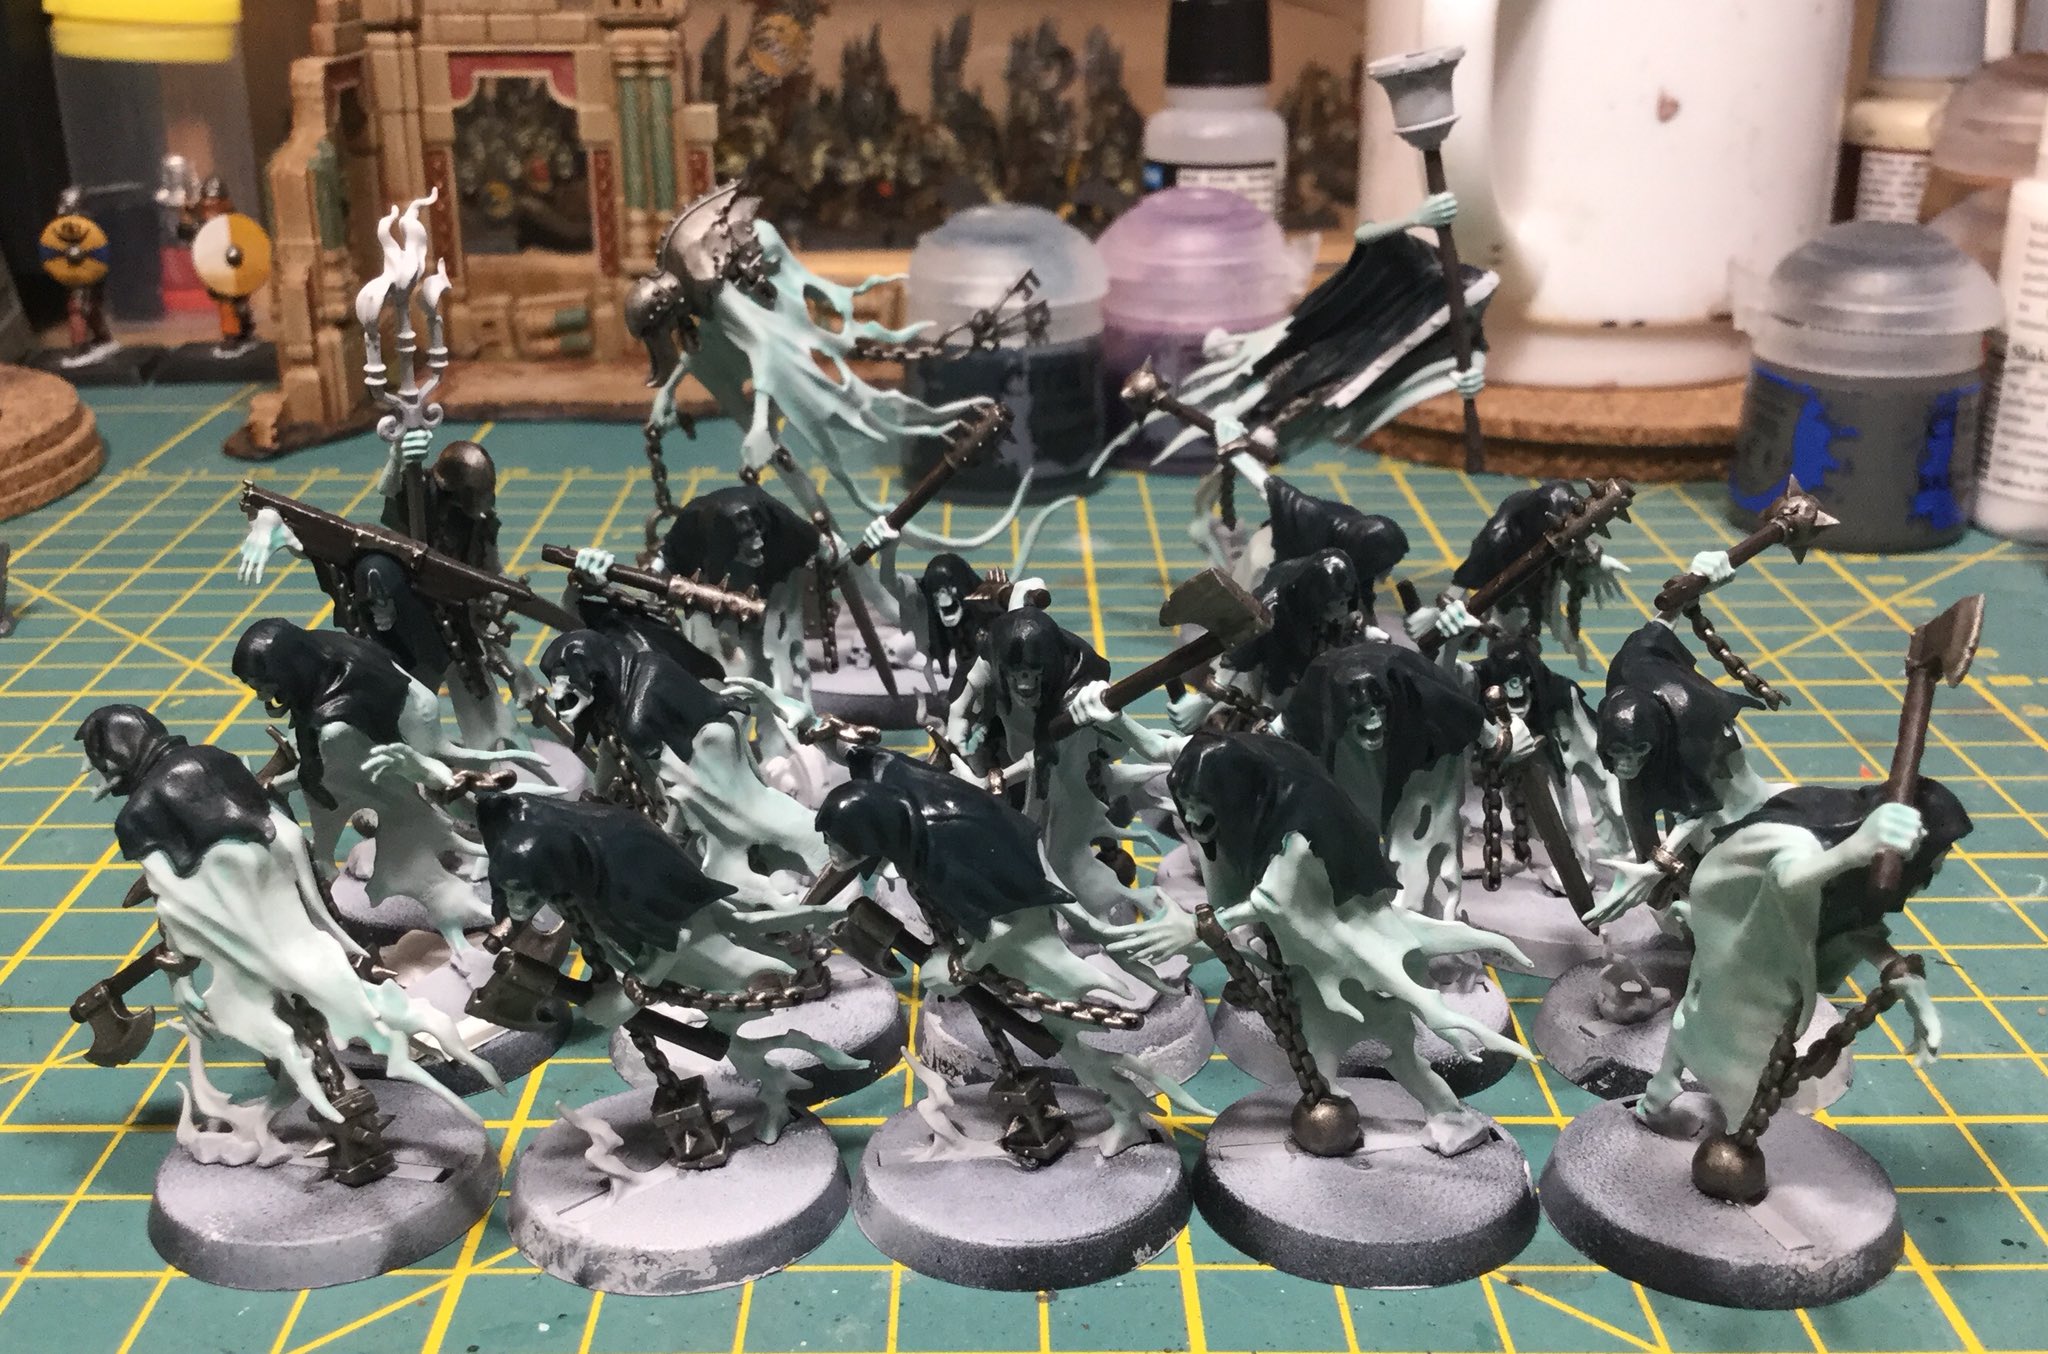
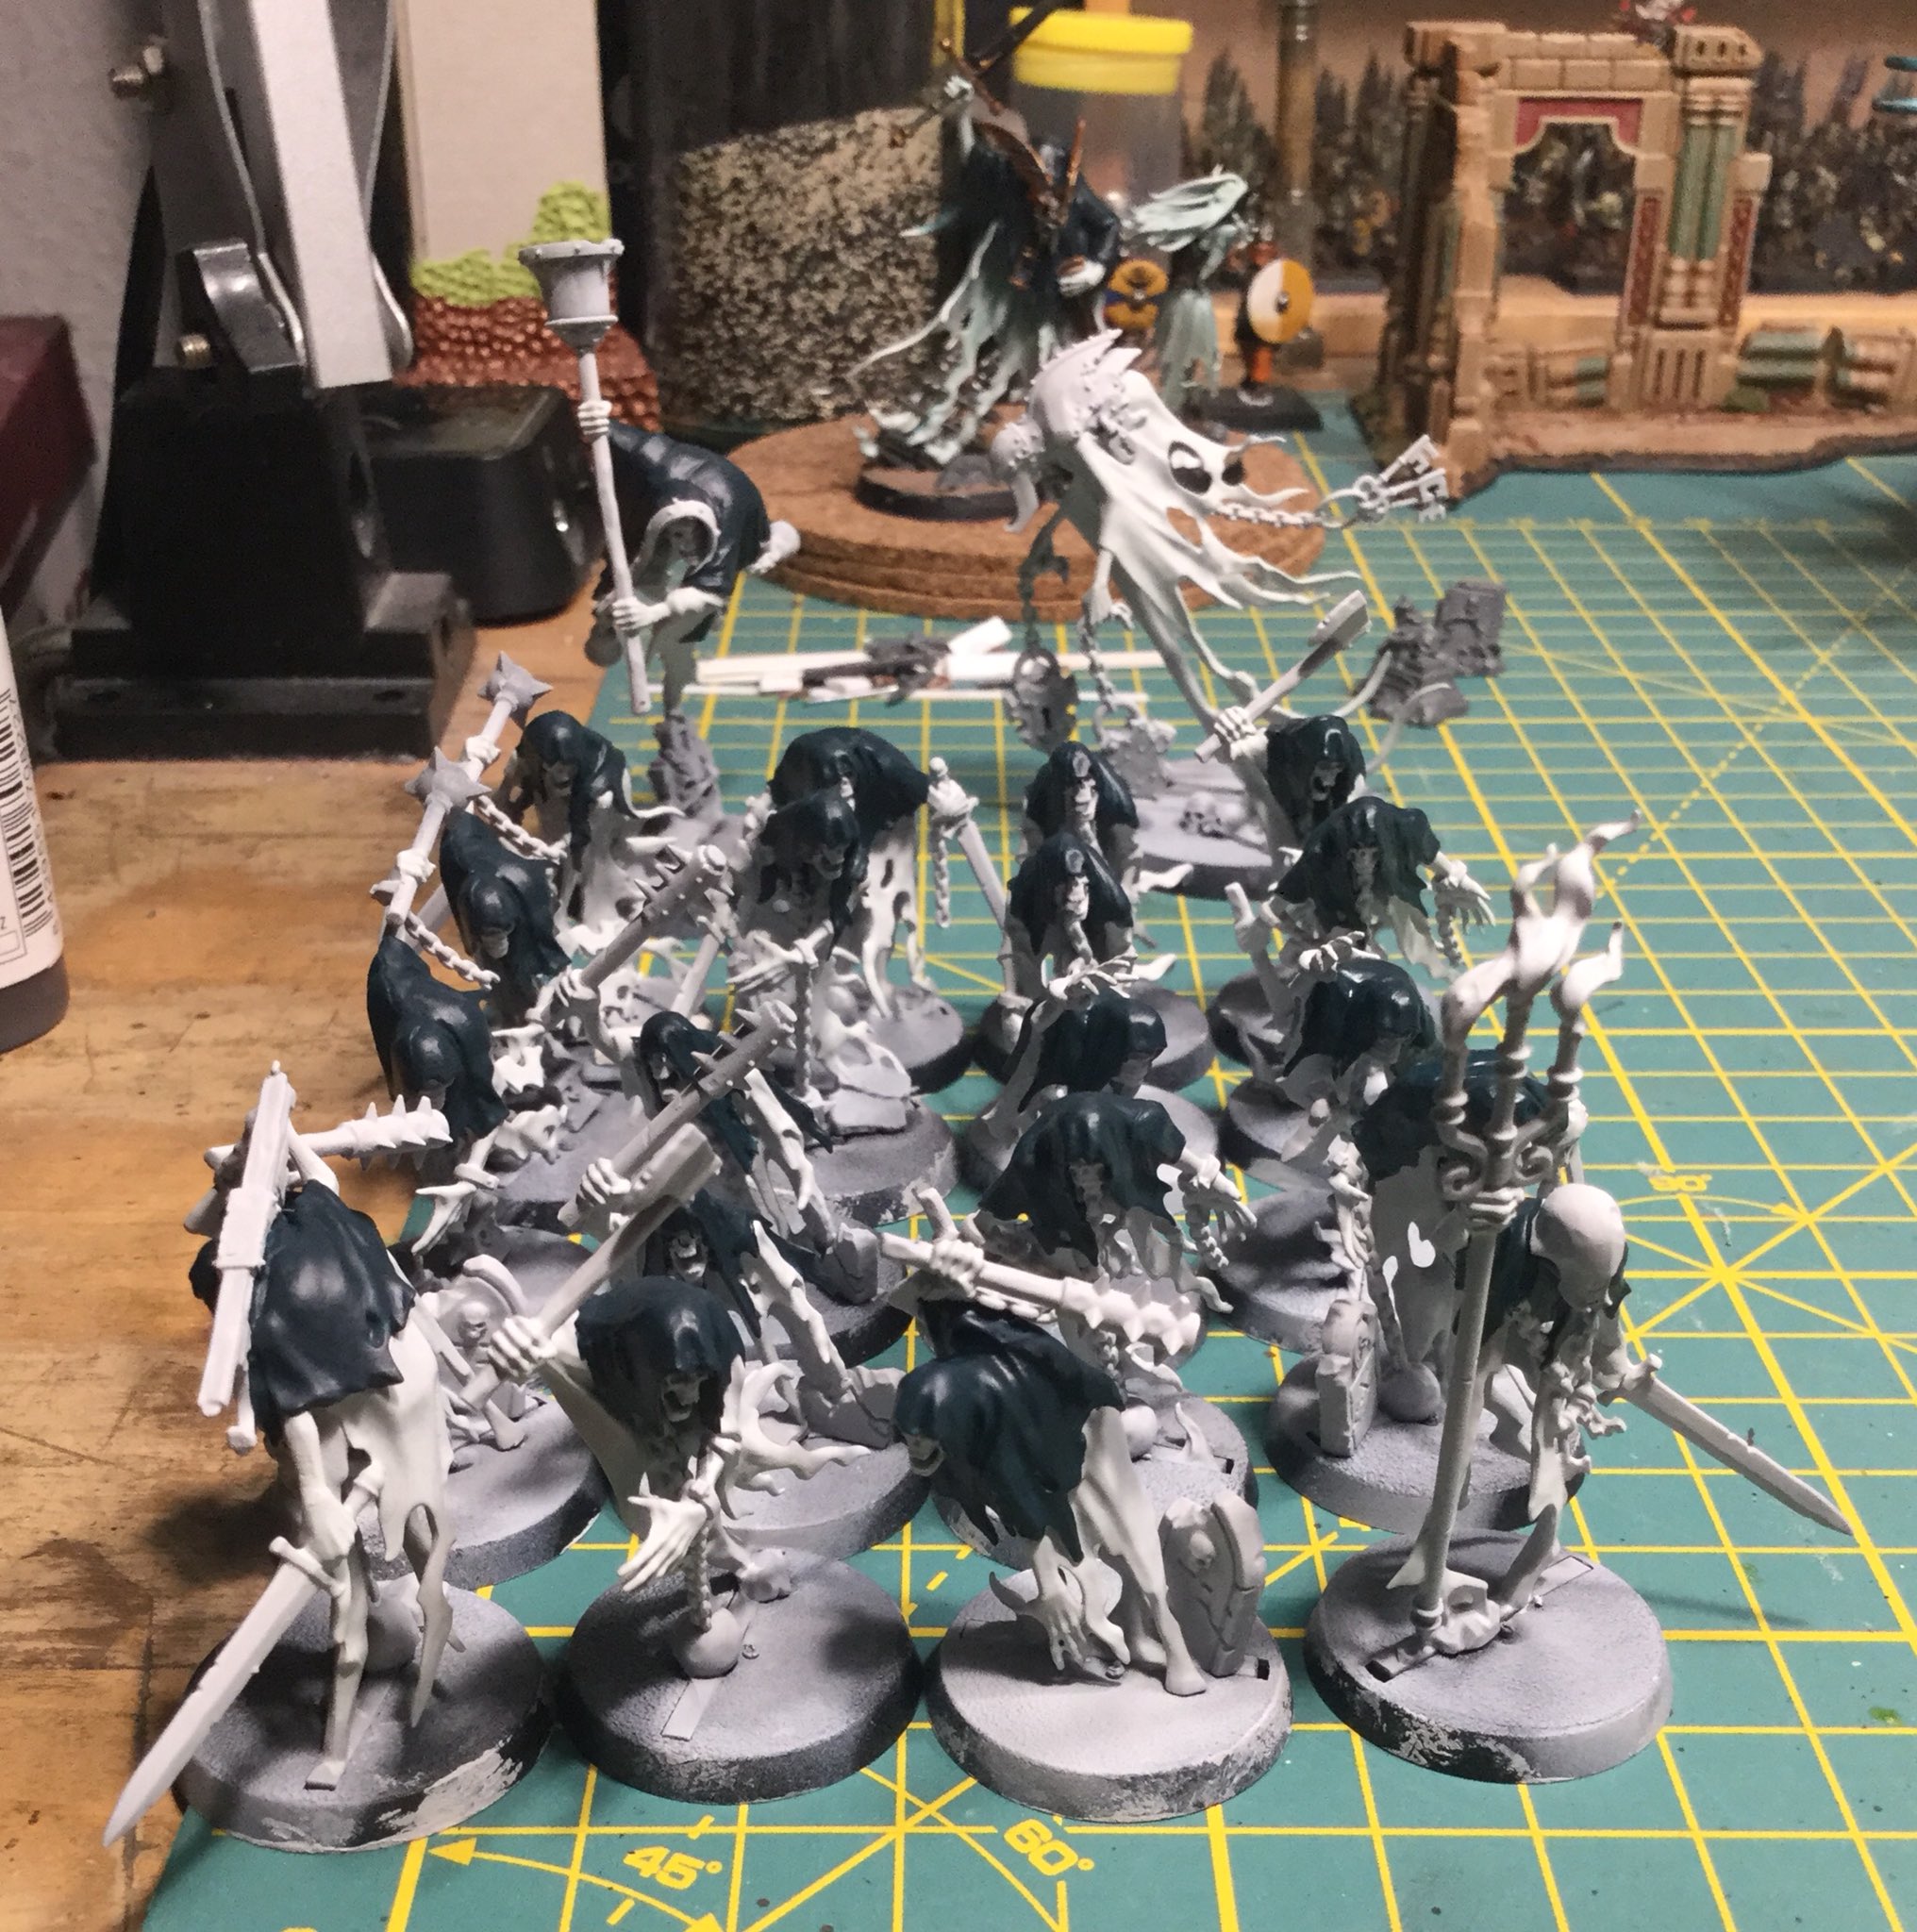
Progress continues apace with my Chainrasps. I definitely think that batch painting 22 models wasn't the best decision but at least I still feel like I am making some progress. I've done the basic washes on them all now and tonight I'll be hitting them with a special Coelia Greenshade mix to create a greater depth on the white robes they have. That shouldn't take long but so far that prediction has been wrong at every step. After that wash is dry I can apply some more localised washes of Waywatcher Green to create some variance in the colours. It's totally unnecessary but breaks up what could be a rather monotonous scheme. If all goes well I can even start the highlighting stage. The target is to have these done by the end of the weekend. I don't know if that will include the bases but it would be nice if it did.
July 2, 2018
Chainrasps and a few others
Work has started on my Nighthaunts. I picked up everything last week and then promptly got distracted by a Purple Sun. Somehow I had the idea that it would be quick to paint. It wasn't but its nearly done now, more to follow on that during the week. As for the Nighthaunts the models are lovely but rather flimsy. It takes a while to get them off the sprue and once you've come to the point of putting them together you will discover a lot of gaps that need filling. They are great, don't get me wrong but one of the limitations of push-fit models is gaps in bad places. I tried to fill them with some gloss varnish and it worked for some. Though I noticed that if you aren't careful in applying it you will actually exacerbate the problem by creating two ridges that run parallel to the gap you need to fill. people have recommended GW's 'Ardcoat for the job and that might be better. I was using Vajello gloss Varnish.
Anyway I have managed to get two of the three colours on these guys that constitutes their base coat, Ulthuan Grey and Incubi Darkness. The third is for the metals and is Leadbelcher. Once that's on tonight I can start washing the models and hopefully I will make rather rapid progress from there. I have pre-mixed both a blue and a dark green wash so I don't have to worry about getting ratios correct each time. The only wash I'll still mix by hand is Waywatcher Green as I use it very sparingly over the models.
If all goes to plan I'll be able to post updates each day this week and by the end of it I'll have the bulk of the Starter Box done. That's the plan anyway.
June 25, 2018
The First of the Nighthaunts
They are done finally! These Spirit hosts took a little longer than expected but in the end I think it was worth it. I may have mentioned before that I am using Tyler Mengels' excellent painting guide for the models in my Nighthaunts army. I am trying to get this army knocked out quickly as time is extremely limited at the moment. If I could get the army done by the end of the summer I would be extremely happy. Having seen how extensive the range is I am not sure if that's going to be entirely possible. Anyway these models were a bit of a pain to put together. Once I got familiar with the kit though it wasn't too hard. I think the instructions could be done a little better but hey these came out fine. Painting consisted of a white spray followed up with a nice thin coat of Ulthuan Grey (GW). This is quite blue but pale enough to work well with my washes and the final white highlight. I've made up some magic blue wash with about 60% Lahmian Medium and 40% Nikhilak Oxide, both from GW. This is still a little thick for me but making sure that the coverage is even and thin is fine. It can pool and that ruins the effect. After this I give some spot shading with thinned down Waywatcher Green (GW). Thats the easy work done as after this I highlight in two stages, Ulthuan Grey and White. As these models have a lot of surface area this can take its time. Hopefully the smaller Chainrasps will be quicker.
For bases I have gone with a graveyard theme as a lot of the models in the range come with this as standard. I made some railings and flagstones for the bases and with the addition of what comes in the kit I think it all works well together. Some dead looking vegetation tops this off for a nice Shysh look.
June 20, 2018
Spirit Host W.I.P.
I don't have long to wait for the rest of the Nighthaunt models to be released, in the meantime I am trying to keep busy with some of the battleline requirements. I'm told that the Spirit Hosts are an excellent inclusion in the army and as I can already pick them up, how could I resist. I know the kit is much maligned online due to how difficult it is to put together and well I do have to agree somewhat. It definitely isn't the easiest to put together but its still okay. I've had worse Malifaux kits for instance. Anyway now that I have six put together I hopefully won't have anymore to do.. I followed the same painting scheme as I have done for my other models in the army. The white was a little intimidating to do over such a large surface. It took a lot longer than expected to be honest. Still the effect came out fine and should be a lot quicker to replicate on smaller models with less surface are to cover. At least that's the hope... I still have work to do on the base of this model. I think I am going for a graveyard theme. My hand was a little forced with the easy to put together models coming with these style of details integral to the model. I think it will look great but it is a lot of work to get it to look right.
Subscribe to:
Posts (Atom)