 A few people on the Warhammer Forum have asked about a tutorial for the armour I painted on my Chaos Warriors. I have finally managed to get something together. It is not perfect but it should give a good idea of how to do it. I have popped this tutorial there and on the Northerns Wwasters site too. I have been slowly getting my Forsakonettes done for this months challenge on the Northern Wasters site. They are approaching the finished state. I might have them finished by next weekends deadline if I am lucky. Thankfully New Years comes with a few holiday days around it, however it also comes with parties! Maybe I will have some time. While doing their armour this weekend I have photographed the process.
 Step 1
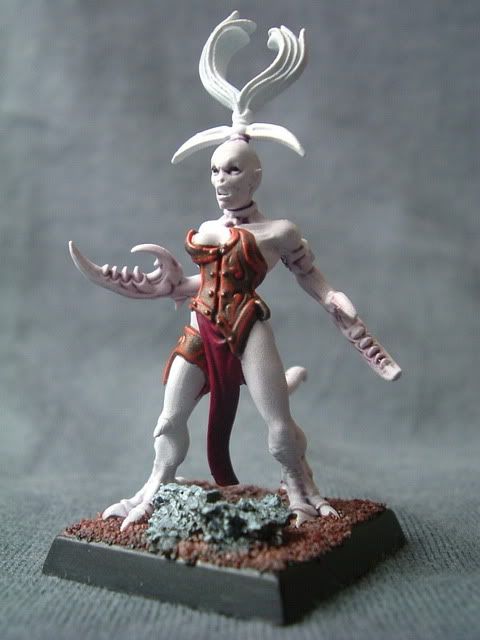 The armour is basecoated from a mix of paints. I used to use Dwarven Bronze but as GW don't make that anymore I have mixed my own. I start with Brazen brass and add a lot of black ink. It thins the paint a lot and darkens it nicely. It needs a lot of mixing and it will separate for a few weeks but after a while it settles well. The dark bronze colour this achieves is still very metallic. I then give this a wash with GW Badab black. It is important not to water this wash down as it loses the quality needed to give the burnished effect. Once this is done and dry, which thankfully does not take too long, I begin with the first Orange. The Chaos Warriors' armour was much easier to do as the flat plates lend themselvels to edging. The Deamonttes are a different mater entirely! I am not sure if what I have done is actually that good but considering their ribbed armour it came out alright. Anyway Vallejo (VJ) Hot Orange is the first colour. It is laid down lightly along the natural edges of the armour. I lay it down thinly and over a thicker area than I intend to have in the end. I want it to form a failry translucent band along the edges. I then lightly trace in the lines between the edges ot in this case along the indents in the armour. As I said with flat plates this is a lot easier! Again I try to creat a translucent band. This stage is shown above.
Step 2
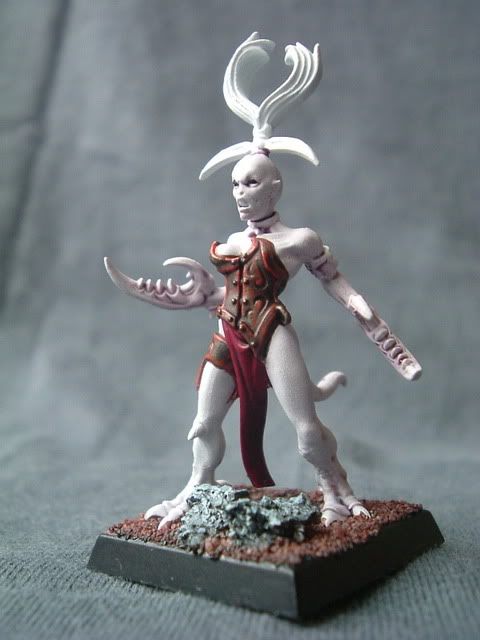 The second stage is designed to have the previous orange blend a little into the armour and form a base for the stronger brighter effect of the later stages. It also serves to dull the armour down and give only the highest points a metallic effect. The blackness of the armour accentuates the lava\burning effect but the higher metallic areas make it still look like armour. Anyway this stage is simply a second wash of undiluted Gw Badab Black. Just don't allow it to pool too much in the recesses.
Step 3
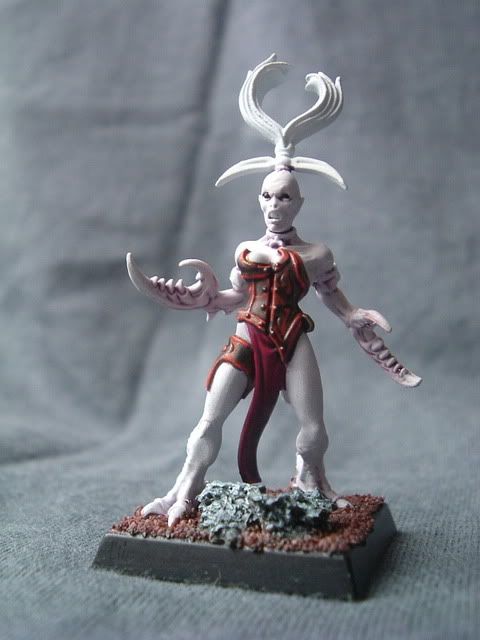
This step is important, possibly the most important to get right. It is once again easier on the Warriors but is still okay to do on the Daemonettes. The orange is very dull after the wash and looks terrible. It blends well into the armour though. I use VJ Hot Orange again but in thin strong lines to give the heat. The previous orange then looks like the heat dissipating into the metal. On this model my orange lines are a little too thick due to the form of the Daemonette armour. The delicate models don't give you much room to play with! I was also a little out of practise and heavy handed when it came to the strokes I think.
Step 4
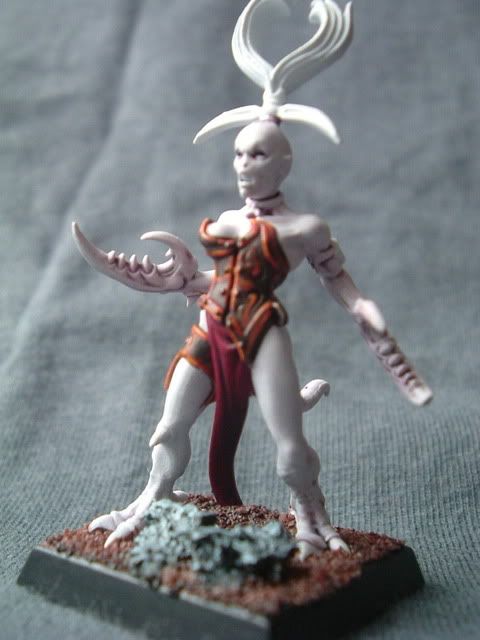 (Sorry for the poor photograph, I didn't realise it was so out of focus. It is too late to go back now though)
This stage really gives the model some heat! Again I missed a few tricks but the principle is easy to explain. I use VJ Orange Fire for this layer. Here what I am trying to achieve is the warming of the lines. I highlight the areas where the lines meet. So basically where one line intercepts another you paint in the brighter orange leaving a little of the darker one showing. I also sometimes paint the brighter orange on the raised areas. This gives a nice effect.
Step 5
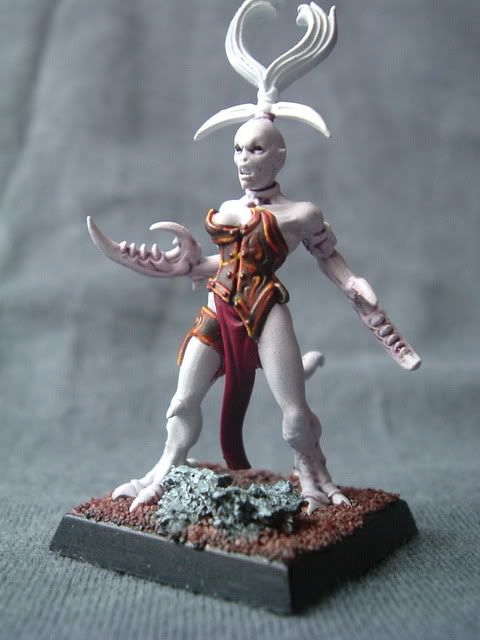 Thankfully the more you do of this effect the quicker the steps become. The second last colour to go on is GW Sunburst Yellow. This is used sparingly right at the intersection points of the lines and on some of the most raised areas. The paint is really thin which works to my advantage. I can take a little and work it into the lines in two coats. As it is transparent it highlights perfectly. Its that simple! Just ensure not to get any of the yellow outside the orange lines as it really defeats the effect.
 Step 6
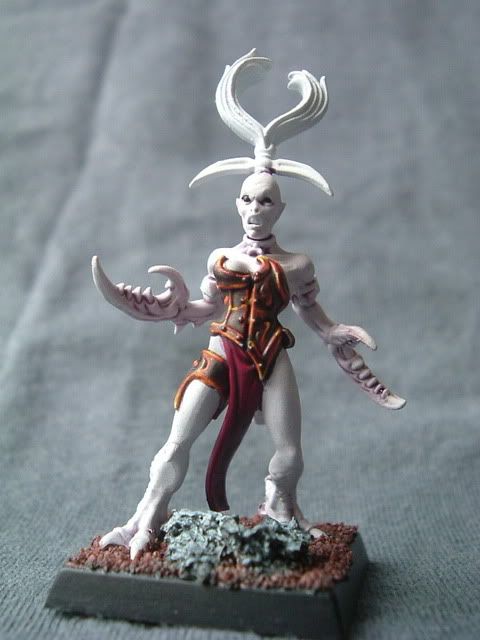 The final painting layer is optional. I actually left it off most of the Daemonettes. The exact meeting point of the lines of orange should be given a very thin coat of white. I use GW Skull White but having just bought VJ Dead White I have come to prefer it already. I also pick out certain areas that have received a yellow highlight with the white. The Deamonettes white skin however might not suit this so I really kept it to a minimum on this model just to show what it should be like.
Thats pretty much it for the burning armour. I do have to say again that my inspiration came from the Warriors of Chaos book. There is a much nicer effect achieved there that a bit of study should be able to recreate well. If anyone else has tried this please let me know so that I can learn what might work better in future! I will be doing this on my Chaos Knights once I get to them. Hopefully it will look nice there too!

No comments:
Post a Comment