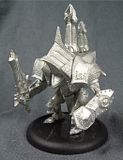
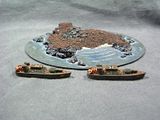
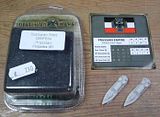
Last week I was luckily informed that there was an informal gathering of Warmachine players in my local store. I hastily packed an army and travelled down, easger to see what this 'Warmachine Treffen' was all about. I hadn't met many of the Hamburg players still so it is always good to get a few contacts. Some of my club mates were heading along too so it wouldn't be too awkward if I had a complete failure with my German! My local store is Atlantis Games. The shop is fairly standard in size but it is very well packed with stock meaning that gaming is relegated to one of the corners.
However soon enough after I got there four full sized tables were brought out and packed with decent terrain. I was pretty suprised they managed to fit but they did so easily. My memories of the shop from before when there were some games there was that the corner got cramped really quickly. My first game was against Blasi, the local press ganger. He was using Circle on a table packed with forests. My menites clumped together in the centre and marched forward. I was shocked at how good the druids are in this edition of Hordes. Being immune to all effects meant most of my army couldn't hurt them and the rest could only hurt them if I didn't crit! Anyway he thought me a lesson in how to play. I didn't stand a chance as one Satyr slammed another right through my army, followed him up into base contact with Feora and then smashed her too.
My second game was against Lars, a clubmate from Miniwar Hamburg. He was using his tournament Cryx list and I once again got thought a lesson. Deneghra managed to knock down the screen I had in front of Severius and two pistol wraiths finished the old man off. I thought I was doing well when I managed to take out most of the Bane Thralls and Bile Thralls. It wasn't to be however. There was a third game offered but I didn't have time as I had to go to a friends birthday party. It would have been nice to get to know another opponent before the tournament this weekend.
The biggest lesson I got from the meet up was that I am really off my game. I got easily destroyed in ways I didn't see coming. If I am to become competitive in anyway I need to really focus and start learning some of the tricks that are being used now.
May 31, 2011
May 30, 2011
Artillery is good, right?
I painted my second sunburst finally. I picked this up cheap in my local shops clearout and it has been sitting for three months assembled and awaiting paint. I wasn't particularly motivated to paint this weekend but once I got started on this I couldn't stop. I haven't got enough propellant to continue my work on the Dreadstone Blight so this gave me an enexpected break. I need to seal the pigments in place before I can do anymore work on that piece. I painted the Sunburst differently from the one I did years ago. I have a vague memory of there being a lot more gold involved in the painting. Sadly I don't have them side by side to show a comparison shot. It would have been handy for me to at least attempt to get the paint schemes to be similar. Once I get back to Ireland I will be able to bring it back.
I haven't used one of these since MKI and the one I do own is in Ireland. In MKI it was useless. I used it in almost every game after I bought the Sunburst. It never hit anything but 'jacks and the scatters never really killed anyone. I persisted however... Anyway in MKII I have had some initial success. I can tell that the artillery is better simply due to the fact that it gets targetted very quickly by my oppontents. I have a tournament this weekend which I am looking forward to. I may use the Sunburst, I haven't really considered a list yet but I guess I will use the High Reclaimer...
May 27, 2011
Friday Showcase - Stone Thrower
I am slowly running out of Dwarves to showcase here. I guess soon I will have to moe onto my Orks. Anyway here is my Stone Thrower. This is a pretty old model now but I love it. It is far superior to the current model. I had this in my collection for a long long time half painted. Thankfully the Gorey tournament last year gave me the impetus to actually get this model finished. The wood was the most annoying part but probably the most effective. The model doesn't have very sharp wood rain so painting it on was pretty much done free hand with a few lines for guidance.
The crew are really nice, I am not 100% sure if these are the actual crew members. Well I guess the guy carrying the stone is at least! However as I only have about six crew members painted from nearly ten machines I hae to do some substitutions! Sadly you can't get this model anymore. It is a true Dwarf classic!
May 25, 2011
More of the same?
No I hope it isn't too boring. I really want to get the Dreadstone finished and with a decent paint job too. Getting the base correct if going to be one of the hardest parts to do. I spent some time last night with a brown pigment and I dirtied up the base and outside a little. This didn't have the effect I wanted, that of muting the rust in the centre so I will have to take some corrective action there. Exactly what I don't know but the orange has to come off some how. It is just too stark. The brown came out fine without too much of an effort. With some plants and debris on the model it should work out really nice.
Here you can see a shot of the stone work outside. This came out better than the flat floor pieces. Working the pigment into the stones was simple. You can also see that I based the tower. This makes it easier to handle in general and in my mind at least frames the piece. I have seen a few comments, mainly from Rob Hawkins on the Privateer Press Blog, about not basing buildings but I really think this looks bad. Firstly with a self constructed building it strengthens the piece. This is really important for the long term use of the terrain which tends to be bashed in use. Also aesthetically it improves the piece as you can tie it into other terrain and the board quite well.
So tonight I won't get any progress made as I have a work training day and I will be wrecked tired. I will hopefully get this piece done over the weekend. I just need to get some propellant for my airbrush so that I can fix the pigments before continuing. I hope I am not boring you all with the slow progress on this piece!
Labels:
Games Workshop,
Terrain,
Wargames,
Warhammer Fantasy Battle
May 24, 2011
Continuing with the Dreadstone Blight
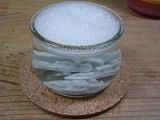
I managed despite my amazing super drowsy, non-drowsy, medication to stay awake long enough yesterday to make some progress with the Dreadstone Blight. I lightened and tidied the stone work. Its still not finished but it is looking a lot better now. I had just washed the drybrushed grey with Badab Black to get some shading but that generally leads to it going on to heavily in certain areas. So to compensate I lightend the stone work in places, especially where they were too dark. I might go back and give some white highlights to the edges to make them pop, I will certainly do this to the more decorative elements that are there. Also as you can see in the picture I got busy on the magic dial in the centre. The rust in the centre looks a little vibrant at the moment. Thats mainly due to the camera. I will be darkening it down later so I hope it won't be quite like this on the finished model. At least this part of the model will be in shadown so that should also work to tome everything down. I plan on using a brown pigment on the lower stone courses and the floor to really make this place look over grown. Lets see how that goes!
May 22, 2011
What is Hunter: the Vigil
This question is a tought one. I have struggled with it for a long time. I can't really start to design a game until I know what that game is. I have read the books and I think the problem is that there is too much information. All the conspiracy and organisational stuff just gets in the way. There is too much confusion. Keeping it simple and down to earth for me is paramount.
I scanned the White Wolf forum today. Why I don't really know why but the following post clearer up a lot of confusion for me:
Hunters are not some big game hunters who happened upon Supernaturals and decided to change specialties. They are people, ordinary people, who found the supernatural and recognized that most of them are not exactly friendly.So they decide that they need to do something (this step is important! This is were the character picks up the candle and becomes a hunter).What they do, depends. They might try to contain them, study them, frighten them off, talk to them, etc. But sooner or later they are gonna be noticed by less friendly creatures or creatures who do not even understand the idea of talking. Hunting is not a life you choose. It is forced upon one by ones own morals. By an inability to stand aside and close ones eyes.My players are getting restless . They know I have started to prepare stuff. I am nowhere near ready for gaming yet though. One of the toughest challenges I face is keeping the group small. I have about eight prospective players and I only want to have a group of four. Anymore than that makes it the game unruly and hard to creat an atmosphere for. So with the mantra above in my mind I can start designing the chronicle.
May 21, 2011
A Wallet Punch
So here we go again. Games Workshop have raised their prices again but this time its a pretty large rise. This is great for our hobby. Yep you heard it I think it is fantastic. This is the best move GW has made for us gamers in a long time. Of course on their behalf it is stupid, really stupid. Now maybe from a purely numbers point of view it makes some sense to them, it may even be an ievitable price rise due to materials becomig more expensive. I still think they should have tried not to make the rise quite so big.
For us gamers this means that a lot of Games Workshops range is priced unreasonably, especially when compared to some competitors. While I think Mantic Miitures are really terrible, quite like GW's miniatures from the nineties, they are value for money. At some point a decent manufacturer will release a really kick ass range I hope. However there are still alternatives and hopefully we will see these come to the table more and more often. I am looking forward to the day when some one takes out a really individual army at a tournament for me to play against. So in short this price rise will give other manufacturers a boost in sales and hopefully enable them to raise their own quality a little.
For Games Workshop it would seem that they are secure in their high street prescence in most towns and cities we know. This allows them to sell to impulse shoppers very easily. What twelve year old child(well male child at least) can resist checking out whats inside a GW store. I kow I couldn't. So Games Workshop will still sell plenty of Space Marines to passing traffic. The change in their poverseas selling policy is also interesting as this will promote brick and mortar retail stores (more likely it will just mean each area gets an internet superstore like Maelstrom). I can't say it is a bad thing, anything that supports local games stores is good but I do see the rise of the gaming super store driving a lot of these stores out of business and I don't see that this policy helps that much at least in the longer term. We shall see...
This price rise and the combination of eigth edition Warhammer Fantasy means a lot of lost players. I notce in my local games club that while 40k has been played almost every week that I have only seen one game of Warhammer Fantasy Battle there ever. I am not sure how this is going in my club back in Dublin but I am assume Warhammer may be on the decline there too. I wonder is there now any chance of getting these people back. Is their investment but finacially and emotionally in Warhammer now finished with? I know to an extent mine is. I like the game and the background. The miniatures are great. I can't really afford a new army any more. Or maybe I can't justify the cost of one is a better way to express what I feel. I can keep my Dwarves up to date and collect the new miniatures. I guess that means some spending every seven years or so when a new book with new toys is released.
There is a good post here worth reading. You will find a lot of handy liks to other cheaper manufacturers. Here is the link to the Space Marine picture I used above.
For us gamers this means that a lot of Games Workshops range is priced unreasonably, especially when compared to some competitors. While I think Mantic Miitures are really terrible, quite like GW's miniatures from the nineties, they are value for money. At some point a decent manufacturer will release a really kick ass range I hope. However there are still alternatives and hopefully we will see these come to the table more and more often. I am looking forward to the day when some one takes out a really individual army at a tournament for me to play against. So in short this price rise will give other manufacturers a boost in sales and hopefully enable them to raise their own quality a little.
For Games Workshop it would seem that they are secure in their high street prescence in most towns and cities we know. This allows them to sell to impulse shoppers very easily. What twelve year old child(well male child at least) can resist checking out whats inside a GW store. I kow I couldn't. So Games Workshop will still sell plenty of Space Marines to passing traffic. The change in their poverseas selling policy is also interesting as this will promote brick and mortar retail stores (more likely it will just mean each area gets an internet superstore like Maelstrom). I can't say it is a bad thing, anything that supports local games stores is good but I do see the rise of the gaming super store driving a lot of these stores out of business and I don't see that this policy helps that much at least in the longer term. We shall see...
This price rise and the combination of eigth edition Warhammer Fantasy means a lot of lost players. I notce in my local games club that while 40k has been played almost every week that I have only seen one game of Warhammer Fantasy Battle there ever. I am not sure how this is going in my club back in Dublin but I am assume Warhammer may be on the decline there too. I wonder is there now any chance of getting these people back. Is their investment but finacially and emotionally in Warhammer now finished with? I know to an extent mine is. I like the game and the background. The miniatures are great. I can't really afford a new army any more. Or maybe I can't justify the cost of one is a better way to express what I feel. I can keep my Dwarves up to date and collect the new miniatures. I guess that means some spending every seven years or so when a new book with new toys is released.
There is a good post here worth reading. You will find a lot of handy liks to other cheaper manufacturers. Here is the link to the Space Marine picture I used above.
May 20, 2011
Friday Showcase - Battle Standard Bearer
This is one of the most important miniatures in my collection. He has saved me on quite a few occasions for sure! The model is a limited edition one from a 'Skullz' promotion that was done by GW a few years back. The offer allowed you to get various rewards, the only one I came anywhere near having enough Skullz for was this miniature. I think it cost me twenty five of the tokens. It is a wonderful miniature, one of my favourite Dwarf sculpts. The Banner I got with the model was miscast but that wasn't too bad as I hadn't intended using it anyway. The banner comes from the Orc box with a few accoutrements from the then current Clansmen box. The paint job was annoying as hell as getting a flat white on that banner over Space Wolves grey was next to impossible. Even keeping the lines of the runes was impossible. I of course went with Vallaya's rune for the banner. It has always been the most expensive rune available and of course one that I would never take! Thats always the way I find. I had to update him to the gold scheme of my current force which was fine and gave me a good excuse to finish the model. I just need to finish the gems I think as looking at them now they seem unfinished.
May 19, 2011
Dreadstone Blight again!
This terrain peice seems to take forever! At least I finally managed to glue it together somewhat. I had to pull apart everything previously done and clean it up. I then shaved the pieces back much more. This helped them join together better. However I am still conviced one of the pieces ir warped as I still am uable to get the walls flush with the floor in the curve they are supposed to be. I glued them together anyway and filled the gap with green stuffed stones. Curretly I am just base coating the piece and washing it down with black to get some definition. I will probably not get the Dreadstone Blight finished for another few weeks yet so you ca expect some more WIP posts.
My other posts on this piece can be foud here:
A big fail
A promising start
My other posts on this piece can be foud here:
A big fail
A promising start
May 18, 2011
Vilmon, stop dying!
So I got Vilmon finished last week for a game. I rushed him a lot.I could go back and do some more work on him but I really don't feel like it at the moment. I was annoyed with him right from the beginning. There is a hellishly annooying mould line right across the cloak in a very visible place and due to a misalignment or maybe just the age of the mould I had a really tough time removing it. Especially considering I don't have a good needle file anymore so getting the area I 'doctored' smooth was time consuming. The arms also didn't fit together despite my best attempts to get everything ready. After a lot of curses and some green stuff I managed to assemble Vilmon.
Of course I was looking forward to using him on the tabletop. As you can predict the second he stuck his neck out even a little bit he got stomped on by the Withershadow Combine. So he didn't really get to shine on the tabletop just yet. I am hoping to give him some more game time on Sunday, maybe he can do better then!
May 16, 2011
Warhammer Terrain on the Cheap
Getting terrain done is always a bit of a chore. Despite the fact I don't have a board to play on at home still I decided to push on and get some of my terrain done. I started these rocks a while ago and had left them sitting half done for ages. Its like all the other terrain projects I have at the moment. There is an unfinshed trench piece, a house and the dreaded Dreadstone Blight sitting awaiting some paint on my desk at the moment.
Getting these rocks together was really cheap. It is €5 for a big bag of cork chunks. It is even possible to get a much larger bag for €10. I think this one weighs in at 180 grams of cork which is suprisingly a lot. I break these up into more managable chunks and glue them to a CD. I generally try to use the inserts you get in a CD spindle, the clear plastic CD's that are used to stop the real ones from scratching on the spindle. Even using the actual blank CD's are cheap enough. The most frequent target has to be free game CD's I get with demos and such. These as bases are great as they are strong and not too flexible so they won't warp much. With the cork glued on I usually use some air drying clay to fix the edges. The cork won't sit flush with the base and it can look a little odd. Adding a clay edge makes the join flush. It also offers some weight to the piece. I flock over the clay once it is dry and then these pieces are ready to get some paint. All in all the piece can't cost more than a Euro to make.
I spray the piece grey. As you can see I miss a lot of the cracks and odd angles that the cork has. This is fine as it adds a nice texture once the painting is complete. I wouldn't recommend leaving too many, a few here and there are fine. If it is overdone then the effect can be lost. Once the grey is dry I then add some green. This is to represent moss or lichen. I just mix some catachan green with a glaze medium and apply it where water might sit under overhangs on the rocks or along run-off channels. It only takes a few seconds but helps to add a nice texture to the rock once everything is done. Over this a light wash of badab black is applied to heighten the shadows. Finally I dry brush in two stages of lightening grey. All in all if you are not counting drying times this takes little more than fifteen minutes with adequately sized brushes. If you are doing it with a big bag of cork over a few bases there is barely any waiting for things to dry.
May 13, 2011
Friday Showcase - The Oldest Dwarf
This guy is one of the oldest Dwarves I have had in my collection. I might have a few metal models that were made before this guy but he is the one I bought first. I used to have a good regiment (never painted) of these but over the years they have slowly vanished leaving me with this guy and a few others scattered around various boxes. It would be nice if I could scrounge up enough to make this regiment anew but they are very hard to come by now. They came from what I think was GW's first endeavour into plastic miniatures. The box was simply called Fantasy Regiments I think. It contained a good mixture of troops, ten Dwarves, ten Dark Elves, ten Skaven, ten Orcs, ten Goblins and I think ten Wood Elves. I could be wrong though as this was well back in the eighties.
May 12, 2011
Confessions of a painting table
I have a backlog. My lead pile has steadily grown this year. While I have been able to push through a lot of stuff I have to admit, I have a problem! My shelves are straining somewhat under the weight I have stacked there and I can't seem to stop acquiring stuff. I say acquiring as buying is a harsh word... Getting things from ebay isn't really buying... right? It is at such a discount it is more like acquiring or gathering. The picture on the right here shows one quarter of my stock and it doesn't include whats actually on the table awaiting paint. On top you can barely make out my menites. The camera seemed unable to focus when I took this picture. Below these lie almost two deep boxes of 40k Orks and Warhammer Chaos. On the bottom shelf are my Warmachine boxes and some Forgeworld stuff I never got around to starting! As you can see I really have a backlog. The other areas in the shelves are just as full if not more.
The Guardian is the first on the list of what is sitting on my table. Thankfully he is well underway and a few hours should see him finished. I am going to make him stand out a little more than my other menite 'jacks by keeping him in white and having less red. Combined withthe golden armour that should help. The banners I am not sure about still. Should they be white also or red? I am thinking red to give some contrast.The Redeemer is one in a number of 'jacks that has a basecoat on. I paint all my 'jacks with a drakflesh undercoat so that it makes weathering them much easier. Over the weekend these fellows will get some attention from my newly acquired hairspray. I doubt I will have much time due to some gaming commitments but they may also get sprayed white.The Devout is in the same boat as the Redeemer. I do at least have the base finished. I have varnished it a few times in an attempt to toughen up the wood and the clay into which a pin will be sunk to hold the model on the base. I hope it works!The final in the trio the Revenger also has his base done. I have also strengthened this with varnish. I don't actually know if this method works but I guess it can't cause any harm. The wood I have been using is just balsa wood and thats not really tough at all. The pin will sink into the base as normal but I do want it to be as stron as possible. Finally on my desk is the nightmare - Avatar. I had such a terrible time getting this model together that I really don't care for it at all. Its not really that nicely sculpted either and so I am not eager to paint it. Maybe once I get back into the mood for Warmachine I will be motivated for this fellow? So there was a brief tour of my painting table. It doesn't include everything thats sitting there but it does include some of the stuff. Maybe next week I can bring the rest to light?
May 11, 2011
The Battlecruiser sails
Seemingly everywhere is now sold out of Dystopian Wars stuff. Well the cheaper places are. I picked this Battle Cruiser up at one of the more expensive shops here in Hamburg, Spieleland. I have to admit I am really enjoying painting these. It is nice to have a break from the Warmachine stuff finally. While I look forward to getting back to them once Wrath looms closer for now I am concenrating on getting my Prussian Fleet ready.
May 6, 2011
Friday Showcase - Thunderers
Here is another of my Battle for Skull Pass regiments. I have a full metal regiment of these guys somewhere too but those were painted in my old blue and white colour scheme. These twenty doughty warriors were prepared for a tournament a long time ago and they have featured in almost every battle I have fought with my Dwarves since. For these I just went with red rather than the mixed red and green scheme I had been using. I guess this was due to the fact I had painted the Clansmen from Battle for Skull Pass fully in green. The strong gold helps tie them together well.
I made a funky movement tray for this regiment as I often found that I needed them deployed in a line rather than as a block. Having them in trays as you can see here let me quickly and relatively easily reform the regiment. Thankfully in eight edition I can now fire in two ranks so there is no need at all for me to use a really long thin line like I used to sometimes just to get all the shots I wanted/needed. I still cant decide if I should expand this regiment out to thirty guys or not. Eight edition suggests I should but I really haven't the desire to paint more...
May 3, 2011
Islands in the Sun...
So I can't just play Dystopian Wars on the open sea. Nope that would be boring so I deciede to make some island terrain. I still haven't fully committed to playing the game so i am not really sure why I am making terrain. I guess I just like to do it!
How to make your own dream island:
Islands are not hard to make. They are hard to get to look correct though. Unlike terrain at other scales here you are creating an entire geographical feature and for it to look its best it has to look natural. I am far from an expert but I know there are only certain ways in which an island will form and the best looking islands will keep this consideration in mind. For this island I decided for an outlying rock with a small and slightly eroded bay. I collected up a few blank cd's recently and these make excellent if a little restrictive bases. I would love something a little larger but finding something like these thats cheap and durable isn't easy. Also I don't have to cut the cd's to shape they are fine as they are!
I started off with the rocks. I can't really call these cliffs as they are according to scale only six meters high on average. I used some torn pieces from a cork placemat. These make the best rocks for terrain in general. They take paint well and they are really nicely textured. I framed the island with these building up some height in places so that the piece is a little more visually interesting. I left the bay area free from rocks.I then filled in the gap with some air drying modelling clay. I made sure to wet the top of the piece down a good but and to smooth the individual chunks together while doing this. I find it cuts down a little on the surface cracking. It won't help with shrinkage but thats not to big of a problem on this smaller scale. When I am doing pieces like this I tend ot use lots of small chunks of clay. When these dry they separate and can leave cracks in the surfec which are annoying to fill. Wetting the top and smoothing it down with your finger, while messy, manages to stop this a lot.
Once all this is dry I start flocking the piece. I use a fine sand with a few small stones thrown in. I think it is similar if not the same as what GW sell. I do this in sections to minimise any possibility of warping. Thats the fastest way to ruin a terrain piece in my opinion. Once the flock is dry I gave everything a black spray as undercoat and to seal the piece. I manage to spray paint the window at this point so I was in a lot of trouble once that got noticed! I guess thats one of the dangers of spraying out a window. For painting I used grey on the rocks, pretty simple with some Badab Black in the end to wash it down and make if look different from the sea. The land was Scorched Brown with a Bestial Brown drybrush over the top. The sea was painted grey with a lighter grey closer to the cliffs. Some green was added further towards the rim. Over all this I gave the base a blue wash. This gave a nice light blue tint to everything. Finally I added the waves with an old brush I had. Its just straight white over everything.
So thats how I made my island. I am not sure what I should do with it now but maybe some others will pick the game up too?
May 2, 2011
And now for Something Completely Different!
So I have been busy... and not with either Warmachine or Warhammer. The Miniwar Hamburg club have been talking about starting with Dystopian Wars and so last week when I was in the games store I decided to take the plunge and see what all the fuss was about. I had heard the D6 Generation's review and it raised my interest. So rather than buy everything at once as my collectible habits have conditioned me to do I decided to get something small and see how it paints up. So I ended up with a packet of Arminius Class Frigates and the sudden urge to paint. Thankfully the urge to paint lasted until I got home!
How to Paint Dystopian Wars Ships:
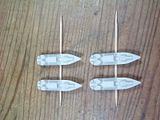
These models are resin and that means problems. I haven't really worked with resin before other than some very small jobs and I certainly haven't painted it before. Plastic and metal are really easy to paint and don't really need any special considerations. Resin does and it is nasty stuff to get in your lungs. So wear a mask... you have been warned! Examining the models closely I noced very little problems with flash. The models seem to be sculpted and cast in a very simple manner. I am assuming a one sided mould is used with the top open. This means that the only flash you should get is along the bottom of the model which would sit at the top of the mould. The fact that there are no other mould lines anywhere on the model supports this. That meant very little clean up. I basically broke off the flakes that you can see in the picture above. Simple, just the way I like it! I was worried a little about the mould release agent that is usually used for resin. It can bubble the paint you put over by producing a gas. I have seen a lot of Forgeworld models ruined by this. So these ships went into some warm soapy water for a few minutes to ensure that none remained. I didn't scrub them as I am not sure how strong the resin is. The warm soapy water seemed to have done the trick however as there was no bubbling.
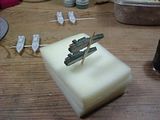
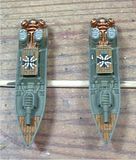
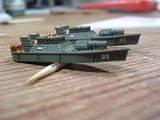
So the first thing I noted as being a problem is the lack of a base. I have seen these models based but I didn't have the material to do so and seemingly it can cause a problem in the game when ships get up close. So to paint these I needed to glue them onto cocktail sticks. Two to a stick made it pretty easy to handle them and paint at the same time.Having the ships mounted on the sticks also gave me the benefit of having something else to hold them by. Three pieces of foam from old blisters held the ships while I was doing the detail work. As a basecoat I used German Field Green from Vajello. I am slowly phasing out my GW paints so needing this colour gave me an excuse to buy other Vajello paints to shore up my dwindling supplies. When I painted the basecoat on I noticed that the models don't have many flat surfaces. The armoured plates on the side of the models are heavily textured. I assume this is intentional on behalf of the designers. I at first thought it was a reaction between the paint and the resin. This will be annoying on larger models but for now it is fine on these small ones. I picked out the wooden sections with Snakebite Leather.A black wash over this picked up all the texture on the model nicely. I then added some details like the Imperial Flag and the Iron Cross. These took a little time to figure out but I was able to manage them easily enough after some trial and error. I highlighted everything that seemed to need it. The wooden sections on the ships got some Snakebite Leather mixed with Bleached bone. This brightened them up a lot and gave a good contrast to the darker green of the ship. The metal plates got a selective highlight of German Field Grey and Sea Green. This just picked out the raised struts and armoured areas. I got fancy then and numbered the ships too... I don't know if this is needed in the game but it can't hurt.
Subscribe to:
Posts (Atom)