 So I have been busy... and not with either Warmachine or Warhammer. The Miniwar Hamburg club have been talking about starting with Dystopian Wars and so last week when I was in the games store I decided to take the plunge and see what all the fuss was about. I had heard the D6 Generation's review and it raised my interest. So rather than buy everything at once as my collectible habits have conditioned me to do I decided to get something small and see how it paints up. So I ended up with a packet of Arminius Class Frigates and the sudden urge to paint. Thankfully the urge to paint lasted until I got home!
How to Paint Dystopian Wars Ships:
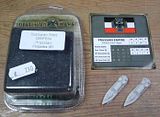 These models are resin and that means problems. I haven't really worked with resin before other than some very small jobs and I certainly haven't painted it before. Plastic and metal are really easy to paint and don't really need any special considerations. Resin does and it is nasty stuff to get in your lungs. So wear a mask... you have been warned!
 Examining the models closely I noced very little problems with flash. The models seem to be sculpted and cast in a very simple manner. I am assuming a one sided mould is used with the top open. This means that the only flash you should get is along the bottom of the model which would sit at the top of the mould. The fact that there are no other mould lines anywhere on the model supports this. That meant very little clean up. I basically broke off the flakes that you can see in the picture above. Simple, just the way I like it!
 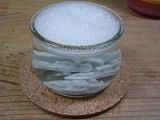 I was worried a little about the mould release agent that is usually used for resin. It can bubble the paint you put over by producing a gas. I have seen a lot of Forgeworld models ruined by this. So these ships went into some warm soapy water for a few minutes to ensure that none remained. I didn't scrub them as I am not sure how strong the resin is. The warm soapy water seemed to have done the trick however as there was no bubbling.
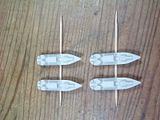 So the first thing I noted as being a problem is the lack of a base. I have seen these models based but I didn't have the material to do so and seemingly it can cause a problem in the game when ships get up close. So to paint these I needed to glue them onto cocktail sticks. Two to a stick made it pretty easy to handle them and paint at the same time.
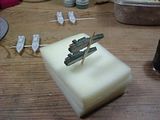 Having the ships mounted on the sticks also gave me the benefit of having something else to hold them by. Three pieces of foam from old blisters held the ships while I was doing the detail work. As a basecoat I used German Field Green from Vajello. I am slowly phasing out my GW paints so needing this colour gave me an excuse to buy other Vajello paints to shore up my dwindling supplies. When I painted the basecoat on I noticed that the models don't have many flat surfaces. The armoured plates on the side of the models are heavily textured. I assume this is intentional on behalf of the designers. I at first thought it was a reaction between the paint and the resin. This will be annoying on larger models but for now it is fine on these small ones. I picked out the wooden sections with Snakebite Leather.A black wash over this picked up all the texture on the model nicely. I then added some details like the Imperial Flag and the Iron Cross. These took a little time to figure out but I was able to manage them easily enough after some trial and error.
 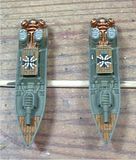 I highlighted everything that seemed to need it. The wooden sections on the ships got some Snakebite Leather mixed with Bleached bone. This brightened them up a lot and gave a good contrast to the darker green of the ship. The metal plates got a selective highlight of German Field Grey and Sea Green.
 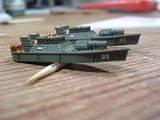 This just picked out the raised struts and armoured areas. I got fancy then and numbered the ships too... I don't know if this is needed in the game but it can't hurt.

No comments:
Post a Comment