


The Project:
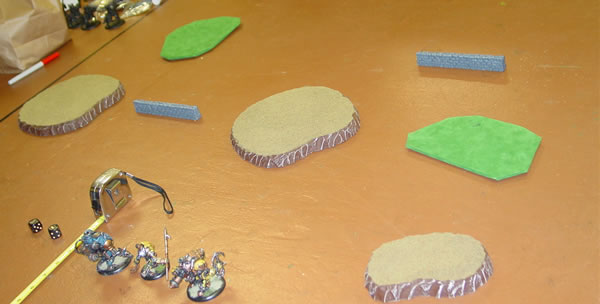
I want to create a few small to medium sized fields using the Warhammer Walls and Fences kits I've had for over a decade. I want these to really look good on the table but I also want to have removable crops in them so that regiments can be placed inside.
It might not sound too difficult but my friend Steve set the challenge to have the crops removable and that's thrown quite a spanner in the works. Do I have the entire crop lift out at once? Seems the easiest to do but it'll look poor once units are in there and suddenly the field is bare. Maybe it is better to divide the inside into irregular shapes that will fill it and can be lifted out as required though it shouldn't be either too regular or a jigsaw puzzle. I'll need to get a field put together and work with some scraps of paper to decide on what might work. I guess one large irregular piece and then some smaller irregular ones to go around it will probably be the most adaptable.
Then I have to think about what crop. I was going to go with the ubiquitous wheat crop but I'll need to see what the closest DIY shop has on offer, judge its quality and work from there. I could just do something a little different like cabbages but I am really unsure about how to approach that.
My first task therefore is to build the fields by getting a base adding the walls and painting all that up. Then I can look at what'll fit in and how it might look once it is finished. Also if you are reading this: thanks. Let me know in a comment just so I don't get the feeling I am shouting into the void.


 I've been working away on some Old West terrain for a while. As I am slowly building a complete town with a friend we need quite a lot of terrain. While buildings are fun to do we also need some more scatter style pieces. As the town represents a rapidly growing gold rush location we felt that some more temporary accommodation might be fitting. Having looked at the Dead Wood series we came to the idea that tents would be a common feature of towns like this as people arrive but can't afford to build a house straight away or live indefinitely in a boarding house. I tried making my own to varied success and finally felt that the effort wasn't worth it for the result and so I went in search of some alternatives online.

 I’m slowly getting some terrain done for Age of Sigmar. I’ve been eyeing up the Azyrite Ruins kit since it came out and I finally grabbed one last week. The kits great, not quite as modular as I’d have liked but good enough to get some variation in the final pieces. Of course I couldn’t just do a simple build I had to complicate it. I saw somewhere online that somebody had built a realm gate in with the kit and as I don’t have a realm gate yet this seemed a good way to make a unique looking one. This is still very much a WIP but hopefully I can get it finished in the next few days.
 With the New 40k coming out and the imminent release of Necromunda, I've found myself needing some terrain. I bought a Ferratonic Incinerator but I quickly realised that this wasn't going to go far in covering a 4x4 table, never mind a 6x4. I can't really justify spending the amount of money I'd need to buy all the sets. So instead I had planned on making my own terrain. I bought a few builts to scratch build panels I could cast but to be honest they just weren't coming out as well as I'd hoped. After wondering what to do I thought that maybe I'd try casting some of the pieces from the sets I had. In the picture you can see where I made a few holes in the casts. This was as a result of not having mixed the Stewalin plaster at the right ratio and probably demoulding it too quickly.
 I bought some silicone and Stewalin plaster. I have used the plaster and the silicone before while maing some scatter terrain for the Old West. You can expect a post on that at a later point. To make the mould I just followed one of the plethora of videos online. It was really simple and worked a charm, though next time I might break them into single pieces as that way I can judge what I need to cast them better and also I don't have a huge amount of working time with the Stewalin and it taes a lot of time to work it into a mould this highly detailed. Anyway I have to approach this project as a learning process. I haven't moulded or cast anything like this before.
 This is a picture of the mould. As you can hopefully make out its pretty detailed. It is 100% bubble free which is impressive. The crevices are deep and tight yet the silicone was able to flow into them. I used an electric toothbrush as a vibration device which wasn't very effective. It seems I didn't need it or it was far more effective than I thought it was. The plan for this project is to make a few low structures with walkways connecting them. I'm going to keep them fairly modular for storage purposes. I'm going to concentrate on getting a single structure done and then I'll know better how to get these mass produced quickly. Just as a note to the curious: I won't be selling, trading or otherwise giving away the moulds or the casts I make from them, please don't ask. The purpose of this blog post is to show whats possible and to track my progress.
 Railroad terrain looks great on a Warmachine or Malifaux board and despite the fact I don't play those games offline anymore I still want to get these pieces painted up. These railway pieces have been lying around in my cabinet for a long time and so I pulled them out and finished them off. This piece represents a flood relief section. I am not sure how accurate it is but I think breaks in the raised bed of the track are made to allow floodwaters to pass through rather than have them erode the bed. It also offers some good tactical opportunities. The bridge section is wide enough to allow a Heavy Warjack to move along it.It is important that the piece is as fully playable as possible and I think I achieved that.

 I bought this model at the same time as the Dreadstone Blight. I pretty much instantly regretted the decision as I bought them without paying any attention to the pictures. Once it arrived I realised that they are more or less the same model with an additional layer on top.I put it together last year but didn't do much with it. I decided the other day that leaving it on top of my display cabinet gathering dust probably wasn't getting the best use out of it even if it is an impressive dust magnet. With that in mind and the strong possibility of an Age of Sigmar campaign coming up in the next few months I decided to get this piece done. I will approach it a level at a time working from the top down. I went with Averland colours as that represents my opponents colour scheme and offers a decent contrast. The darker stone work had already been painted so I went back and painted a lighter stone colour. So far this is what I have managed. Only three more levels and a base to do, that can't take too long right?
 I am making really slow progress on this building due to not really having all the material I need. Today I picked up some thinner balsa and I was able to get the tiles done on the veranda roof. I measured them all out at 1cm intervals but due to the difficulty of keeping them all aligned there is a good bit of variability in them which is fine. I glued a sheet of paper down and I added the tiles on top of this. I also added the first section of the removable roof. To make any more progress I need to get this building based. I will go on the hunt tomorrow for some plasticard. Hopefully I can find some that's at a decent price.
 After many hours of cutting and gluing here is the result. This part of the building is the easiest as there really isn't anything complicated to do. The windows aren't finished yet in the back. I have to let the glue dry a little more before I can get some wood in there for the frames. I haven't figured out how I am going to join the stone chimney which is fairly irregular to the rest of the structure without leaving a lot of gaps. I am hoping it won't prove too difficult. I also need to pick up some thinner wood as the thickness I am currently using isn't right for the tiles. I need a thickness of about .5mm and I have one of 1.5mm. Hopefully one of the cafes around here has some coffee stirrers that are the right size.
 I have another fourteen to do here in Hamburg still and twelve I intend to bring back from Ireland next time I am home. Thirty six to forty eight of these spread around a board is probably a little too much but I am figuring that especially with Malifaux which uses a 3'x3' board the extras can serve as dressing along one side. I had considered building a small cliff face to go down one side and while I still might it would be annoying to store.
 I took a while to figure out what I would use to build the chimney section of the building. I finally settled with some air drying modelling clay. I usually don't like the stuff and for this type of building it really isn't that good. However as I had nothing else I just went with it. The problem is that it dries and shrinks. I couldn't really glue it before it dried and so it was likely to fall apart once I started doing anything with it. To over some this I added some reinforcing wire into the corners. I built the entire chimney in four sections and joined them together once everything was dry. Using the plan from the last post I could maintain the scale I wanted despite working in four sections at once.
 Once each section was close to dry I painted the joins with a coloured watered down PVA glue. This gave enough support that once everything was 100% dry I could apply a stronger glue. I only had one or two problems where the bricks I had made weren't glued but I could get them back into place easily enough. Again once this was done I got busy filling the tiny gaps in. There were loads. The clay shrinks a lot and so I added in small stones to cover the holes left behind. As these were small the dried really quickly and so by the time I was finished the last face I could already glue the ones into the first face. I covered everything in a dark brown paint at this stage and also sprayed some black up through the centre so that the white of the clay was no longer showing. When these coats were dry I used a thick gloss varnish to hopefully prevent the inevitable chipping from coming up with the original white. I guess the building shouldn't recieve too much wear and tear. I don't play at home that often. However the removable roof will probably cause some wearing so the gloss varnish is a good way to try to stop that.
 Here is the chimney finished. It looks a little more grey in the photos than in actuality. I went with a few colours for the base coat, mainly a very dark brown. I added some grey to this and then highlighted with some Bleached Bone (GW) additions. I washed it with a little green in places and then some dark brown to bring out a little of the texture. As you can see in the profile as I went on with the building the stones got smaller and thinner. It is definitely something I would do if I was to repeat the process. The larger squared stones don't look as good as the thinner ones. I tried to mix the sizes but I could definitely have done with using more of the smaller ones. I will eventually have to build a second building in the same size for Muskets & Tomahawks. The game demands them and the minimum number is two. I was half thinking of building it completely in stone but that would take too long. I might use this technique to do the lower floor in stone and then the top half in wood. Using small thin stones I think I could get it to look quite good. Now I have to start building the rest of the house.
 I have been building a few buildings recently and I thought I might show a step by step of exactly the process I use when building them. I don't tend to get too complicated with what I do. Mostly I rely on the lessons learned from an old White Dwarf article from issue 130. I don't know if many of you will remember that exact issue but it thought me the basics of constructing a building. Despite searching I can't find a picture of the cottage.
 This picture from 4ground buildings is an excellent example of what I want to build. They also have some interesting information on styles of building in this period so they were an invaluable resource when it came to doing this project. There must be a good book on the subject but I can't find it. Now that I know what I should be doing I can get busy cutting the balsa to make the rest of the walls.
 The dominant thing I remember was the broken nature of the ground with thin but deep cracks everywhere. The ground was actually higher than the dry areas around it as the water it contained caused it to swell. Heather was the dominant plant at least in terms of coverage. There was not really much water pooled everywhere but this was due to the fact that the bog was worked and drained in the main places I could access.
 I tried to incorporate all of the above in the piece you see here. I used a CD as a base asI don't currently have better basing material. Using wood on this would have made it way too tall in the end. The CD is a perfect thinness for basing and I have used them fairly often before. I put some air drying modelling clay on top of this. I sculpted it with some texture tools I have made. This gives a nice rough texture to the clay and visually separates it from the normal sand flocked surface. It also serves to raise the surface gently. Painting was simple, a layer of black and then some dark browns over the top. I added a few pools to the piece to indicate that it is a water feature. These aren't finished yet but I used a high quality gloss varnish to fill them. It is a slow process as I can only add a very thin layer at a time. For finishing the piece I added various plants. In the light of the photograph these are quite bright but generally they don't look quite so stark. A few grass tufts to break up the flock worked perfectly and with that the piece was finished.
 With the recent games at my house I noticed I am missing a few standard terrain pieces. Having moved from Ireland I left a lot of what I had behind and that included the rather difficult to transport collection of trees I have. I have two small trees here that I use as part of a spell template for Hordes. So with that in mind I sat down and started to put together some of the pieces I have here. They are Woodland Scenics frames with their weird sponge cover stuff added. Foliage is probably the name but I am not sure. Anyway These actually take some time to put together but they are worth it. There are few relatively cheap trees on the market that look this good. Back in Ireland I have two full packets of the largest trees put together and I guess I will have to bring them back here once I get the chance.
  Linear Obstacles in Warmachine seem to be a rather popular piece of terrain and I thought I would try out making one. I wanted to do a quick mock up to see what could be achieved and this here is the result. I wanted it to tie in fairly well with the other terrain pieces I have so I went with bricks. Using bricks allowed me to thicken the wall a little bit more than if I used some other materials. I wanted the wall to emulate the template provided for these in the rule book. So it should be three quarters of an inch thick. This prevents models without reach from attacking over it for instance. The length was determined by the piece of plasticard I had left. It is about four and a half inches long.
 One thing that does annoy me a little is random wall syndrome. I like a realistic battlefield. Randome walls have no place on one. They make no sense even though they are fine for the game. If I do more pieces I am thinking I will make them as some sort of a fixed size enclosure. It would represent a storage yard or the like. I think walls like the above shown one might be a little too much for agricultural purposes! I haven't decided yet but I think a terrain piece like this can work.
 It seems like an age since I started this project. Thankfully it is now completely finished. I really just needed to get my airbrush going to that I could do the weathering I wanted and after that it was simple. The green colour is to match my Khadoran scheme. Now they have something to defend at least!The colour somehow blecds in with the aged wood which wasn't what I wanted at all. I thought it might offer a better contrast when finished. It looks good, just different from what I expected. I did apply a 'filter' of brown over the green and this may have caused the blending. A filter is a very dilute wash with pigments that is worked after drying to simulate something like dust or dirt. I haven't really experimented much with it but I imagine it would be a very interesting technique to use on the colossal I guess I will soon be painting.
 I thought that the tower might look a little boring in just the plain green and brown so I added this symbol to one of the sides. I cut a stencil from some stiff paper and used the airbrush to paint it on. I wasn't very succesful as the airbrush applied the paint more thinnly than I would have prefered. I was able to touch it up for the most part. It looked horrible before the weathering but now it looks just as old as the rest of the surface around it. I didn't draw the stencil as exactly as I should have but at least for next time I will know what to do.
 To differentiate the entrance from the other sides better I added a barrel. You would think a door would be enough but adding a barrel always helps! I picked these up on a whim in a local games store and I like using them on terrain as it adds a little character. The cd base I was using doesn't fit snug to the walls of the tower so adding this filled up a lot of that empty space I think. I didn't weather the entrance side too much in case I add more stuff to it later. I doubt I will but it is a little plain. A shield or something on the wall might be nice.


