Showing posts with label Weathering. Show all posts

January 21, 2016

Railroad Terrain

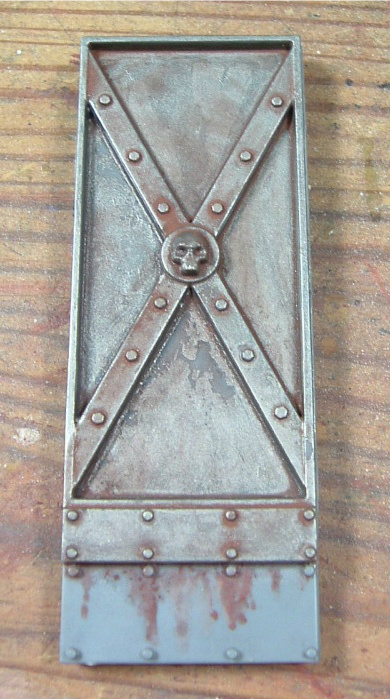
Railroad terrain looks great on a Warmachine or Malifaux board and despite the fact I don't play those games offline anymore I still want to get these pieces painted up. These railway pieces have been lying around in my cabinet for a long time and so I pulled them out and finished them off. This piece represents a flood relief section. I am not sure how accurate it is but I think breaks in the raised bed of the track are made to allow floodwaters to pass through rather than have them erode the bed. It also offers some good tactical opportunities. The bridge section is wide enough to allow a Heavy Warjack to move along it.It is important that the piece is as fully playable as possible and I think I achieved that.

I should have done the weathering a little different. I think the salt method I have done on other projects would have worked better. This is fine and I am not going to change it but next time I will use the salt method. I need to put some vegetation on these pieces still but I am lazy at the moment and as I won't be playing with them soon they are fine to go into the cabinet. When I come eventually to use them I will get the flock out.

Currently I have three foot long sections completed and I will need a fourth as the railroad does have to cross the board. I am not sure though what to do for the fourth piece. I have been thinking of a shed sitting over the track. I have also been thinking of a tunnel but building a cliff face has kind of put me off. I have thought about building one before as a sort of table dressing, something to sit on the edge of the board and look nice. The main problem is storage space for something like that. There is no way it could be small and I already struggle to keep my gaming collection in a somewhat organised state. I am however going to build a railway station.

July 26, 2012

Rusty Rails

Despite the fact that turpentine dissolves the foam I have ben using I risked it on the railway. I think it came out fine. Once varnished over it will be less vibrant than it is now. I essentially washed the areas I wanted to be rusty with turpentine and pigments. These are normal artists pigments, nothing fancy. All the pigments that are sold by various companies are all the same and you can buy them in an art supply shop a lot more cheaply than you can from a wargames supplier. I have enough in each bottle I don't think I will ever need to buy more! I got the variance in colour by applying a second wash with much more yellow mixed in over the first coat. As the pigment is suspended rather than dissovled in the turpentine you are picking up variable amounts and this gives a random amount of coverage. This is perfect for a project like this.

July 24, 2012

Progress on the Tower

It is a busy week for terrain here. I fired up the airbrush and got my Watchtower basecoated. I am using the salt weathering technique on it. You can see some of the lumps on the metal sections where the salt is sitting under the drying paint. The orange that is underneath is going to be a strong contrast to the green and I am hoping it comes out fine. I have had a lot of problems when weathering stuff as I find it can sometimes blend in to the surrounding colours a little too much. I want to do a stencil design on the side. I cut out a 5th border legion symbol but the five is remarkably hard to do and I am not convinced mine is right. I shall have to experiment. I can't find a handy printable symbol online so if anyone knows where I can find one please let me know! I stuck a castigator beside the tower to show the scale. This building is really tall. It will probably overshadow most of the colossals. It doesn't quite fill the base but if it did it would be great as a sanctuary for the colossal event scenario.

Last week I played over 350 points of Warmachine. Three hundred of those points were part of a campaign between myself and Owen from Farfaraway. Owen is still editing the video of the one hundred point game. However he made a videos of the other games. These are the main body of the campaign and you can find them here if you are interested:

Part One
Part Two
Part Three
Part Four

The one hundred point battle was an epic clash that took us about five hours to reach a conclusion. Kromac should have been killed early but some poor rolls saved him. We reached a point where I would have killed at least one of the Cryx 'casters in the next turn and the attrition was heavily in my favour. It would have taken too long to finish that turn and pack up so we declared it a slight win to me which was an okay resolution. If Kromac had been killed earlier in the game I think it would have turned out a lot different!

June 27, 2012

Kodiak WIP

Here is my Kodiak nearing completion. I hope you can see that this is a vast improvement from my Menoth Warjacks. I put a lot more effort into shading this model and while I haven't done it perfectly it is good enough. I have gone for the same scheme as with the Man O War Kovnik. I shaded a little darker however and I think this helps the contrast with the lighter green. I want to keep the tabard red on my Warjacks to tie them into the main Khador colour somehow. It is also breaking up the green a little with a warmer colour. The off white on the edges of the shoulder pad is similar to what I did with the pads on the Kovnik and I think I will keep it as a compliment colour on the army.

I haven't as yet added any damage or weathering to the model. I am almost to afraid to at this point. I could happily leave him as is and just finish the base. However I do want my Khador Warjacks to have some battle damage and I need to think about ways to do it. I think painting it on is better than salt weathering or the hairspray method. I intend to keep the damage to a minimum level which I can then ramp up for the older chassis such as the Berserker and Drago.

I put a lot more effort into the mettalics than usual. The poor photographs don't help show it off. I will be weathering these down but I think I achieved some good contrast on them. My blends are not quite seamless yet but I am getting there. Metallics are really hard to do... I watched Ghool's video on how to do them and he really makes it look easy. Check out Hand Cannon Online for his excellent videos. So this is the current state of the Kodiak. Hopefully he will look even better when next he appears!

September 15, 2011

Rusty Swords

So I have once again been practising on my rust techniques. I am currently painting Alexia and the Risen.. At least for this Thrall Warrior it worked out fine. Again I used turpentine washes to get the effect. I used a lot less yellow and browns this time and concentrated more on the orange pigments I have. This gave a nice varability in the rust which is especially good along the edges at the top of the blade where a much brighter orange can be seen. Now I just need to get this to work also on the armour of the various Risen I have still to do. Getting the wash to coat evenly if a problem, it is a wash after all though. The pooling isn't too bad except where it is obviously effected by gravity and large flat armour plates really show this. Resting a model at varoius angles to compensate is just a little bit too intensive though. So having figured out a lot on rust techniques I really want to spend some time on mud and soot. While the first few mud techniques I tried are fine I guess there must be some other nice techniques awaiting to be discovered...

September 6, 2011

The Talon Fail

So I managed to get my Talon to a nearly finished state. I am really unhappy with him however! While the weathering came out generally fine I think it really suits a display piece more and the amount of effort I have still to do to match all the surfaces to this weathered standard probably isn't worth it. I will drop this fellow into some paint stripper this week so I can restart at the weekend. While everything, in weathering terms at least, worked out as I wanted it to I haven't been able to get the grey correct. The scheme is boring and dull for a start. I have picked up about five more vajello greys so I think I can still go for grey but I need to find a more interesting shade. I have found that their military range really has some lovely colours especially in greens, browns and greys. I will have to spend some more time figuring out what is best but I am impressed so far!

The shield worked out a lot better than I thought it might after I had made a few mistakes. The weathering is a little heavy on the bottom but at least it gives a good showing as to how effective the rust washes can be. This surface looks really like it has been out in the weather for a while. The streaks came out okay too though I had to doctor them a little with some basecoat. I am able to get a good streak effect but I am not really able to get it to look small, instead I end up with a really big streak. Breaking this up with some of the original colour is fine enough but I could probably then just paint on the streaks and not have to mess around with turpentine and pigments. I also put some mud effects on parts of the shield. You can see this on top of the boss. I just wanted to see how it might work. I applied it far too heavily but in general it seems fine. Again less is more...

So for me it is off to German Class, this evening I can get this little 'jack into the tub of stripper along with the Nomad so that maybe by the weekend I can have them ready to restart. It's a pity but it has to be done.

September 2, 2011

Weathering the Nomad

I also was working on my Nomad at the same time as the Talon I showed on Monday. So I made the same mistakes! This shot gives a good view of the effect of the turpentine wash. I have since found a better method for the washes, well I wouldn't call it a better method but a better use of this one. Basically I should have just layered some rust washes on like I showed yesterday rather than just one. Well these 'jacks are very much trial pieces for when I start on my Khador ones. I added a little bit more salt to this fellow as he is that much bigger. I also guessed that he must get bashed around a lot more too! I packed the salt on especially on the engine as I wanted to see what can be achieved. In these shots you can make out the weathering pigment a little better than on the shots of the Talon. If I was to do this again I would add a lot more varied shades to build up a better effect.


So I once again followed it up with a nice flat grey basecoat. I am a little worried that this scheme will be boring. I picked up some better greys from Vajello on the way home yesterday and I probably should have gone with something a lot darker. I will accent the models with a very dark trim but I am still worried they will be boring. I am hoping that the weathering can make them stand out. I am hoping that over the weekend I can dedicate a day or so to getting these guys finished off but thats probably a little too ambitious. Getting the Talon done would be enough for me! I have been wondering a little about the basing scheme as well. I think something a little more green than usual would also offer a nice contrast and make the models stand out better. Anyway I have to examine some of the newer products I have seen out. Those grass tufts look awesome and I would like some brass etched plants too. I haven't seen anyone really use them much before.

September 1, 2011

Rust: my new method

Well I have been swamped with work this week. It seems that the second I find a hobby project I am enthusiastic about I have to spend my evenings in the office instead. So I haven't really been able to put up the posts I wanted as I wasn't able to get everything finished. However I did manage to experiment a little more with some rust techniques and here are a series of photos of the result. Here I had just base coated the top section silver and put on the first wash. The wash is made up of turpentine and some rust pigments. As you can see I was a little eager in my efforts and I removed some of the silver base coating. Thats fine as once everything was dry I could add some more and continue with the process. This usually dries quickly but I sped up the process a little by using a hair dryer. i think I will have to start using one more often as it really helps! This second shot shows the third more yellow coat having been applied in the same manner as the previous two. With each coat I simply changed the colour of the rust going from dark to light. When it is wet it looks terrible but as it dries it starts to look more and more awesome! You can see here that the previous trouble I had with the basecoat is fixed. The silver I painted on afterwards can't be distinguished at all. I want to use this effet on the 'jacks where there is bare metal showing. It should look fine I guess the only problem I forsee is trying to restrict the washes to where I want them. The turpentine based washes really just go everywhere. By varying the extent and colours of the wash I am guessing that it can really be used to make interesting visual effects. I am suprised at how the colours build up and I am looking forward to trying it with other colours to emulate effets like a dust patina or rain run off on armour. So I need to study a little more and see what I can manage to fit on a 'jack!

August 29, 2011

Tutorial: Salt Weathering

I have once again been experimenting with weathering and I have tried out the salt weathering technique. I wanted the chipping I was doing on my menite 'jacks to look a little more pronounced and this seemed to be the best way to do that. I coated the Talon first in a unidentified Vajello paint. I think it is something like bestial brown or beast brown. I can't read the label anymore so I have no idea what it is. Once I had a nice even coat of this I wanted to already make a rust effect so that when the weathering began I would have a nicely textured rust effect already done just waiting to be revealed. I made a turpentine based wash for this. Using turpentine for a wash is a massive departure from what I am used to but I have to say it is really good, at least for rust effects. Turpentine will strip paint from a model pretty easily so you have to be careful with what you are doing. I also didn't buy odourless turpentine... big mistake. Anyway the wash can be quickly spread all over the model. Don't brush over areas you have already coated as this will cause the paint to start to lift off. I then left mine to dry, it doesn't take too long. I didn't measure out the wash too perfectly and I was left with a thick residue underneath the liquid. However this meant I got a good uneven coating of the pigment something that adds very much to the natural look of the rust.

So the next thing to do is to place salt where you want the rust to show through. Now thats a lot easier said than done and it took some experimentation to get everything going the way I wanted it to. Basically you have to wet the area and then sprinkle the salt on. I found that this left a very thin coating of salt that the paint could soak through. I used rather fine salt and I have seen most other people use coarser grains. However I noticed that if I coated a larger area and then using my brush to apply a drop of water to this I could manipulate the salt nicely and gather it together into some thick and well shapped clumps. It took a lot longer for the salt to dry but it was worth it in the end I think. You have to be careful where you place the salt so that the weathering looks natural and I am really still learning this. Its easy to see tanks and how they get worn. There are awesome guides explaining how to use this technique. However nobody has, that I have seen, done this for Warjacks before. The technique has been used but never in a way I feel captures exactly what has been done on some of those beautiful scale tanks. I definitely won't manage it for a long time yet either! So with the salt dried, which I left overnight, I then sprayed the model as gently as possible with the basecoat. This is going to be a grey for my Mercenaries. I was worried that the pressure of the airbrush might knock off the salt but thankfully it didn't. I was able to coat the model easily without any problems. The extra water on the salt gave it a good strong bond to the model. It was pretty difficult to actually knock it off when I needed to! I also tried to paint the model a little with the salt left on. The spear I gave a rime of salt to and I painted the point of the spear in silver to see if it would soak under the salt or just be a pain in general to paint.

So here is what I have once the salt has been knocked off. I think the effect is interesting but not as of yet perfect. Having now done this I am left with a few problems. How can I justify such harsh rusted patches and yet still have untarnished or not as tarnished metal elsewhere. I have a few more tchniques that this 'jack is the test piece for but I have to collect a few more materials to try them all out. I can at least say that the salt weathering achieved exactly what I wanted it to. It isn't perfect and I know what I will do better for next time.

March 30, 2011

A sooty rusty Castigator... almost

First thing to say... this is a big 'jack. Thankfully he is done and my wrist is thankful. Just holding this guy up while painting is a punishment. Putting this guy side by side with the older chassis for Menoth really shows the difference. I wanted to keep him whiter than he usually tends to be painted and so I kept the central armour plate white rather than bordering it in red. I black lined the plate but it doesn't come out in these shots. I need to find a way to diffuse the light better so that it shows up the subtlety a little better. I have seen a lunch box with a hole cut in it to fit the camera used! The white comes out very flat in these photographs and while in reality it is very stark there is some shading there believe me! I am going to copy this scheme on the Reckoner who I am looking forward to fielding. With a big gun and the assault order he seems to be much more straightforward. I have no idea how to use this 'jack on the battlefield. He really seems to be a decent 'jack but he is much more specialised and expensive when compared with the Crusader. He seems to be very useful against infantry but getting him that close is always dangerous. The two open fists are a nice benefit and allow him to deal with other warjacks via power attacks. I am looking forward to a field test in the next few weeks.

PhotobucketHere is the finished smoke and soot effect I attempted on the fist. Its not perfect thats for sure. I have no idea how to make it better though. The vents under and over the fist should be billowing smoke. Therefore it should leave a dark grey or black residue. So I used Carbon Black from the Vajello pigments range to try to achieve this. Interestingly this when mixed with a little water looses the black colour and instead goes an almost metallic grey. Using water to temporarily fix the pigments I put this on the surfaces along the fingers where I thought that the soot would leave a stain. As this area is in close and constant contact with the smoke I built up some more layers to give a rough texture to the area. I also trailed this from the individual vents. The picture shows this only a little as the pigment blends a little with the darkened mettalic area. The other thing I tried to achieve was a smoke effect from the mini smoke stack on the arm. This should leave a stain on the shoulder. I think I didn't do enough weathering here. PhotobucketI think I could get away with a good bit more. However I am hesitant as the main problem I have had with weathering so far is over doing it. I also tried the effect on the under head vents like with the Redeemer. This shot is not a great illustration of this however I have noticed that the pigment works very well over the red. Maybe white is a bad colour for weathering over?

Photobucket This shows the engine from the side a little better. The weathering here has really started to look like how I am expecting it to. This process is a tough one to get right as the smallest amount of pigment can have a startling effect and it is a difficult medium to control. Despite all the tutorials on the web describing various ways to achieve rust streaks the best way I have found is to brush the pigment on without any additions. Maybe this is due to the fact of putting it on over white. With a stronger colour as the base maybe this wouldn't have such a strong effect. I know while practising on my Ork Truk that the pigment wasn't as strong at all and that was over a light yellow base. The one thing this way of applying the rust doesn't achieve is a gradual weakening of the streak. This way keeps the streak weak throughout whereas the other people doing this manage to have a very strong beginning and then have the pigment wash out towards the end of the streak. They can achieve this over a really short area too. So I still have a lot to learn. Thankfully the local deals have continued and I have managed to pick up a good few new 'jacks.

March 21, 2011

Broken Lamps are a pain

So I broke one of my painting lamps. Then I fixed it. The I broke it again. Great because I managed to do it right before I sat to paint for the evening. I was trying to take a WIP shot of my Castigator and I was adjusting the lighting to get the angles just right to illuminate the model. I got one shot with which I wasn't happy and then without paying attention I grabbed and attempted to move the lamp. SNAP... I don't know how I did it but the lamp broke in two pieces at the bottom of the stem. However being an ingenious modeller I decided I could pin it. So armed with my drill and some paper clips I managed to get everything together nice and snug. I tested it and all was fine. So setting up again for a better shot I moved the lamp and then it began a slow motion fall towards my pile of almost fully painted miniatures. Well luckily I noticed in time and caught it. Now the lamp is consigned to the rubbish heap and I can't paint in the evenings until I have a new one.

Here is the bad shot of the Castigator. Once I get another lamp I will take another better shot. I should be painting models from Prime but I actually have none left. I am awaiting the delivery of a few models still and while I have Templeguard to do I wasn't that motivated to actually do them. The Castigator also gave me a chance to practice with more smoke weathering which I have been itching to do. Until I have some better shots I can't really show you what I mean but on the left fist of the Castigator I tried to get a good smoke effect with some pigment. Also on the shoulder where there are some exhaust pipes I tried to discolour the nearest armour plates. It came out fine but as always not perfect. At least I have plenty more 'jacks to test these techniques with still. I picked up some more cheap menites this weekend. Rather than being from my local gamestore they come from ebay. So just as I thought my menite pile of unpainted lead was reducing I have now multiplied it by about four.

March 14, 2011

Rocket power would seem to need some smoke

The Prime Challenge continue this week with another model finished! This guy has been calling to me for many years but I never bought him. Why I can't be sure as he really seems on paper to be awesome. The Redemeer is the only light Warjack from Prime that I need to complete for the Challenge. However I have managed to get a cheap Repenter and I will paint him up too. My orignal one sits in a box in Ireland. I am not sure who he combines well with. I guess Severius. Eye of Menoth really must boost the rockets a lot and he has enough focus to get this guy fully charged up for a salvo! It might be a while before I get him onto the table though as I don't have any games scheduled for a while except for the Annihilation campaign where I can't use him.

PhotobucketI painted the Redeemer in the same way as my Crusader and Vanquisher. The white I kept pretty simple and flat. There is some shading there but it can be subtle and while I should put more emphasis on it I think it can ruin the look of the Warjacks. The large flat surfaces don't really take a strong contrast in colour well. I din't paint a menite symbol onto the 'jack as I was lazy. I could have freehanded one on but to be honest that was going to represent a lot of work and the purpose of this army is to game with not as a showcase piece. The red is a simple scab red with a fine highlight of blood red. On the armour sections this is hard to make out but on the skirt it came out fine. I need to figure out a way whereby the red on the armour trim takes the highlight better. I once again don't want to go too extreme.

PhotobucketHere you can see some of the weathering finished. The light I was using has washed the colours out of the photograph a little but you can hopefully still catch the effect! This little vent is located on the side of the jack's head. To me it looks like somewhere either for excess steam or smoke to vent through. I dedcided on smoke and took out my black pigment. I then simply brushed it in as best as I could to the top of the vents and achieved a nice sooty effect. I continued this up the front of the Warjack where the smoke should leave a stain. It came out much darker than is apparent in the photo. Its a nice and simple effect. Also you can see the paint chipping here. In this case I used the hairbrush technique. However I am still not proficent enough and I make a lot of mistakes. The main thing I do is to lift of the base coat and undercoat at the same time! However for the next 'jack I have something else to try and hopefully I can get the chips to look more realistic.

February 7, 2011

Weathering and airbrushing - part four tutorial

So it seems that I am destined to have to continue my efforts at discovering how to properly weather a 'jack. I took out my crusader this weekend to give it a go. The procedure was the same as last time though I kept the weathering as a more minimal element of the model. I feel that this time I was more succesful but I still haven't managed to get it correct. The first problem I think is the fact that I am only weathering with one type of rust. Their should be a lighter colour included here, something like Vajello Dark Red Ochre or Burnt Sienna. Then I should probably branch into some other advanced techniques. One thing I find very difficult is getting the pigment to stay in place and to be honest even getting it in place! As it is a light powder it blows all over the place. On every tutorial I have seen this is never presented as a problem. However for me it is as annoying as hell. Not only does it not stay in place but it falls onto other parts of the model wher I don't want it to be! I am hoping that there is a trick to this that I will discover somewhere.

PhotobucketPhotobucketPhotobucket Here are the shots of the completed Crusader. He came out much better than the Vanquisher simply by not having covered him in pigment. The shoulder pads I thought wouldn't see much wear and so I didn't chip them heavily. The armour on the hands and arms of the Jack got some more chips though. These worked out pretty well. I had given the model a much more heavy coat of hairspray than before and this helped with the weathering a lot. I did manage while cleaning my brush to splash a small amount of water over one of the backs of the shoulder blades. This caused the hairspray to bubble under the white. However I left it and eventually after some drying it shrank back into position. I also weathered the engine parts more heavily than before on the Crusader. I think this came out well but could really do with a lighter rust colour on the most heavily weathered areas.

PhotobucketPhotobucketPhotobucketThese are the WIP shots. The hairspray as you can see it really shiny. It was dry in this photo. However once you come to chipping it you actually lift it off so there is no shine showing. The final shot shows the chipping having been completed but without weathering pigments added. All that is left for me to do with these two 'jacks is apply varnish to fix the pigment in place, add some highlights to the red on the shoulder pads and then to do the bases.

I am wondering if it is possible to use the varnish I bought from Vajello in an airbrush. It seems from a few disscussion fora that I can. I am pretty reticent about doing this for the moment as when I tested the varnish on an Ork it isn't quite as matte as I would like and even tends to obscure a lot of highlights. This will be the next test for my airbrush!

Part One
Part Two
Part Three

February 3, 2011

Weathering and airbrushing - part three tutorial

This is my base coated Vanquisher just before I got busy chipping and weathering. This was shaded prior to the weathering as I didn't think that I would manage it afterwards. Shading is simply a wash of GW bleached bone and once that has dried overnight some black lining along the pronounced areas. This was tidied up with a reapplication of white in the most raised areas. Nothing very inventive in that! While letting all that dry I continued with the base. I generally paint the bases first as it saves accidentially getting paint splashed from the base on the model. I stuck with the standard swamp bases as I have with the rest of the army. The one thing I don't like however is how often I manage to make the 'jack look like he is standing on a little island. I did this once again and I am unimpressed! However with the other 'jacks I have planned I will be watching out to avoid this. The distiction between making a land base with a water feature and making a water base with a land feature is huge.

PhotobucketThis picture shows what I did with the chpping and the pigments. You can click on it to enlarge it. Firstly I had a lot of difficulty with the chipping. I am not sure if it is the hairspray or my failure. I would like to blame the hairspray. I actually used a very expensive one and maybe the cheaper ones would give a better effect. I could not for the life of me manage to get it to chip with a stiff paint brush. I have no idea how that is possible. After stabbing the model in various places for five minutes nothing had happened. I had wet the area as advised but still nothing. I then took out a cocktail stick (small wooden stik used at parties for sausages). I wet this and softened the top of it a little. After some strong words I managed to get a chip on the left shoulder pad. I tried a second time and managed to lift the undercoat off also. There were some strong words again. I continued and I was able to make the chips but not in a great way. I lifted a lot of undercoat off in places.

PhotobucketThis close up shows the chips a little better. The central part of the jack, above where the head goes came out really poorly. I stupidly placed the chips pretty much equidistant from the others giving a really false look. I also made them far too big. Next time I will try to reign in my impulses. However on the small area just below this I really managed to get some nice hips done. How they came out so good here I have no clue. Maybe it is the smaller area? I then proceeded to do the leg armour which also came out fine. The minimalist look is definitely the way to go. One thing I did notice is that by wetting the area some of the white paint will soak it up and begin to move around. This is okay but you have to be careful not to let it spread over the chips and dry as it gives them a terrible milky look.

Once the chips were down... I mean done I got busy with the pigments. I have to say these will be a great addition to my painting repetoire. However at the moment they are a complete annoyance. Learning new techniques for these is not easy. On the left shoulder pad ('jacks left) I followed the method described here. This involves applying the pigment and then with a damp brush streaking it downwards, or stumping it as described on that guide. Well I used too much turpentine and my brush was wet rather than damp. I probably also used way too much pigment. I made massive red streaks down the should pad. So to rectify that I attempted to remove some of the excess with a clean wet brush. This helped a lot and also changed the colour of some of the rust. There is a stronger orange colour on this shoulder pad than elsewhere on the model where the rust is much more red. I am guessing this was just a result of thinning with the turpentine. I did go back later and touch up a few places with white paint to make the streaks look a bit more natural.

PhotobucketThe right shoulder pad and elsewhere were done using the guide found here. Basically I applied the rust powder in clumps and flooded the area with turpentine. I then let this dry (very important to let it dry fully!) and then with a stiff brush streaked it downwards. The first thing to note is that I used far less pigment powder on the right shoulder pad. This meant smaller steaks. Also I didn't go straight downwards with these. For some silly reason I went off at an angle and so the rust doesn't look quite as good in my opinion. However this method with less pigment seems good. I didn't achieve the nice orange the otherside has however. I also came back later to touch up this side. I mixed water with the powder on a palette and then applied some fine lines within the streak. This darkened the centre and with a little more practice should look good.

So this is model one of the weathering experiment. I can't say I am happy with it. It is a good beginning I hope. The most important thing I learned is not to overdo it. I thought I was being conservative but looking at the model I really went over the top. The central piece of the 'jack is the worst. It looks terrible and while the shoulder pads are not that fantastic either they are ruined by the monstrosity between them. So with this in mind I have cleaned and glued together a Crusader Warjack. I managed to pick it up cheap also which was nice. I will begin with it at the weekend and hopefully the next part of my weathering experiment will go better. One excuse I will make is that white is unforgiving for an experiment like this. I guess it would be easier to weather models on a darker basecoat than white!

Part One
Part Two

January 31, 2011

Weathering and airbrushing - part two tutorial

So this is how my Vanquisher looked before the weathering begun. He wold change quite a lot. First though I would need to test the techniques I had previously just seen online. There are a lot of resources for tutorials already but I haven't found a good one. To be fair they are all excellent examples of these techniques but none of them really explain it enough to satisfy me. They are good enough to get me started and experimenting first. I decided to base coat the 'jack and while that was drying I would test some rusting on an Ork Truk I have lying around.

PhotobucketI had painted the Truk with a view to weathering it before. I had applied my standard 40k vehicle weathering techniques. These basically consisted of using bestial brown to achieve some form of a rust stain. I hadn't applied any hairspray so I couldn't chip the model. Instead I used a sponge and some scorched brown to chip the edges of the plates. This worked out fine. I didn't do this on the sides just to test the differences I achieved.PhotobucketI first put the powder on while holding hte vehicle vertical. As there is nothing for it to really grip onto a sharp intake of breath is enough to cover the desk with powder rather than your models. I am not sure if this is really how it should be applied but I don't see another way yet. Once this was done I added turpentine to the entire region letting it flow everywhere.PhotobucketOn this side plate you can see that it is wet still. The turpentine will quickly enough evaporate. It does stink a little so I recommend buying an odourless version is you can. Als be careful not to buy a turpentine substitute. I don't know if it is good for this but it is really prevalent on the shelves of my hobby store and I almost left with a bottle. At this point I was following Forge Worlds guide for using pigments. Its fairly basic but explains some of what to do.PhotobucketI allowed all this to dry and then took a stiff brush and simplky swept it down wards over the clumps of dry powder. This had the effect of making the streaks too big. I guess I have used too much powder here. I also added some black streaks to represent a dust run off. So for my first foray into the weathering world I can't say I have made a complete success. Still it is a beginning and hopefully with the Menoth Vanquisher I can make a better attempt.

I will be attempting to chip the basecoat and add the rust to the chips. Fingers crossed it works!If someone could tell me what exactly is meant by the word stumping in this guide I would appreciate it! The rust streaks this guy achieves are masterful and I would really love to manage something like that.

Tutorial Part One

January 30, 2011

Weathering and airbrushing - a beginners tutorial

So I finally got my airbrush out to try. I have been wanting to weather some vehicles for a long time and I felt now is a good time to start as I am almost solely collecting 'jacks. I have a lot of Menoth 'jacks already but they are back in Ireland. So that means a flight home or buying some more. I rally wanted to try out the hairspray technique and with that in mind I got started. Firstly the airbrush is a GW one. Nothing expensive or fancy. Very much an entry level tool but good to test the basics. I fixed it up and filled the bottle with paint. Here is where I learned the first lesson. If you squeeze a vajello paint bottle and the nozzle is a little but not completely blocked it will shoot off like a bullet. Thankfully I had the paint bottle pointed at the airbrush bottle and as such the mess was contained. Ifished the nozzle out of the bottle eventually. I then added some water not much and proceeded to spray! The result is what you see above. Not great eh? However with another pass of the brush I managed an even coat and it worked out fine.

Photobucket Here is what I used, the glass bottle hangs under the airbrush probably not the best place for it. I can't see how a gravity fed design wouldn't have been a better idea from GW. The only thing to note is that the bottle lid came lose and almost caused a catastrophe. Luckily I noticed in time and tightened it. I don't know if this was my fault or a problem with the bottle. Just be careful whe doing this yourself. A spilled bottle of paint will ruin your day!Photobucket This is the muddy mixture I sprayed on. I didn't pick a perfect colour. I used Dark Flesh which was too similar to the scab red I use on my newer 'jacks. As I shot the paint into this I ended up mixing far more than I needed! This wasn't too much of a problem as I could always pour it back into the bottle. I guess after a few uses the paint in the bottle becomes overly dilluted. I have looked at the Vajello air paints but I am not sure how much more superior they are so for now I will stick with the standard colours. They have a good description of the product on their site but I would prefer a more independent description and review. So far I haven't turned up much online.PhotobucketThis is the set up for the airbrush. Pretty simple! I have been wondering if the propellant could be a generic brand rather than GW only. I assume they have somehow made sure that the connecting pipe will only fit their cans. They wouldn't have missed something like that! The brief look I had in the nearby hobby shop proved this with the propellant having to large of a connector to fit the GW airbrush. I will search further afield though before I give up hope.

PhotobucketThis is the spray box I made up. Thankfully the fumes from the propellant are not very strong at all. This means I don't need to hang out the window to spray. Instead I can do it in comfort at my desk. The box was good enough to catch all the spray and it overhangs in such a way that it should catch a lot of the rising paint. I am not sure if this really presents a problem but it may.

PhotobucketEventually this is what I ended up with. A nice even coat of Dark Flesh. This was perfect and I am really happy with the airbrush. It won't be able to do very advanced techniques I would have to invest more for that. However for doing this type of work it is fine. The one thing to note is that the paint stays fluid much much longer than normal. I had to use a hair dryer between coats to really dry it within an acceptable time frame. The next step is the hairspray. If you haven't heard of this technique before it is used by WWII tank modellers. It is used to chip paint and gives a very realistic effect. I liberally sprayed the hairspray over the model. I probably shouldn't have used diamond effect! PhotobucketIt thankfully does not cover in thick coats. It was a nice fine even coat that didn't clog any detail. It was hellishly shiny. The third step of this technique is putting on the base coat. The base coat is the colour you want to see at the end. I sprayed white over the hairspray and made sure I got a good coverage again. I watered the paint down more than I had the Dark Flesh and this meant I got better coverage. It was similar to milk in consistency and I thought that it was probably too thin. I was quickly provde wrong. The hair dryer was still essential but a few seconds of that and the paint was dry enough to touch.Photobucket I needed to make sure and get under the model and cover everything 100%. This is the base to work all the other techniques on and it has to be good. Thankfully the airbrush made this pretty easy. I wasn't sure how long I needed to let this dry for but I thought I had read somewhere that it needed twenty four hours. So I left it over night. Once I get the next few stages done I will be posting them up here so stay tuned to see how the chipping and weathering turn out. I am hopeful that this Vanquisher turns out to be the best 'jack I have so far manage. These techniques should also be applicable to 40k vehicles and some Warhammer Fantasy stuff especially painted armour plates. Black Orcs come straight to mind.

Here is a great blog that shows how all the effects I intend to use come out when done by a true master!

Part One
Part Two
Part Three
Part Four

About Me

Friends