 So I finally got my airbrush out to try. I have been wanting to weather some vehicles for a long time and I felt now is a good time to start as I am almost solely collecting 'jacks. I have a lot of Menoth 'jacks already but they are back in Ireland. So that means a flight home or buying some more. I rally wanted to try out the hairspray technique and with that in mind I got started. Firstly the airbrush is a GW one. Nothing expensive or fancy. Very much an entry level tool but good to test the basics. I fixed it up and filled the bottle with paint. Here is where I learned the first lesson. If you squeeze a vajello paint bottle and the nozzle is a little but not completely blocked it will shoot off like a bullet. Thankfully I had the paint bottle pointed at the airbrush bottle and as such the mess was contained. Ifished the nozzle out of the bottle eventually. I then added some water not much and proceeded to spray! The result is what you see above. Not great eh? However with another pass of the brush I managed an even coat and it worked out fine.
 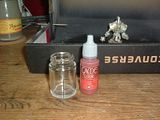 Here is what I used, the glass bottle hangs under the airbrush probably not the best place for it. I can't see how a gravity fed design wouldn't have been a better idea from GW. The only thing to note is that the bottle lid came lose and almost caused a catastrophe. Luckily I noticed in time and tightened it. I don't know if this was my fault or a problem with the bottle. Just be careful whe doing this yourself. A spilled bottle of paint will ruin your day!
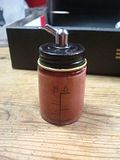 This is the muddy mixture I sprayed on. I didn't pick a perfect colour. I used Dark Flesh which was too similar to the scab red I use on my newer 'jacks. As I shot the paint into this I ended up mixing far more than I needed! This wasn't too much of a problem as I could always pour it back into the bottle. I guess after a few uses the paint in the bottle becomes overly dilluted. I have looked at the Vajello air paints but I am not sure how much more superior they are so for now I will stick with the standard colours. They have a good description of the product on their site but I would prefer a more independent description and review. So far I haven't turned up much online.
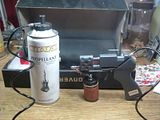 This is the set up for the airbrush. Pretty simple! I have been wondering if the propellant could be a generic brand rather than GW only. I assume they have somehow made sure that the connecting pipe will only fit their cans. They wouldn't have missed something like that! The brief look I had in the nearby hobby shop proved this with the propellant having to large of a connector to fit the GW airbrush. I will search further afield though before I give up hope.
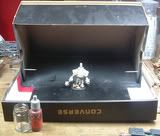 This is the spray box I made up. Thankfully the fumes from the propellant are not very strong at all. This means I don't need to hang out the window to spray. Instead I can do it in comfort at my desk. The box was good enough to catch all the spray and it overhangs in such a way that it should catch a lot of the rising paint. I am not sure if this really presents a problem but it may.
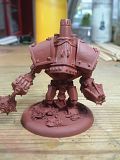 Eventually this is what I ended up with. A nice even coat of Dark Flesh. This was perfect and I am really happy with the airbrush. It won't be able to do very advanced techniques I would have to invest more for that. However for doing this type of work it is fine. The one thing to note is that the paint stays fluid much much longer than normal. I had to use a hair dryer between coats to really dry it within an acceptable time frame. The next step is the hairspray. If you haven't heard of this technique before it is used by WWII tank modellers. It is used to chip paint and gives a very realistic effect. I liberally sprayed the hairspray over the model. I probably shouldn't have used diamond effect!
 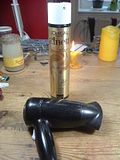 It thankfully does not cover in thick coats. It was a nice fine even coat that didn't clog any detail. It was hellishly shiny. The third step of this technique is putting on the base coat. The base coat is the colour you want to see at the end. I sprayed white over the hairspray and made sure I got a good coverage again. I watered the paint down more than I had the Dark Flesh and this meant I got better coverage. It was similar to milk in consistency and I thought that it was probably too thin. I was quickly provde wrong. The hair dryer was still essential but a few seconds of that and the paint was dry enough to touch.
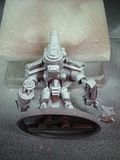 I needed to make sure and get under the model and cover everything 100%. This is the base to work all the other techniques on and it has to be good. Thankfully the airbrush made this pretty easy. I wasn't sure how long I needed to let this dry for but I thought I had read somewhere that it needed twenty four hours. So I left it over night. Once I get the next few stages done I will be posting them up here so stay tuned to see how the chipping and weathering turn out. I am hopeful that this Vanquisher turns out to be the best 'jack I have so far manage. These techniques should also be applicable to 40k vehicles and some Warhammer Fantasy stuff especially painted armour plates. Black Orcs come straight to mind.
Here is a great blog that shows how all the effects I intend to use come out when done by a true master!
Part One
Part Two
Part Three
Part Four

I would think that a local supply place probably can find some fittings for that, spray gun, so you could avoid their propellent. You will get much better results spraying with compressed air from a pressured reservoir supplied by an air compressor though. I just picked up a set of Golden Fluid Acrylics Airbrush colors, but have yet to use them.
ReplyDeleteIs the GW spray gun a single action or double action? Double action airbrush will allow you to vary intensity.
it is a single action... a complete beginners piece. Once I have more need of a better one I will invest.
ReplyDeletePhil, I've checked the sizes and the cap that GW uses is the same size and thread as a generic one that Halfords in UK / Ireland use, and it's about half the price too, might help you there.
ReplyDeleteCheers!
Okay I will check up some of the DIY shops around here so. Thats good news!
ReplyDelete