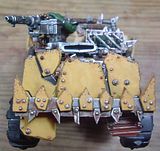
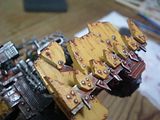
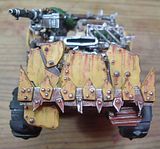
 So this is how my Vanquisher looked before the weathering begun. He wold change quite a lot. First though I would need to test the techniques I had previously just seen online. There are a lot of resources for tutorials already but I haven't found a good one. To be fair they are all excellent examples of these techniques but none of them really explain it enough to satisfy me. They are good enough to get me started and experimenting first. I decided to base coat the 'jack and while that was drying I would test some rusting on an Ork Truk I have lying around.
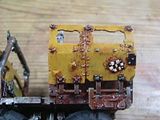
  I had painted the Truk with a view to weathering it before. I had applied my standard 40k vehicle weathering techniques. These basically consisted of using bestial brown to achieve some form of a rust stain. I hadn't applied any hairspray so I couldn't chip the model. Instead I used a sponge and some scorched brown to chip the edges of the plates. This worked out fine. I didn't do this on the sides just to test the differences I achieved.
 I first put the powder on while holding hte vehicle vertical. As there is nothing for it to really grip onto a sharp intake of breath is enough to cover the desk with powder rather than your models. I am not sure if this is really how it should be applied but I don't see another way yet. Once this was done I added turpentine to the entire region letting it flow everywhere.
 On this side plate you can see that it is wet still. The turpentine will quickly enough evaporate. It does stink a little so I recommend buying an odourless version is you can. Als be careful not to buy a turpentine substitute. I don't know if it is good for this but it is really prevalent on the shelves of my hobby store and I almost left with a bottle. At this point I was following Forge Worlds guide for using pigments. Its fairly basic but explains some of what to do.
 I allowed all this to dry and then took a stiff brush and simplky swept it down wards over the clumps of dry powder. This had the effect of making the streaks too big. I guess I have used too much powder here. I also added some black streaks to represent a dust run off. So for my first foray into the weathering world I can't say I have made a complete success. Still it is a beginning and hopefully with the Menoth Vanquisher I can make a better attempt.
I will be attempting to chip the basecoat and add the rust to the chips. Fingers crossed it works!If someone could tell me what exactly is meant by the word stumping in this guide I would appreciate it! The rust streaks this guy achieves are masterful and I would really love to manage something like that.
Tutorial Part One

Mig's English is a little ideosyncratic, but I think it's just a typo... I have his book, he's referring to streaking out brown oil paint to create rust with just a turpentine moistenened brush. Too much turps and you'll wash away the streak, too little and you's just smear the paint.
ReplyDeleteReading that post, I think he just means you'll have the hang of it after 5 or 6 lines. Good luck!
I certainly hope I get the hang of it. Its far from as easy as he maes it seem!
ReplyDeleteTo "stump" is to soften it, it's quite an old term from artistic techniques... a stump being a short almost pointed roll of paper or leather or a wad of rubber (like a tree-stump) which you rub or dab on charcoal drawings to soften them.
ReplyDeleteHmmm it still sounds difficult!
ReplyDelete