
 I was delighted to get him so quickly. I actually had an evening where I really wasn't up to much so I could devote some time last night to assembling the brute! I was a little annoyed to see that he was designed in a similar manner to the Avatar, which I have to ocne again repeat, sucks to assemble. However some more thought was put into this guy and he went together easily enough. There are a lot of parts to the model and once again I managed to make some mistakes. The flags for instance went together in a different position than I thought and by the time I realised this it was almost too late to do anything about it.
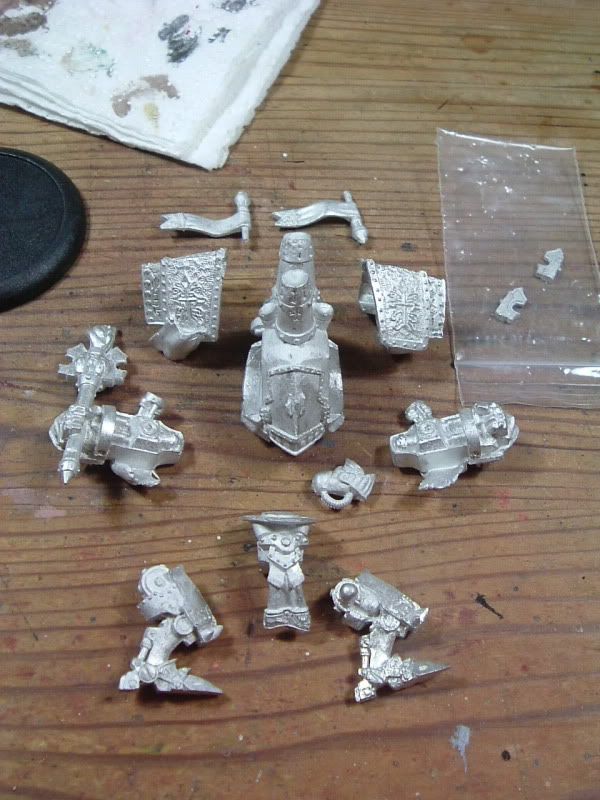 I thought they attached to one of the ball sockets that are on the top of the model. These are actually chimneys and there are two holes behind these for the flags. Of course I had obscured one partially with a shoulder plate and so I had to trim down the peg so that it could still fit. Thankfully I was able to trim it to fit as I had pinned the shoulders and arms as a single piece. I put one pint through the entire, admittedly it is hollow, model and out through the arm joints into the arm pieces.
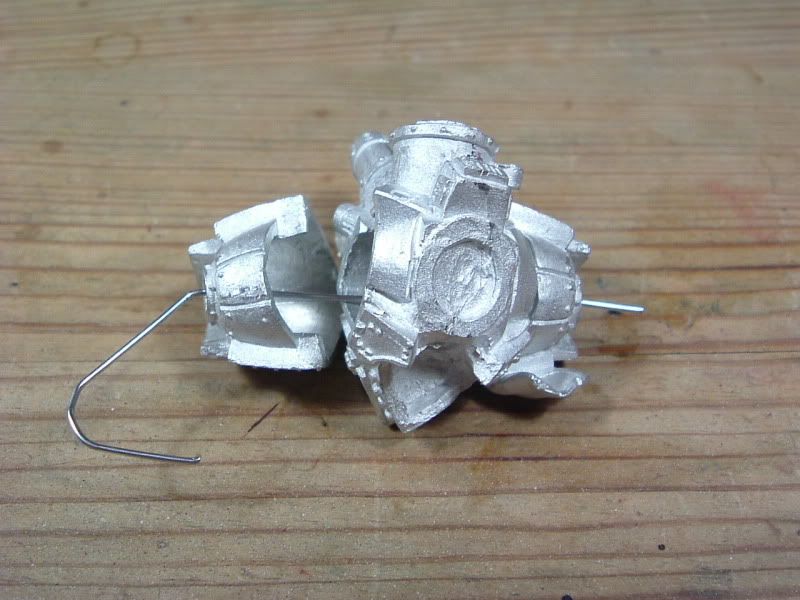 You can see in this picture what I mean. It was a little bit difficult to do and I don't really know if it makes that much sense really but it seemed like a good idea at the time and who am I to argue with that logic! The pieces fit together quite well unlike the Avatar and even the leg joints worked without too much pain. I didn't pin these which I guess I will eventually come to regret but it really seemed like a secure joint and I was lazy. I would point out that you need to be careful to judge the angle on the hips correctly so that the body doesn't lean to far forwards. I noticed this in time and I was able to compensate for the lean. Intuitively you might tend to set this pieces at an angle so make sure to dryfit the components first.
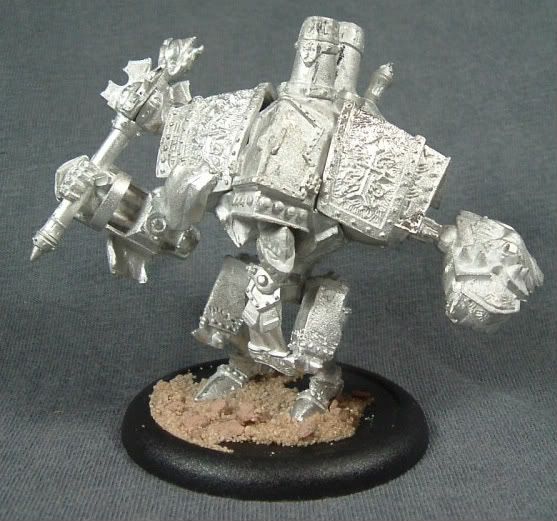
So the result is this.
 I am hoping to get a careful basecoat laid on with the airbrush. Hopefully it will behave better than with the Avatar so that I don't clog up the detail with paint. I think I will go for a very gold carapace in keeping with the Knights Exemplar. It also makes for some eaasy painting, something I am a fan of! I would like to add some verdigris too, something I usually avoid. I might be able to pick up some of the Vajello Verdigris mix, which would make that very easy. I am not sure if the local shop stocks it though. Anyway maybe I can get something done on this guy over the weekend!
No comments:
Post a Comment