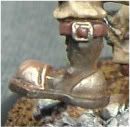
I have once again been experimenting with weathering and I have tried out the salt weathering technique.

I wanted the chipping I was doing on my menite 'jacks to look a little more pronounced and this seemed to be the best way to do that. I coated the Talon first in a unidentified Vajello paint. I think it is something like bestial brown or beast brown. I can't read the label anymore so I have no idea what it is. Once I had a nice even coat of this I wanted to already make a rust effect so that when the weathering began I would have a nicely textured rust effect already done just waiting to be revealed. I made a turpentine based wash for this. Using turpentine for a wash is a massive departure from what I am used to but I have to say it is really good, at least for rust effects. Turpentine will strip paint from a model pretty easily so you have to be careful with what you are doing.

I also didn't buy odourless turpentine... big mistake. Anyway the wash can be quickly spread all over the model. Don't brush over areas you have already coated as this will cause the paint to start to lift off. I then left mine to dry, it doesn't take too long. I didn't measure out the wash too perfectly and I was left with a thick residue underneath the liquid. However this meant I got a good uneven coating of the pigment something that adds very much to the natural look of the rust.

So the next thing to do is to place salt where you want the rust to show through. Now thats a lot easier said than done and it took some experimentation to get everything going the way I wanted it to. Basically you have to wet the area and then sprinkle the salt on. I found that this left a very thin coating of salt that the paint could soak through. I used rather fine salt and I have seen most other people use coarser grains. However I noticed that if I coated a larger area and then using my brush to apply a drop of water to this I could manipulate the salt nicely and gather it together into some thick and well shapped clumps. It took a lot longer for the salt to dry but it was worth it in the end I think. You have to be careful where you place the salt so that the weathering looks natural and I am really still learning this. Its easy to see tanks and how they get worn. There are awesome guides explaining how to use this technique.

However nobody has, that I have seen, done this for Warjacks before. The technique has been used but never in a way I feel captures exactly what has been done on some of those beautiful scale tanks. I definitely won't manage it for a long time yet either! So with the salt dried, which I left overnight, I then sprayed the model as gently as possible with the basecoat. This is going to be a grey for my Mercenaries. I was worried that the pressure of the airbrush might knock off the salt but thankfully it didn't. I was able to coat the model easily without any problems. The extra water on the salt gave it a good strong bond to the model. It was pretty difficult to actually knock it off when I needed to! I also tried to paint the model a little with the salt left on. The spear I gave a rime of salt to and I painted the point of the spear in silver to see if it would soak under the salt or just be a pain in general to paint.

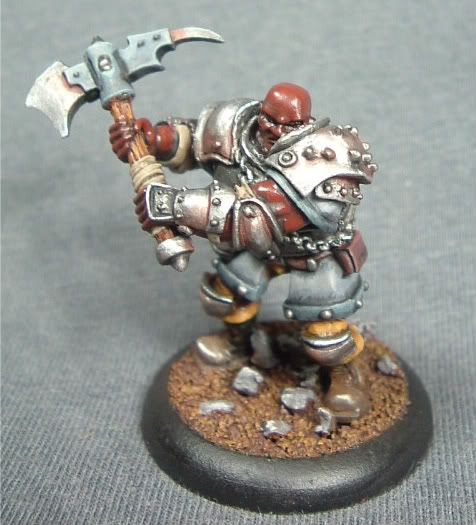
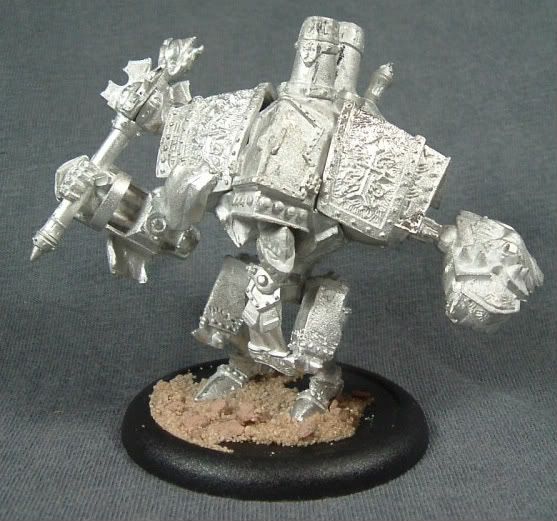
So here is what I have once the salt has been knocked off. I think the effect is interesting but not as of yet perfect. Having now done this I am left with a few problems. How can I justify such harsh rusted patches and yet still have untarnished or not as tarnished metal elsewhere. I have a few more tchniques that this 'jack is the test piece for but I have to collect a few more materials to try them all out. I can at least say that the salt weathering achieved exactly what I wanted it to. It isn't perfect and I know what I will do better for next time.

 I wanted the chipping I was doing on my menite 'jacks to look a little more pronounced and this seemed to be the best way to do that. I coated the Talon first in a unidentified Vajello paint. I think it is something like bestial brown or beast brown. I can't read the label anymore so I have no idea what it is. Once I had a nice even coat of this I wanted to already make a rust effect so that when the weathering began I would have a nicely textured rust effect already done just waiting to be revealed. I made a turpentine based wash for this. Using turpentine for a wash is a massive departure from what I am used to but I have to say it is really good, at least for rust effects. Turpentine will strip paint from a model pretty easily so you have to be careful with what you are doing.
 I also didn't buy odourless turpentine... big mistake. Anyway the wash can be quickly spread all over the model. Don't brush over areas you have already coated as this will cause the paint to start to lift off. I then left mine to dry, it doesn't take too long. I didn't measure out the wash too perfectly and I was left with a thick residue underneath the liquid. However this meant I got a good uneven coating of the pigment something that adds very much to the natural look of the rust.
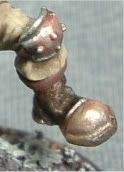
 So the next thing to do is to place salt where you want the rust to show through. Now thats a lot easier said than done and it took some experimentation to get everything going the way I wanted it to. Basically you have to wet the area and then sprinkle the salt on. I found that this left a very thin coating of salt that the paint could soak through. I used rather fine salt and I have seen most other people use coarser grains. However I noticed that if I coated a larger area and then using my brush to apply a drop of water to this I could manipulate the salt nicely and gather it together into some thick and well shapped clumps. It took a lot longer for the salt to dry but it was worth it in the end I think. You have to be careful where you place the salt so that the weathering looks natural and I am really still learning this. Its easy to see tanks and how they get worn. There are awesome guides explaining how to use this technique.
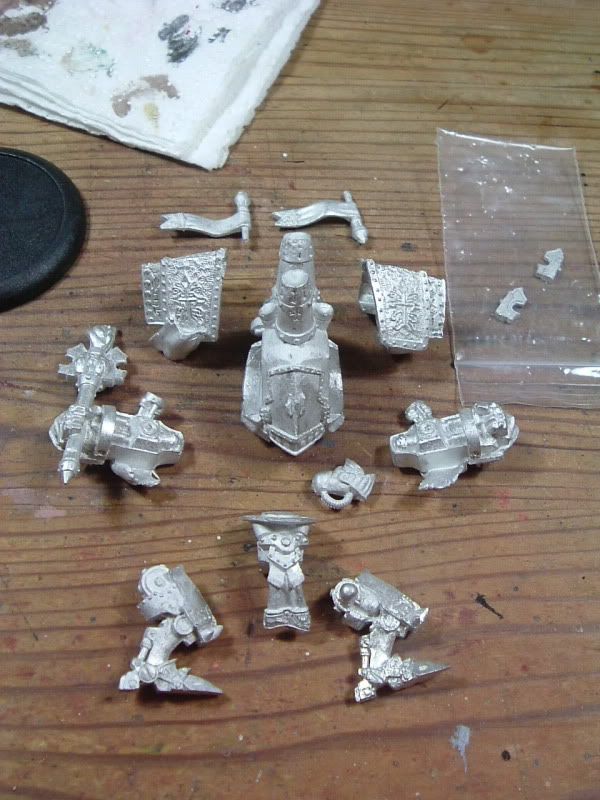
 However nobody has, that I have seen, done this for Warjacks before. The technique has been used but never in a way I feel captures exactly what has been done on some of those beautiful scale tanks. I definitely won't manage it for a long time yet either! So with the salt dried, which I left overnight, I then sprayed the model as gently as possible with the basecoat. This is going to be a grey for my Mercenaries. I was worried that the pressure of the airbrush might knock off the salt but thankfully it didn't. I was able to coat the model easily without any problems. The extra water on the salt gave it a good strong bond to the model. It was pretty difficult to actually knock it off when I needed to! I also tried to paint the model a little with the salt left on. The spear I gave a rime of salt to and I painted the point of the spear in silver to see if it would soak under the salt or just be a pain in general to paint.
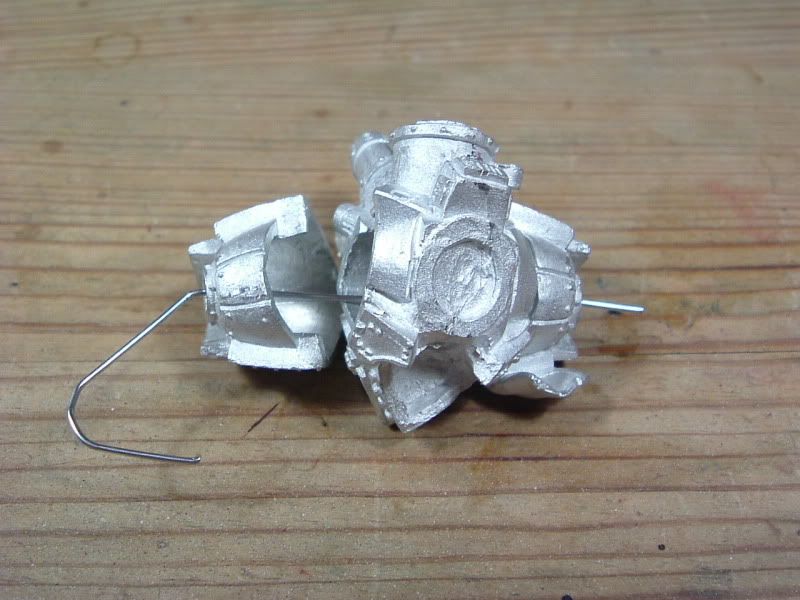
 So here is what I have once the salt has been knocked off. I think the effect is interesting but not as of yet perfect. Having now done this I am left with a few problems. How can I justify such harsh rusted patches and yet still have untarnished or not as tarnished metal elsewhere. I have a few more tchniques that this 'jack is the test piece for but I have to collect a few more materials to try them all out. I can at least say that the salt weathering achieved exactly what I wanted it to. It isn't perfect and I know what I will do better for next time.