Well I have been swamped with work this week. It seems that the second I find a hobby project I am enthusiastic about I have to spend my evenings in the office instead. So I haven't really been able to put up the posts I wanted as I wasn't able to get everything finished. However I did manage to experiment a little more with some rust techniques and here are a series of photos of the result.

Here I had just base coated the top section silver and put on the first wash. The wash is made up of turpentine and some rust pigments. As you can see I was a little eager in my efforts and I removed some of the silver base coating. Thats fine as once everything was dry I could add some more and continue with the process.

This usually dries quickly but I sped up the process a little by using a hair dryer. i think I will have to start using one more often as it really helps! This second shot shows the third more yellow coat having been applied in the same manner as the previous two. With each coat I simply changed the colour of the rust going from dark to light.

When it is wet it looks terrible but as it dries it starts to look more and more awesome! You can see here that the previous trouble I had with the basecoat is fixed. The silver I painted on afterwards can't be distinguished at all. I want to use this effet on the 'jacks where there is bare metal showing. It should look fine I guess the only problem I forsee is trying to restrict the washes to where I want them. The turpentine based washes really just go everywhere. By varying the extent and colours of the wash I am guessing that it can really be used to make interesting visual effects. I am suprised at how the colours build up and I am looking forward to trying it with other colours to emulate effets like a dust patina or rain run off on armour. So I need to study a little more and see what I can manage to fit on a 'jack!

 Here I had just base coated the top section silver and put on the first wash. The wash is made up of turpentine and some rust pigments. As you can see I was a little eager in my efforts and I removed some of the silver base coating. Thats fine as once everything was dry I could add some more and continue with the process.
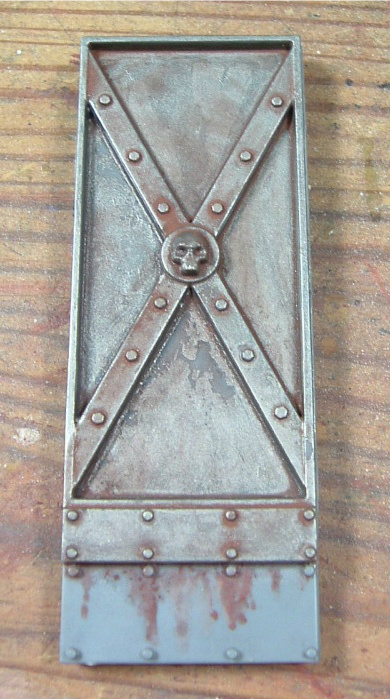
  This usually dries quickly but I sped up the process a little by using a hair dryer. i think I will have to start using one more often as it really helps! This second shot shows the third more yellow coat having been applied in the same manner as the previous two. With each coat I simply changed the colour of the rust going from dark to light.
 When it is wet it looks terrible but as it dries it starts to look more and more awesome! You can see here that the previous trouble I had with the basecoat is fixed. The silver I painted on afterwards can't be distinguished at all. I want to use this effet on the 'jacks where there is bare metal showing. It should look fine I guess the only problem I forsee is trying to restrict the washes to where I want them. The turpentine based washes really just go everywhere. By varying the extent and colours of the wash I am guessing that it can really be used to make interesting visual effects. I am suprised at how the colours build up and I am looking forward to trying it with other colours to emulate effets like a dust patina or rain run off on armour. So I need to study a little more and see what I can manage to fit on a 'jack!
It really looks nice!
ReplyDeleteYep and its not too difficult to do either!
ReplyDelete