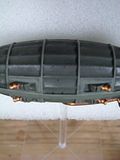
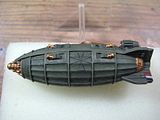
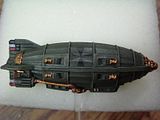
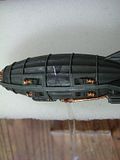
 It is a pretty simple design to paint as it is basically geometric. However these designs become much more difficult once you scale them up. On my frigates they were hard enough though no bigger than 5mm across. My battle ship was easier as it was tiny more like 3mm. On the Pflichts though I was dealing with about 1cm of space to have to fill. While there are great decals available for these designs I am too lazy to go look for them. Instead I get to practise something I am usually terrible at: freehand. This technique is dreaded by most, including me. However when you see a model with a nice effective freehand design they really are stunning. The shots below are all thumbnailed so click on them to blow them up larger.
Step One:
 The picture is a little bit hard to make out but it shows the first step. I take some very watered down black paint and I put a dot in the centre of the space where I want the Iron Cross to go. I then define the outer parts also with a dot. So nine dots in all evenly spaced. This is an important step to get right and it is very easily corrcted as you are only placing small dots of black on the model. So if you take your time with this then everything else should be easy.
Step Two:
 A steady hand helps a little with this step but again it is easily correctable. You are now simply joining the dots up with a thin black line. Using watered down black paint helps. just join everything to the dot in the middle. It is rather simple! Don't worry too much about a wobble on the line. You can correct that in the last step with some white paint if you are feeling lazy.
Step Three:
 So here is an easy part. All you need to do is to fill in the four triangles you have made. It is much easier to see the shapes if you outline them before you fill them in. Oftern I would have attempted to paint the triangles without outlining them first. This usually leads, at least in my attempts, to a very non symetrical design.
Step Four:
 So having gotten this far you are pretty much finished. The last thing to do is to get the white lines in. Once upon a time I would have painted the white first and then filled in the black afterwards. However I find that this method means I make better looking designs. So working always from the center out draw even white lines to the outer edges of the cross. This helps keep a point where two lines meet in the center and it means you don't overdo it there either. It is very easy to paint towards the center and go too far making corrections difficult.
  So if you follow the steps above you should come up with a design like this one. It was far easier to do than I thought. I was quite nervouse to put this there but really the models need it. The Airships are missing some detail as the baloon area is rather boring. The Iron Cross really breaks this up and makes the model far more interesting. I have also been practising with the Imperial Eagle but I am still not happy that it would look good on this model.
  Its very much a rushed attempt but I will practise and hopefully I can perfect this design enough to get it onto one of the larger Airships. I can imagine it would look nice on the landing platform of the Imperial Sky Fortress! Though the wooden texture might make it difficult... hmmmm.

That's good for that scale. Very cool looking.
ReplyDelete